Loading...
Loading...
Loading...
Loading...
Loading...
Loading...
Loading...
Loading...
Loading...
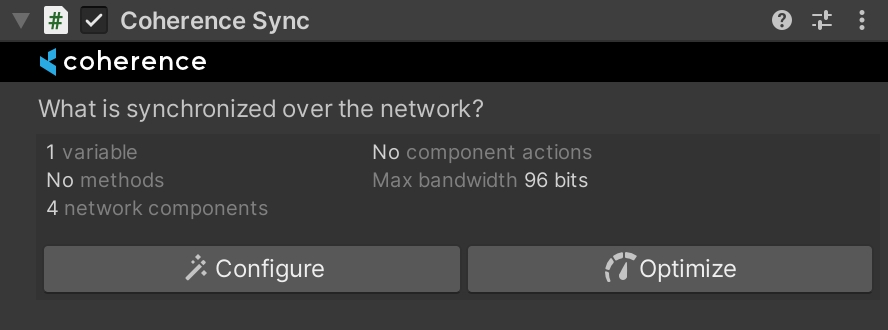
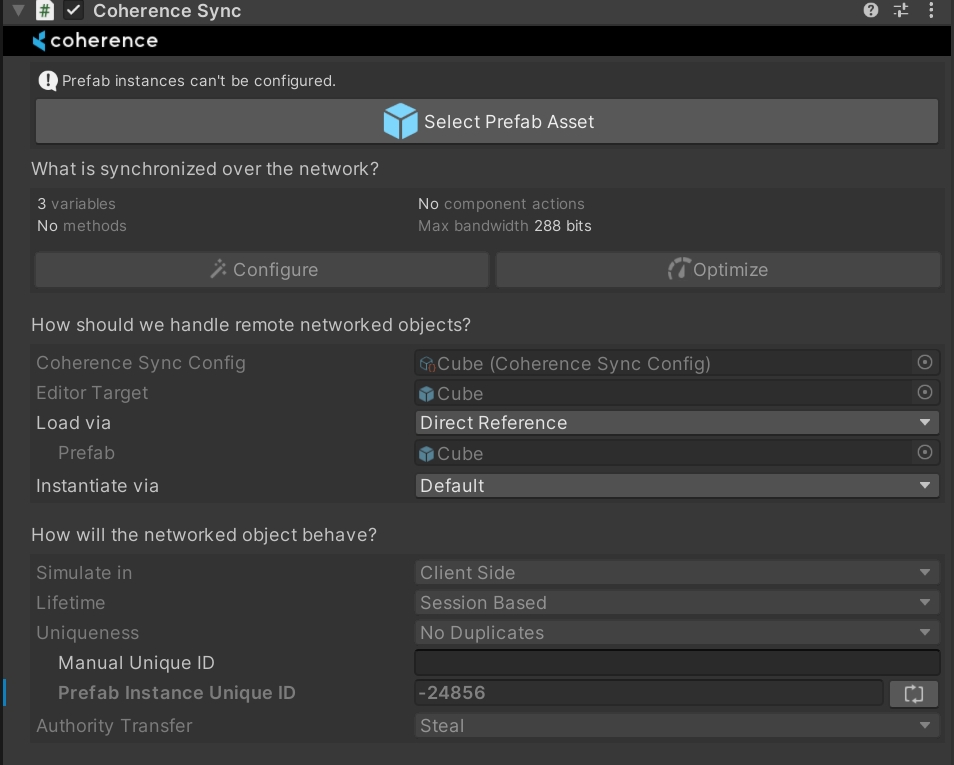
CoherenceSync is a component that should be attached to every networked GameObject. It may be your player, an NPC or an inanimate object such as a ball, a projectile or a banana. Anything that needs to be synchronized over the network and turned into an Entity.
Once a CoherenceSync is added to a Prefab, you can select which individual public properties you would like to sync across the network, expose methods as Network Commands, and configure other network-related properties.
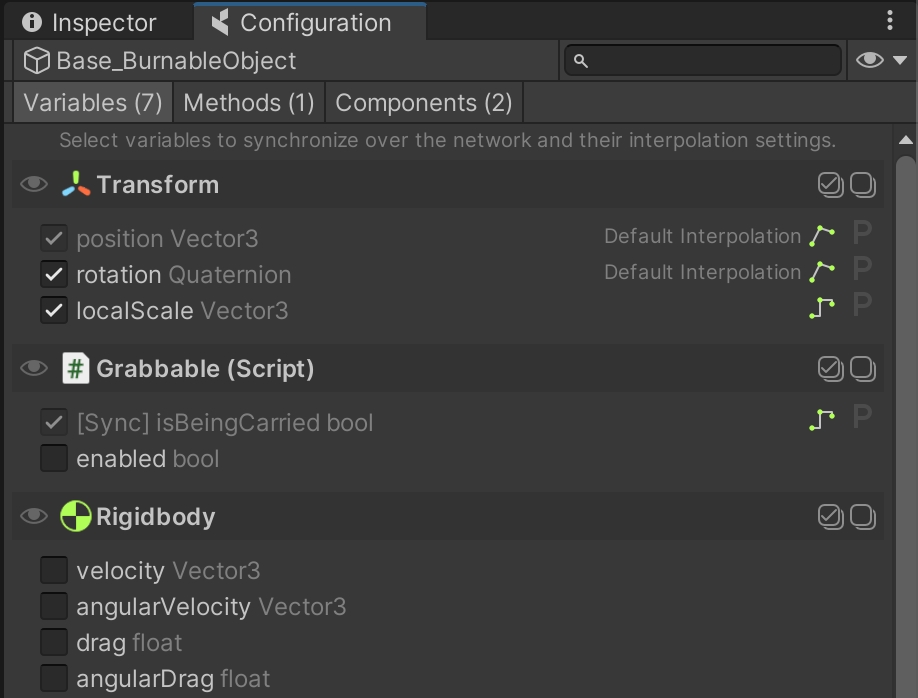
To start syncing variables, open the Configure window that you can access from the CoherenceSync's Inspector.
Any components attached to the GameObject with CoherenceSync that have public variables will be shown here and can be synced across the network.
To start syncing a property, just use the checkbox. Optionally, choose how it is interpolated on the right.
Network Commands are public methods that can be invoked remotely. In other networking frameworks they are often referred to as RPCs (Remote Procedure Calls).
To mark a method as a Command, you can do it from the Configure window in the same way described above when syncing properties by going to the second tab labelled "Commands".
For more info, refer to the page about messaging with Commands.
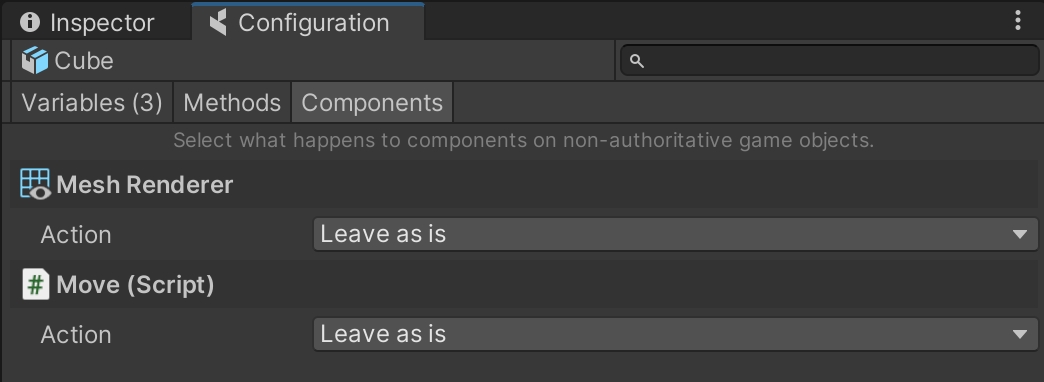
When an entity is instantiated in the network, other Clients will see it but they won't have authority on it. It is then important to ensure that some components behave differently when an entity is non-authoritative.
To quickly achieve this, you can leverage Component Actions, which are located in the Components tab of the Configure window:
The sections above describe UI-based workflows to sync variables and commands. We also offer a code-based workflow, which leverages [Sync] and [Command] C# attributes directly from within code.
(You can notice in the screenshot above how the isBeingCarried property is synced in code, and displays the [Sync] tag in front of its name.)
The two workflows can be used together, even on the same Prefab!
You can also create your own, custom Component Actions.
When you create a networked GameObject, you automatically become the owner of that GameObject. That means only you are allowed to update its values, or destroy it. But sometimes it is necessary to pass ownership from one Client to another. For example, you could snatch the football in a soccer game or throw a mind control spell in a strategy game. In these cases, you will need to transfer ownership over these Entities from one Client to another.
When an authority transfer request is performed, an Entity can be set up to respond in different ways to account for different gameplay cases:
Not Transferable - Authority requests will always fail. This is a typical choice for player characters.
Steal - Authority requests always succeed.
Request - This option is intended for conditional transfers. The owner of an Entity can reply to an authority request by either accepting or denying it.
Approve Requests - The requests will succeed even if no event listener is present.
Note that for Request, a listener to the event OnAuthorityRequested needs to be provided in code. If not present, the optional parameter Approve Requests can be used as a fallback. This is only useful in corner cases where the listener is added and removed at runtime. In general, you can simply set the transfer style to Steal and all requests will automatically succeed.
Any Client or Simulator can request ownership by invoking the RequestAuthority() method on the CoherenceSync component of a Network Entity:
A request will be sent to the Entity's current owner. They will then accept or deny the request, and complete the transfer. If the transfer succeeds, the previous owner is no longer allowed to update or destroy the Entity.
When a Client disconnects, all the Network Entities created by that Client are usually destroyed. If you want any Entity to stay after the owner disconnects, you need to set Entity lifetime type of that Prefab to Persistent.
Session Based - the Entity will be removed on all other Clients, when the owner Client disconnects.
Persistence - Entities with this option will persist as long as the Replication Server is running. For more details, see Configuring persistence.
Orphaned Entities
By making the GameObject persistent, you ensure that it remains in the game world even after its owner disconnects. But once the GameObject has lost its owner, it will remain frozen in place because no Client is allowed to update or delete it. This is called an orphaned GameObject.
In order to make the orphaned GameObject interactive again, another Client needs to take ownership of it. To do this, one can use APIs (specifically, Adopt()) or – more conveniently – enable Auto-adopt orphan on the Prefab.
Allow Duplicates - multiple copies of this object can be instantiated over the network. This is typical for bullets, spell effects, RTS units, and similar repeated Entities.
No Duplicates - ensures objects are not duplicated by assigning them a Unique ID.
Manual Unique ID - You can set the Unique ID manually in the Prefab, only one Prefab instance will be allowed at runtime, any other instance created with the same UUID will be destroyed.
Prefab Instance Unique ID - When creating a Prefab instance in the Scene at Editor time, a special Prefab Instance Unique ID is assigned, if the manual UUID is blank, the UUID assigned at runtime will be the Prefab Instance ID.
Manual ID vs. Prefab Instance ID
To understand the difference between these two IDs, consider the following use cases:
Manager: If your game has a Prefab of which there can only be 1 in-game instance at any time (such as a Game Manager), assign an ID manually on the Prefab asset.
Multiple interactable scene objects: If you have several instances of a given Prefab, but each instance must be unique (such as doors, elevators, pickups, traps, etc.), each instance created in Editor time will have a auto-generated Prefab Instance Unique ID. This will ensure that when 2 players come online, they only bring one copy of any given door/trap/pickup, but each of them still replicates its state across the network to all Clients currently in the same scene.
Defines which type of network node (Client or Simulator) can have authority over this Entity.
Client Side - The Entity is by default owned by the Client that spawns it. It can be also owned by a Simulator.
Server Side - The Entity can't be owned by a normal Client, but only by a "server" (in coherence called Simulator).
Server Side with Client Input - This automatically adds a CoherenceInput component. Ownership is split: a Simulator holds State Authority, while a Client has Input Authority. See Server Authoritative setup for more info.
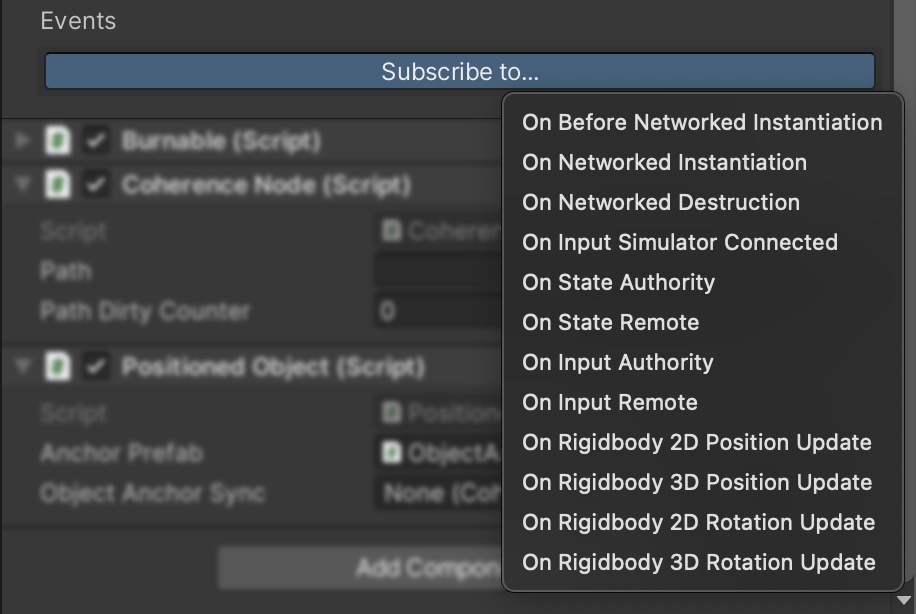
You can hook into the events fired by the CoherenceSync to conveniently structure gameplay in response to key moment of the component's lifecycle. Events are initially hidden, but you can reveal them using the button at the bottom of the Inspector called "Subscribe to...".
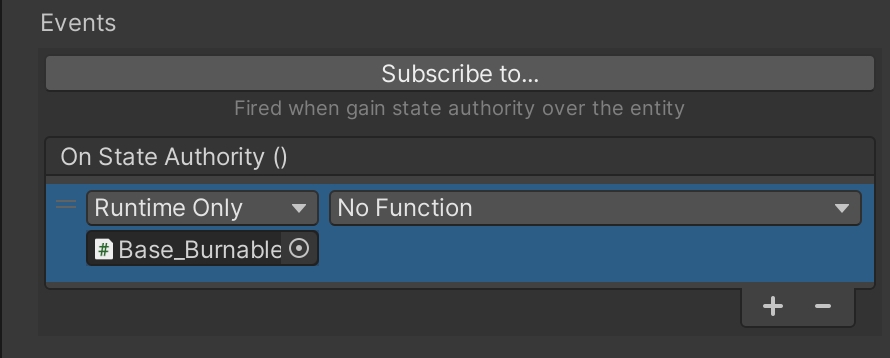
Once revealed, you can use them just like regular UnityEvents:
You can also subscribe to these events in code.
You might also want to check out the CoherenceSync instance lifecycle section at the bottom of the Order of execution article.
When CoherenceSync variables/components are sent over the network, by default, Reflection Mode is used to sync all the data at runtime. Whilst this is really useful for prototyping quickly and getting things working, it can be quite slow and unperformant. A way to combat this is to bake the CoherenceSync component, creating a compatible schema and then generating code for it.
The schema is a file that defines which data types in your project are synced over the network. It is the source from which coherence SDK generates C# struct types (and helper functions) that are used by the rest of your game. The coherence Replication Server also reads the schema file so that it knows about those types and communicates them with all of its Clients efficiently.
The schema must be baked in the coherence Settings window, before the check box to bake this Prefab can be clicked.
When the CoherenceSync component is baked, it generates a new file in the baked folder called CoherenceSync<AssetIdOfThePrefab>. This class will be instantiated at runtime, and will take care of networked serialization and deserialization, instead of the built-in reflection-based one.
You can find more information on the page about Baking.
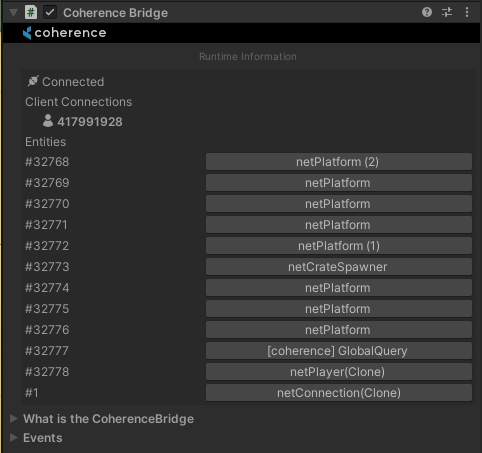
The Bridge establishes a connection between your scene and the coherence Replication Server. It makes sure all networked entities stay in sync.
When you place a GameObject in your scene, the Bridge detects it and makes sure all the synchronization can be done via the CoherenceSync component.
At runtime, you can inspect which Entites the Bridge is currently tracking.
A Bridge is associated with the scene it's instantiated on, and keeps track of Entities that are part of that scene. This also allows for multiple connections at the same time coming from the game or within the Unity Editor.
You can use CoherenceBridgeStore.TryGetBridge to get a CoherenceBridge associated with a scene:
The CoherenceBridge offers a couple of Unity Events in its inspector where you can hook your custom game logic:
This event is invoked when the Replication Server state has been fully synchronized, it is fired after OnConnected.
For example, if you connect to a ongoing game that has five players connected, when this event is fired all the entities and information of all the other players will already be synchronized and available to be polled.
This event is invoked the moment you stablish a connection with the Replication Server, but before any synchronization has happened.
Following the previous example, if you connect to an ongoing game that has five players connected, when this event is fired, you won't have any entities or information available about those five players.
This event is invoked when you disconnect from a Replication Server. In the parameters of the event you will be given a ConnectionCloseReason value that will explain why the disconnection happened.
This event is invoked when you attempt to connect to a Replication Server, but the connection fails, you will be returned a ConnectionException with information about the error.
The Client Connections system allows you to keep track of how many users are connected and uniquely identify them, as well as easily send server-wide messages.
You can read more about the Client Connections system here.
If you have a developer account, you can connect to Worlds or Rooms hosted in coherence Cloud. You can use the CloudService instance from CoherenceBridge to fetch existing Worlds or create or fetch existing Rooms, after you fetch a valid World or Room, you can use the JoinWorld or JoinRoom methods to easily connect your client.
You can read more about the coherence Cloud Service here.
Currently, the maximum number of persistent Entities supported by the Replication Server is 32 000. This limit will be increased in the future.
Any GameObject that needs to be synchronized over the network needs to have a CoherenceSync. It defines a network entity, and what data to sync from its GameObject. In addition, Commands are sent to and from CoherenceSync components.
Handles the connection between the coherence transport layer and the Unity scene. It is necessary to have a CoherenceBridge to be able to connect.
A tool to optimise network traffic, a Live Query specifies an area of interest that is unique to each Client, so that each Client (or Simulator) only receives data that is relevant to them. If the World was very large, the Live Query could be attached to the playable character or camera and move with them, determining a moving area of interest.
It is necessary to have at least one Live Query in the scene.
Tag Queries offer the same kind of traffic-filtering behaviour, but they do it based on a tag rather than according to distance.
Enables a Simulator to take control of the state authority of a Client's CoherenceSync, while the Client retains input authority. This component is added by CoherenceSync in server-authoritative setups.
These two components are used when parenting entities (one is for runtime, the other for edit-time). You can find much more information on their specifics in the Parenting section.
The CoherenceNode component is used to prepare a network entity that needs to be parented to another network entity at a deep level – that is, not as a direct child. You only need CoherenceNode if the object needs to be a child of a child, or more.
The goal of the CoherenceNode component is to keep track of where the object is in the hierarchy, so when it's reparented by its owner coherence is able to replicate the same hierarchy structure on each connected Client.
However, as a user you don't need to do anything about it. You just apply the component to a network entity, and coherence will take care of the rest for you. Happy re-parenting!
To get familiar with all parenting options, we strongly recommend to read the Parenting network entities section.
This section is only interesting if you want to understand deeply how CoherenceNode works under the hood.
CoherenceNode works using two public fields which are automatically set to sync using the [Sync] attribute.
The path variable describes where in the parent's hierarchy the child object should be located. It is a string consisting of comma-separated indexes. Every one of these indexes designates a specific child index in the hierarchy. The child object which has the CoherenceNode component will be placed in the resulting place in the hierarchy.
The pathDirtyCounter variable is a helper variable used to keep track of the applied hierarchy changes. In case the object's position in the parent's hierarchy changes, this variable will be used to help settle and properly sync those changes.
The way you get information about the World is through LiveQueries. We set criteria for what part of the World we are interested in at each given moment. That way, the Replicator won’t send information about everything that is going on in the Game World everywhere, at all times.
Instead, we will just get information about what’s within a certain area, kind of like moving a torch to look around in a dark cave.
For a guide on how to use LiveQuery, see .
More complex areas of interest types are coming in future versions of coherence.
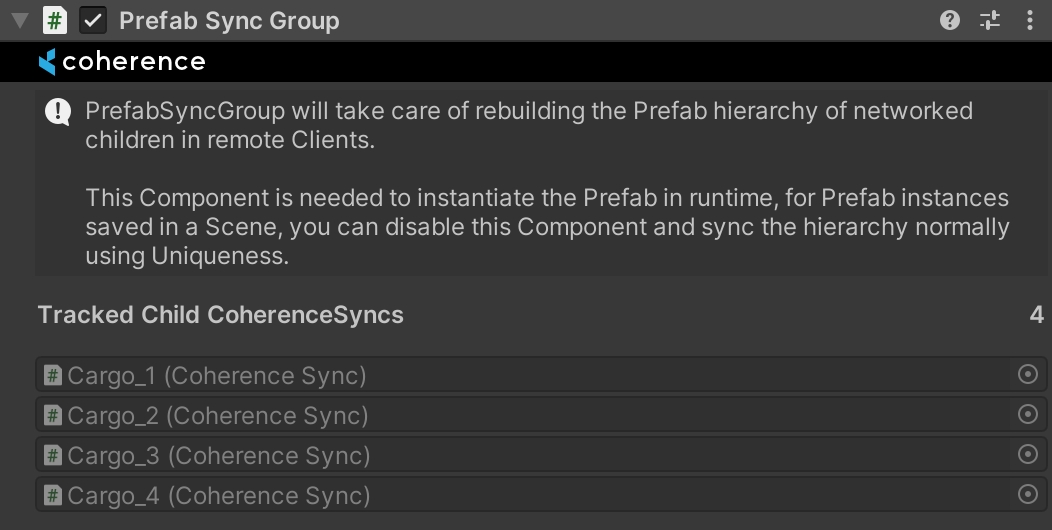
PrefabSyncGroup is a component to enable workflows where networked Prefabs are nested into each other. By adding this component, coherence will be able to track "which Prefab is nesting which one", and thus keep their structure and lifetime synchronised once the game is running.
The complexity of that is all taken care of for you. As a user, all you need to do is add PrefabSyncGroup to the root of the Prefab that is containing the others.
Read more and see an example in the dedicated page .
CoherenceInput is a component that enables a to take control of a Client's entities, based on the Client's inputs. It is an essential piece of a .
When you select Server Side with Client Input in the Simulate In option on a CoherenceSync, coherence will add a CoherenceInput component to the entity.
From this point on, the authority on this entity is split: a Client has Input authority, while a Simulator will have State authority. This means that the Client is not fully in control of the entity, but only has the license to send inputs to a Simulator. The Simulator in turn will process these inputs, elaborate new state, and send it to the Client who can now display the results.
Because of this round-trip, there will always be a delay between the player's inputs and what they see on screen. To make the game more reactive, you might need to implement prediction.
For more information on how to setup and configure inputs for a CoherenceInput component, refer to the page.
In addition to the LiveQuery, coherence also supports filtering objects by tag. This is useful when you have some special objects that should always be visible regardless of World position.
For a guide on how to use TagQuery, see .
To get familiar with all parenting options, we strongly recommend to read the section.


This page describes the order of various coherence events and scripts in relation to Unity's main loop.
Check out ScriptExecutionOrder.
Additionally, take a look at your project's Script Execution Order settings by opening Edit > Project Settings and selecting the Script Execution Order category. See this Unity manual article for more details.
Depending on the reason for a disconnection the onDisconnected event can be raised from different places in the code, including LateUpdate.
When a Prefab instance with CoherenceSync is created at runtime, it will be fully synchronized with the network in the OnEnable method of CoherenceSync. This means that you can expect your custom Components to have fully resolved synchronized values and authority state in your Awake method. It occurs in the following order:
Awake() is called
Internal initialization.
OnEnable() is called
Synchronize with a new or existing Network Entity.
OnBeforeNetworkedInstantiation event is invoked.
Initial component updates are applied (for entities you have no authority over).
OnNetworkedInstantiation event is invoked.
OnStateAuthority or OnStateRemote (for authority or non-authority instances respectively) event is invoked.
Awake() is called
At this point, if you get the CoherenceSync component, you can expect networked variables and authority state to be fully resolved.
