Loading...
Loading...
Loading...
Loading...
Loading...
Loading...
Loading...
Loading...
Loading...
Loading...
Loading...
Loading...
coherence can sync the following types out of the box:
bool
int
uint
byte
char
short
ushort
float
string
Vector2
Vector3
Quaternion
GameObject
Transform
RectTransform
CoherenceSync
SerializeEntityID
byte[]
long
ulong
Int64
UInt64
Color
double
RectTransform is still in an experimental phase - use at your own discretion!
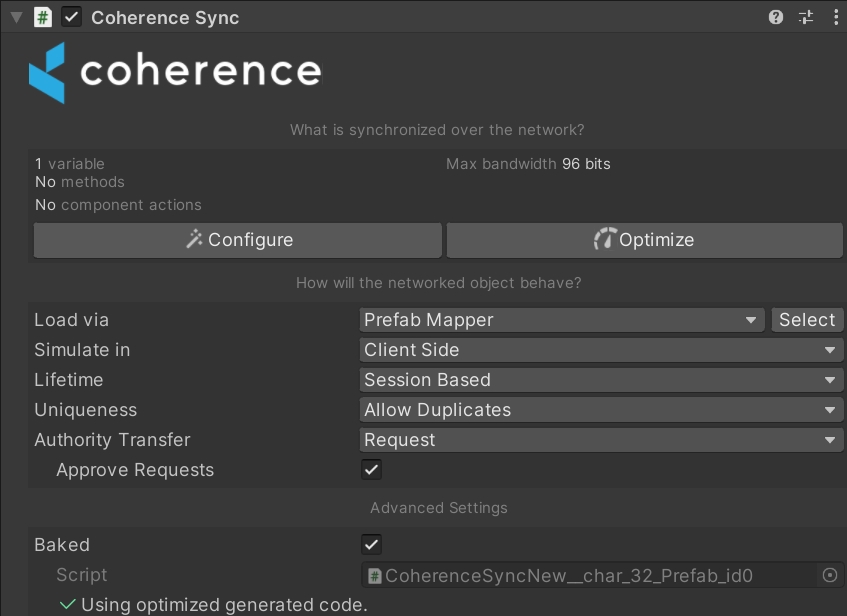
The CoherenceSync component will help you prepare an object for network synchronization. It also exposes APIs that allows us to manipulate the object during runtime.
CoherenceSync is able to sync all public variables and methods on any of the attached components, for example Unity components such as Transform, Animator, etc. This will include any custom scripts, including third-party Asset Store packages that you may have downloaded.
Refer to the Prefab setup page to learn how to configure your Prefabs to network state changes.
Aside from configuring your CoherenceSync bindings from within the Configure window, it's possible to use the [Sync] and [Command] C# attributes directly on your scripts. Your prefabs will get updated to require such bindings.
Mark public fields and properties to be synchronized over the network.
It's possible to migrate the variable automatically, if you decide to change its definition:
Mark public methods to be invoked over the network. Method return type must be void.
It's possible to migrate the command automatically, if you decide to change the method signature:
Note that marking a command attribute only marks it as programmatically usable. It does not mean it will be automatically called over the network when executed.
You still need to follow the guidelines in the Messaging with Commands article to make it work.
Even though coherence provides Component Actions out of the box for various component, you can implement your own Component Actions in order to give designers on the team full authoring power on network entities, directly from within the Configure window UI.
Creating a new one is simply done by extending the ComponentAction abstract class:
Your custom Component Action must implement the following methods:
OnAuthority This method will be called when the object is spawned and you have authority over it.
OnRemote This method will be called when a remote object is spawned and you do not have authority over it.
It will also require the ComponentAction class attribute, specifying the type of Component that you want the Action to work with, and the display name.
For example, here is the implementation of the Component Action that we use to disable Components on remote objects:
Notifying State Changes
It is often useful to know when a synchronized variable has changed its value. It can be easily achieved using the OnValueSyncedAttribute. This attribute lets you define a method that will be called each time a value of a synced member (field or property) changes in the non-simulated version of an entity.
Let's start with a simple example:
Whenever the value of the Health field gets updated (synced with its simulated version) the UpdateHealthLabel will be called automatically, changing the health label text and printing a log with a health difference.
The OnValueSynced feature can be used only on members of user-defined types, that is, there's no way to be notified about a change in the value of a Unity type member, like transform.position. This might however change in the future, so stay tuned!
Extending what can be synced from the Configure window
This is an advanced topic that aims to bring access to coherence's internals to the end user.
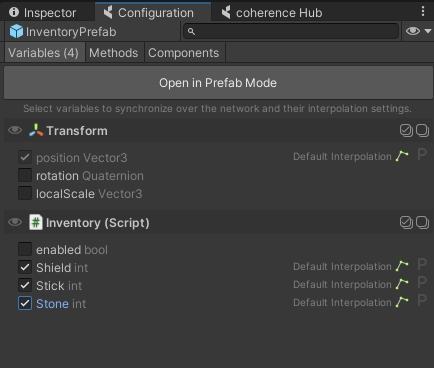
The Configure window lists all variables and methods that can be synced for the selected Prefab. Each selected element in the list is stored in the Prefab as a Binding with an associated Descriptor, which holds information about how to access that data.
By default, coherence uses reflection to gather public fields, properties and methods from each of the Prefab's components. You can specify exactly what to list in the Configure window for a given component by implementing a custom DescriptorProvider. This allows you to sync custom component data over the network.
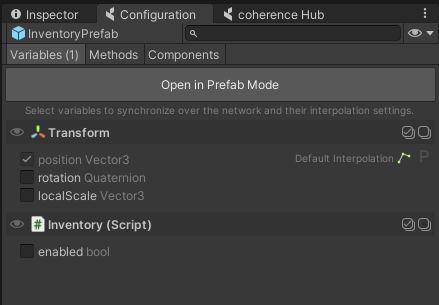
Take this player inventory for example:
Since the inventory items are not immediately accessible as fields or properties, they are not listed in the Configure window. In order to expose the inventory items so they can be synced across the network, we need to implement a custom DescriptorProvider.
DescriptorProviderThe main job of the DescriptorProvider is to provide the list of Descriptors that you want to show up in the Configure window. You can instantiate new Descriptors using this constructor:
name: identifying name for this Descriptor.
ownerType: type of the MonoBehaviour that this Descriptor is for.
bindingType: type of the ValueBinding class that will be instantiated and serialized in CoherenceSync, when selecting this Descriptor in the Configure window.
required: if true, every network Prefab that uses a MonoBehaviour of ownerType will always have this Binding active.
If you need to serialize additional data with your Descriptor, you can inherit from the Descriptor class or assign a Serializable object to Descriptor.CustomData.
Here is an example InventoryDescriptorProvider that returns a Descriptor for each of the inventory items:
To specify how to read and write data to the Inventory component, we also need a custom binding implementation.
BindingA Descriptor must specify through the bindingType which type of ValueBinding it is going to instantiate when synced in a CoherenceSync. In our example, we need an InventoryBinding to specify how to set and get the values from the Inventory. To sync the durability property of the inventory item, we should extend the IntBinding class which provides functionality for syncing int values.
We are now ready to sync the inventory items on the Prefabs.
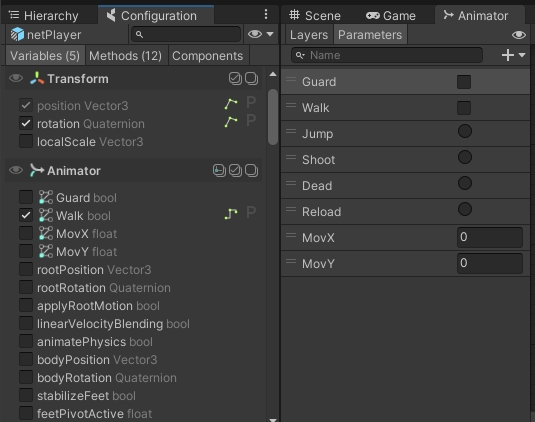
coherence only replicates animation parameters, not state. Latency can create scenarios where different Clients reproduce different animations. Take this into account when working with Animator Controllers that require precise timings.
Unity Animator's parameters are bindable out of the box, with the exception of triggers.
While coherence doesn't officially support working with multiple AnimatorControllers, there's a way to work around it. As long as the parameters you want to network are shared among the AnimatorControllers you want to use, they will get networked. Parameters need to have the same type and name. Using the example above, any AnimatorController featuring a Boolean Walk parameter is compatible, and can be switched.
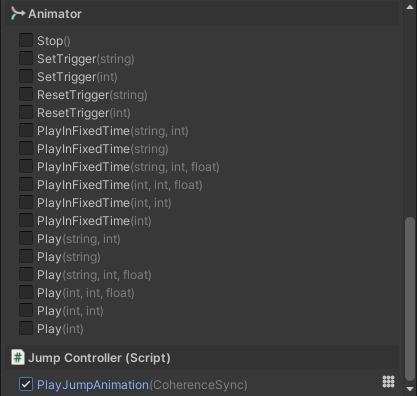
Triggers can be invoked over the network using commands. Here's an example where we inform networked Clients that we have played a jump animation:
Now, bind the PlayJumpAnimator method as a command.
Commands are network messages sent from one CoherenceSync to another CoherenceSync. Functionally equivalent to RPCs, commands bind to public methods accessible on the GameObject hierarchy that CoherenceSync sits on.
In the design phase, you can expose public methods the same way you select fields for synchronization: through the Configure window on your CoherenceSync component.
By clicking on the method, you bind to it, defining a command. The grid icon on its right lets you configure the routing mode. Commands with a Send to Authority Only mode can be sent only to the authority of the target CoherenceSync, while ones with the Send to All Instances can be broadcasted to all clients that see it. The routing is enforced by the Replication Server as a security measure, so that outdated or malicious clients don't break the game.
To send a command, we call the SendCommand method on the target CoherenceSync object. It takes a number of arguments:
The generic type parameter must be the type of the receiving Component. This ensures that the correct method gets called if the receiving GameObject has components that implement methods that share the same name.
Example: sync.SendCommand<Transform>(...)
If there are multiple commands bound to different components of the same type (for example, your CoherenceSync hierarchy has five Transforms, and you create a command for Transform.SetParent on all of them), the command is only sent to the first one found in the hierarchy which matches the type.
The first argument is the name of the method on the component that we want to call. It is good practice to use the C# nameof expression when referring to the method name, since it prevents accidentally misspelling it, or forgetting to update the string if the method changes name.
Alternatively, if you want to know which Client sent the command, you can add CoherenceSync sender as the first argument of the command, and the correct value will be automatically filled in by the SDK.
The second argument is an enum that specifies the MessageTarget of the command. The possible values are:
MessageTarget.All – sends the command to each Client that has an instance of this Entity.
MessageTarget.AuthorityOnly – send the command only to the Client that has authority over the Entity.
MessageTarget.Other - sends the command to every Entity other than the one SendCommand is called on.
Mind that the target must be compatible with the routing mode set in the bindings, i.e. Send to authority will allow only for the MessageTarget.AuthorityOnly while Send to all instances allows for both values.
Also, it is possible that the message never sends as in the case of a command with MessageTarget.Other sent from the authority with routing of Authority Only.
The rest of the arguments (if any) vary depending on the command itself. We must supply as many parameters as are defined in the target method and the schema.
Here's an example of how to send a command:
If you have the same command bound more than once in the same Prefab hierarchy, you can target a specific MonoBehaviour when sending a message, you can do so via the SendCommand(Action action) method in CoherenceSync.
Additionally, if you want to target every bound MonoBehaviour, you can do so via the SendCommandToChildren method in CoherenceSync.
We don't have to do anything special to receive the command. The system will simply call the corresponding method on the target network entity.
If the target is a locally simulated entity, SendCommand will recognize that and not send a network command, but instead simply call the method directly.
While commands by default carry no information on who sent them in order to optimise traffic, you can create commands that include a ClientID as one of the parameters. Then, on the receiving end, compare that value with a list of connected Clients.
Another useful way to access ClientID is via CoherenceBridge, like this:
You can create your own implementation for these IDs or, more simply, use coherence's built-in Client Connections feature.
Sometimes you want to inform a bunch of different CoherenceSyncs about a change. For example, an explosion impact on a few players. To do so, we have to go through the instances we want to notify and send commands to each of them.
In this example, a command will get sent to each CoherenceSync under the state authority of this Client. To make it only affect CoherenceSyncs within certain criteria, you need to filter to which CoherenceSync you send the command to, on your own.
Some of the primitive types supported are nullable values, this includes:
Byte[]
string
Entity references: CoherenceSync, Transform, and GameObject
Refer to the supported types page.
In order to send one of these values as a null (or default) we need to use special syntax to ensure the right method signature is resolved.
Null-value arguments need to be passed as a ValueTuple<Type, object> so that their type can be correctly resolved. In the example above sending a null value for a string is written as:
(typeof(string), (string)null)
and the null Byte[] argument is written as:
(typeof(Byte[]), (Byte[])null)
Mis-ordered arguments, type mis-match, or unresolvable types will result in errors logged and the command not being sent.
When a null argument is deserialized on a client receiving the command, it is possible that the null value is converted into a non-null default value. For example, sending a null string in a command could result in clients receiving an empty string. As another example, a null Byte[] argument could be deserialized into an empty Byte[0] array. So, receiving code should be ready for either a null value or an equivalent default.
When a Prefab is not using a baked script there are some restrictions for what types can be sent in a single command:
4 entity references
maximum of 511 bytes total of data in other arguments
a single Byte[] argument can be no longer than 509 bytes because of overhead
Some network primitive types send extra data when serialized (like Byte arrays and string types) so gauging how many bits a command will use is difficult. If a single command is bigger than the supported packet size, it won't work even with baked code. For a good and performant game experience, always try to keep the total command argument sizes low.
When a Client receives a command targeted at AuthorityOnly but it has already transferred an authority of that entity, the command is simply discarded.
Binding to variables and methods within the hierarchy
If a synced Prefab has a hierarchy, you can synchronize variables, methods and component actions for any of the child GameObjects within its hierarchy.
Note: on this page we cover children GameObjects or nested Prefabs that don't have their ownCoherenceSync. If a child object does have a CoherenceSync of their own, they become an independent network entity. For that, see the Parenting section.
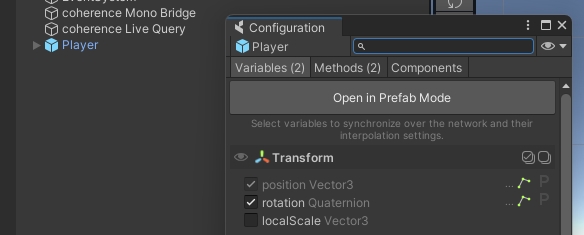
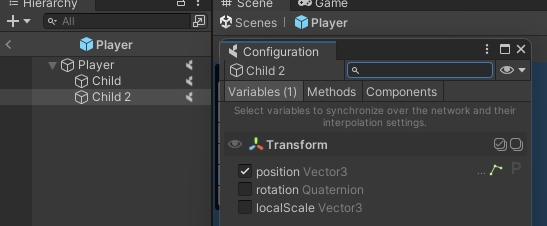
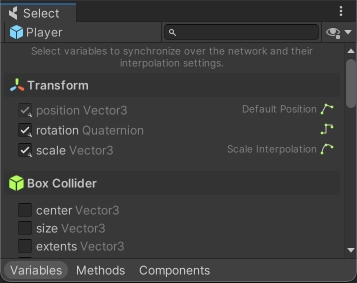
When the Configure window is open it will show the variables, methods and component actions available for synchronization for your currently selected GameObject.
First, make sure to be editing the Prefab in Prefab Mode:
Once in Prefab Mode and with the Configure window open, shift the selection to any of the GameObjects that belong to the hierarchy.
The Configure window will be updated automatically, showing you everything that is available to be synchronized on the child GameObject:
That's it!
Syncing properties, methods and component actions on child GameObjects doesn't require any different flow than what you usually do for the root object. They all get collected and networked as part of one single network entity.
After your changes to GameObject, don't forget to Bake again to rebuild the netcode for the entity.
Make sure to not destroy child GameObjects that have synced properties, or you will receive a warning in the Console. To destroy a synced object, always remove the root.
(you can totally destroy children that don't have any synced property)
Entity references let you set up references between Entities and have those be synchronized, just like other value types (like integers, vectors, etc.)
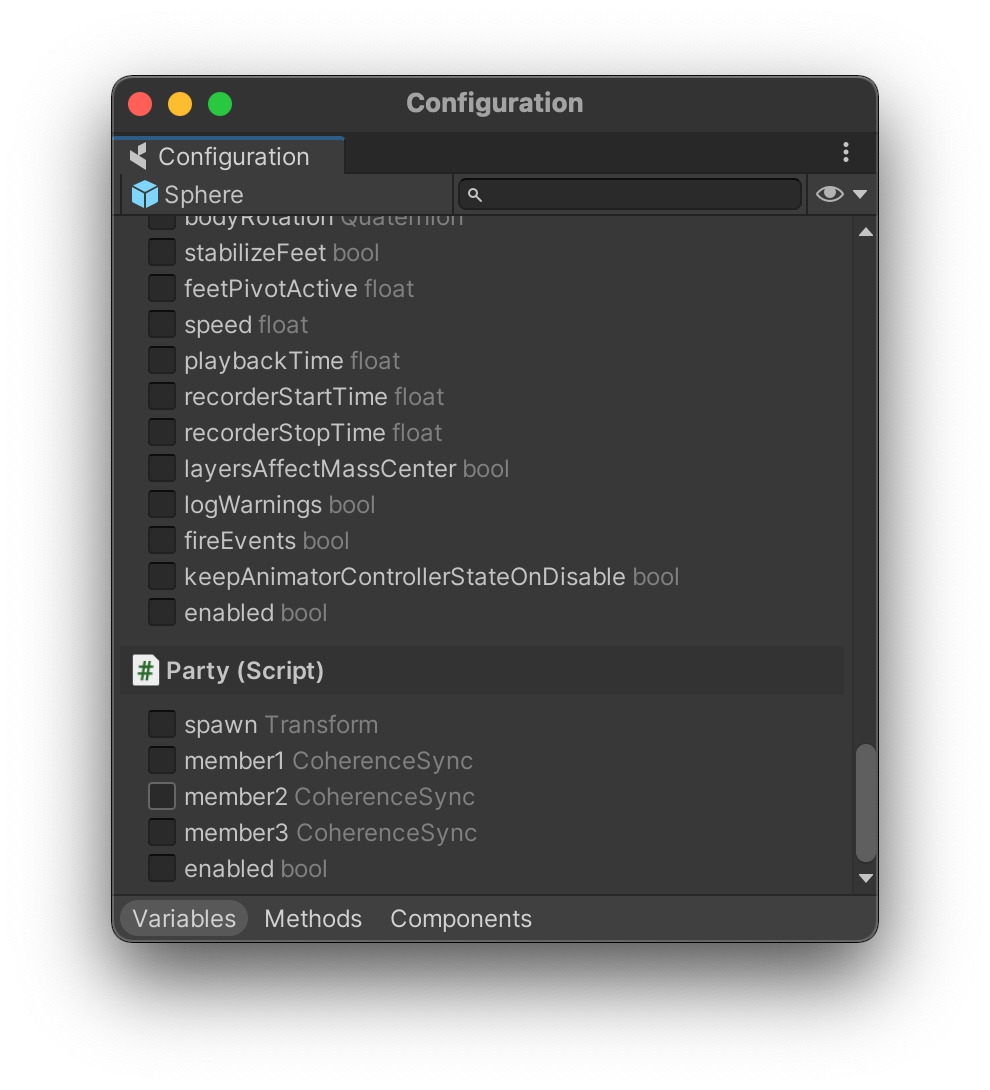
To use Entity references, simply select any fields of type GameObject, Transform, or CoherenceSync for syncing in the Configuration window:
The synchronization works both when using reflection and in baked sync scripts.
It's important to know about the situations when an Entity reference might become null, even though it seems like it should have a value:
The owner of the Entity reference might sync the reference to the Replication Server before syncing the referenced Entity. This will lead to the Replication Server storing a null reference. If possible, try setting the Entity references during gameplay when the referenced Entities have already existed for a while.
Cyclic references are undefined behavior for now. Therefore multiple entities created on the same Client that reference each other might never get synced properly. This is also holds true for references that exist through intermediate entities (A has reference to B has reference to C has reference A - cyclic).
In any case, it's important to use a defensive coding style when working with Entity references. Make sure that your code can handle missing Entities and nulls in a graceful way.
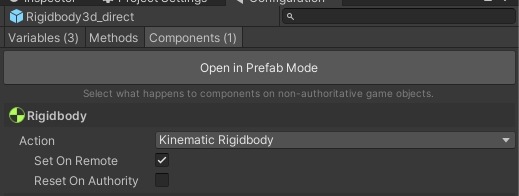
Supporting Unity physics in a network environment requires managing the state of rigid bodies on replicated Prefabs. Generally, if a Prefab using CoherenceSync has a Rigidbody or Rigidbody2D component, the replicated instances of the Prefab should have the body set to kinematic so that they do not simulate in the physics step on non-authoritative clients. There is a convenient configuration for this in the CoherenceSync configuration components tab.
For most purposes, this is all that is required to have physically simulated entities correctly replicated on Clients. However, only the transform of the rigid body is actually replicated. For additional physical state replication a more advanced setup is required.
The CoherenceSync component supports three modes for replication of Unity rigid bodies:
Direct - the default mode used for basic replication of the transform of the Unity GameObject with a rigid body component. When a rigid body is detected, the position and rotation of the GameObject are provided by and assigned to the rigid body's position and rotation directly and Unity updates the GameObject transform after the physics step.
Manual - disables automatic update of position and rotation of CoherenceSync Prefabs with rigid bodies and enables the use of callbacks, allowing custom implementation of how position and rotation updates are applied. The callbacks are OnRigidbody2DPositionUpdate, OnRigidbody3DPositionUpdate, OnRigidbody2DRotationUpdate, and OnRigidbody3DRotationUpdate.
This comes in handy in projects that use authoritative . The Client code can easily react to changes in the Player entity state introduced by the Simulator, updating the visual representation (which the Simulator doesn't need).
The OnValueSyncedAttribute requires using .
Remember that the callback method will be called only for a non-simulated instance of an Entity. Use on a simulated (owned) instance requires calling the selected method manually whenever the value of a given field/member changes. We recommend using for this.
For the full list of supported binding types, see .
Entity references can also be used as arguments in .
A client might not have the referenced entity in its LiveQuery. A local reference can only be valid if there's an actual Entity instance to reference. If this becomes a problem, consider switching to using the component or of prefabs, which ensures that that Entity stays part of the query.
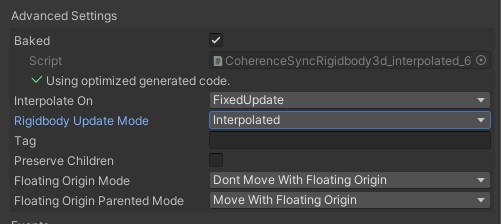
Interpolated - similar to Direct mode, except the update to the rigid body position and rotation are applied using and which allows the Unity physics system to calculate rigid body state such as linear and angular velocity on Clients with replicated Entities.
For best behavior, it is recommended that the interpolation timing use only FixedUpdate. See the article on .
For an object to appear to move smoothly on the screen, it must be rendered at a high rate, usually 60 frames per second or more. However, depending on the settings in your project, and the conditions of your internet connection, data may not always arrive at a smooth 60 frames per second across the network. This is completely okay, but in order to make state changes appear smooth on the Client, we use interpolation.
Interpolation is a type of estimation, a method of constructing new data points within the range of a discrete set of known data points.
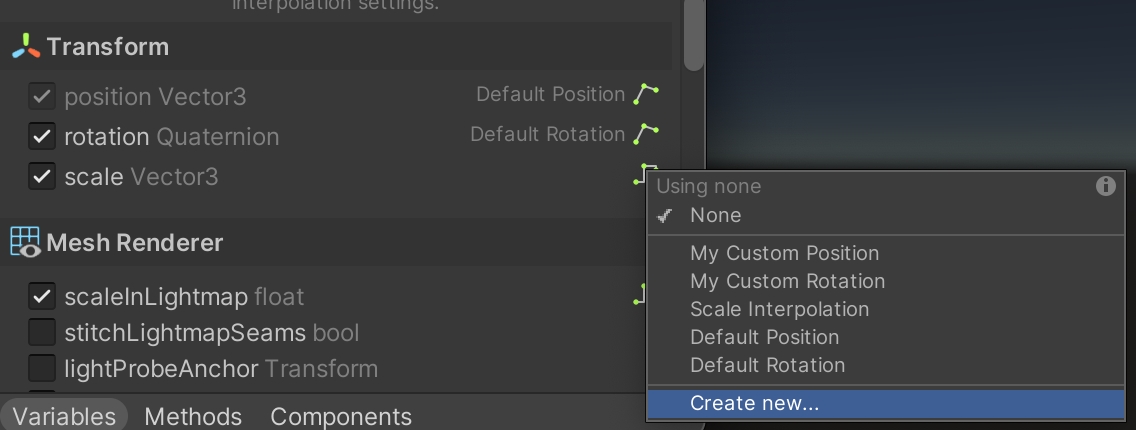
When you select a variable to replicate in the Configure window, it is automatically assigned a default interpolation setting. The default settings are usually good to get started, but you can modify or create your own interpolation settings that better fit your specific needs.
In the Configure window, each binding displays its interpolation settings next to it.
Built-in interpolation settings for position and rotation are provided out-of-the-box, but you are free to create your own and use them instead.
You can also create an interpolation settings asset: Assets > Create > coherence > Interpolation Settings
Linear interpolation blends values by moving along straight lines from sample to sample. This makes the networked object move in a zig-zag pattern, but this is usually not noticeable when sampled at a sufficient rate and with some additional smoothing applied (see section Other settings > Smoothing below).
Spline interpolation blends between samples using the Catmull-Rom spline method which gives a smoother movement than linear interpolation without any sharp corners, at the cost of increased latency (see: Latency below). Spline interpolation requires at least 4 samples to produce good results.
If interpolation type is set to None, the value will simply snap to the most recent sample without any blending. This is recommended for binding types that have no obvious blending methods, e.g., string, byte array and object references.
You could also implement your own interpolation type (see: Custom Interpolators below).
Interpolation will add some additional latency to synced bindings. That's because incoming network samples must first be put in a buffer that is then used to calculate the interpolated value.
The amount of latency depends on the binding's sample rate and interpolation type. The lower the sample rate, the higher the latency.
Linear Interpolation requires a headroom of one sample while Spline Interpolation requires two samples. If interpolation type is set to None, there is no additional latency added, and samples will be rendered as soon as they arrive over the network.
Example: A Prefab that uses Spline Interpolation for its position binding with a sample rate of 30 Hz and network latency of 100 ms will appear to be 2*1/30+0.100 = 0.16 s behind the local time.
Since a Prefab can define separate interpolation types and sample rates for its different bindings, it is possible that not all bindings share the same latency. If, for example, position and rotation are interpolated with different latency, the position and rotation of a vehicle might not match on the remote object.
There are a few settings you can tweak:
Smoothing
Smooth Time: additional smoothing can be applied (using SmoothDamp) to clear out any jerky movement after regular interpolation has been performed.
Max Smoothing Speed: the maximum speed at which the value can change, unless teleporting.
Latency
Network Latency Factor: fudge factor applied to the network latency. A factor of 1 means adapting to network latency with no margin, so the incoming sample must arrive at its exact predicted time to prevent the buffer from becoming stale. In general, a factor of 1.1 is recommended to prevent network fluctuations from causing dead reckoning due to latency peaks.
Network Latency Cooldown: when network latency decreases, wait this amount of time (in seconds) before recalculating network latency. This prevents network fluctuations from causing dead reckoning due to latency valleys.
Additional Latency: increases latency by a fixed amount (in seconds) to add an additional margin for the sample buffer.
Overshooting
Max: how far into the dead reckoning to venture when the time fraction exceeds 100%, as a percentage of the sample rate.
Retraction: how fast to pull back to 100% when overshooting the allowed dead reckoning maximum (in seconds)
Teleport Distance: if two consecutive samples are further apart than this, the value will teleport or snap to the new sample immediately without interpolating or smoothing in between.
Stale Factor: defines when to insert a virtual sample in case of a longer time gap between the samples. High stale factor puts the virtual sample close to first sample leading to a smooth transition between two distant samples. This is suitable for parameters that do not change rapidly - the position of a big ship for example. Low stale factor places the virtual sample near the second sample resulting in initial lack of change in value during interpolation followed by a quick transition to the second sample. This is best suited for parameters that can change rapidly, e.g. position of a player.
Dead reckoning is a form of replicated computing so that everyone participating in a game winds up simulating all the entities (typically vehicles) in the game, albeit at a coarse level of fidelity.
The basic notion of dead reckoning is an agreement in advance on a set of algorithms that can be used by all player nodes to extrapolate the behavior of entities in the game, and an agreement on how far reality should be allowed to get from these extrapolation algorithms before a correction is issued.
Interpolation settings can be tweaked in Play mode where you can see the result on the screen immediately, but the changes you make will be reverted again once you exit Play mode. This is because - in Play mode - a copy of the interpolation settings is created.
Remember that interpolation only happens on remote objects, so you need to select a remote object to experiment with interpolation settings in Play mode.
Interpolation works both in Baked and Reflection modes. You can change these settings at runtime via the Configure window (editor) or by accessing the binding and changing the interpolation settings yourself:
The Linear and Spline interpolators that are provided by coherence are sufficient for most common use cases, but you can also implement your own interpolation algorithm by sub-classing Interpolator.
You can choose to override one or more of the base methods depending on which type or types of values you want to support. The method signatures usually take two adjacent samples and a fractional value (from 0 to 1) to blend between them. There are also method signatures that provide four samples, which is useful for the Catmull-Rom spline interpolation.
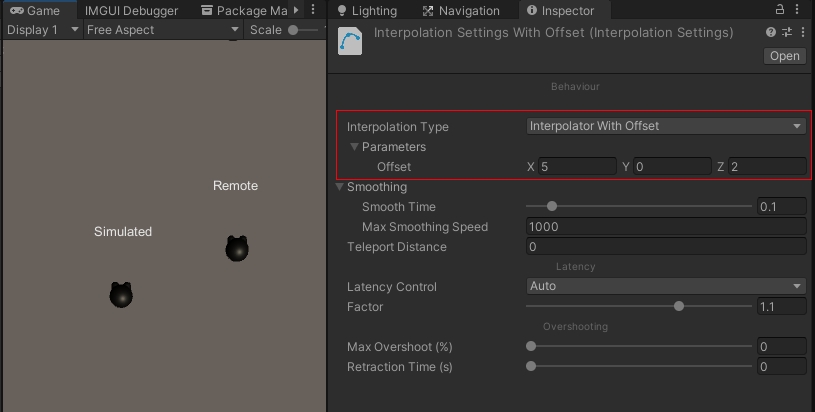
Here's an example of a custom interpolator that makes the remote object appear at an offset distance from the object's actual position.
The NumberOfSamplesToStayBehind property controls the internal latency.
Catmull-Rom splines require four samples to blend between, so its NumberOfSamplesToStayBehind property must be set to 2.
By default, each binding is interpolated on every Update call. This can be changed using the Interpolate On property on the CoherenceSync under Advanced Settings. Possible values are:
Update / LateUpdate / FixedUpdate - bindings will be updated with interpolated values on every Update / LateUpdate / FixedUpdate call
Combination - you can combine any of the above, so that bindings are updated in more than one Unity callback
Nothing - bindings will completely stop receiving new values because interpolation is fully disabled
If you are using Rigidbody for movement of a GameObject, it is recommended to set Interpolate On to FixedUpdate. Also, to achieve completely smooth movement, Rigidbody interpolation should be enabled and you should avoid setting the position of a GameObject directly using Transform.position or RigidBody.position.
Extrapolation uses historical data to predict the future state of a binding. By predicting the state of other players before their network data actually arrives, network lag can be reduced or removed entirely. This will cause mispredictions that need to be corrected when the incoming network data does not match the predicted state.
Extrapolation is not yet supported by coherence.


