Loading...
Loading...
Loading...
Loading...
Loading...
Loading...
Loading...
Loading...
Loading...
Loading...
coherence uses the concept of authority to determine who is responsible for simulating each Entity. By default, each Client that connects to the Replication Server owns and simulates the Entities they create. There are a lot of situations where this setup is not adequate. For example:
The number of Entities could be too large to be simulated by the players on their own, especially if there are few players and the World is very large.
The game might have an advanced AI that requires a lot of coordination, which makes it hard to split up the work between Clients.
It is often desirable to have an authoritative object that ensures a single source of truth for certain data. State replication and "eventual correctness" doesn't give us these guarantees.
Perhaps the game should run a persistent simulation, even while no one is playing.
With coherence, all of these situations can be solved using dedicated Simulators. They behave very much like normal Clients, except they run on their own with no player involved. Usually, they also have special code that only they run (and not the clients). It is up to the game developer to create and run these programs somewhere in the cloud, based on the demands of their particular game.
To use Simulators, you need to enter your credit card details. You can do it by logging into our Dashboard, selecting the Billing tab, finding the Payment Methods section and clicking the Manage button.
If you're on the Free plan, you won't be charged anything - our payment provider will temporarily reserve a small amount to verify that the credit card is in working order.
Only Paid and Enterprise plans offer Simulators external network connectivity. When switching from Free plan to a Paid or Enterprise plan, it may take up to 10 minutes for the Simulators to have their external connectivity enabled.
If you have determined that you need one or more Simulator for your game, there are multiple ways you can go about implementing these. You could create a separate Unity project and write the specific code for the Simulator there (while making sure you use the same schema as your original project).
An easier way is to use your existing Unity project and modify it in a way so that it can be started either as a normal Client, or as a Simulator. This will ensure that you maximize code sharing between Clients and Servers - they both do simulation of Entities in the same Game World after all.
To force a build to start as a Simulator, you can use the following command line argument:
The Simulator is started with the following parameters in coherence Cloud:
The SDK provides a static helper class to access all the above parameters in the C# code called SimulatorUtility.
To build Simulators, it's best to use the Linux Dedicated Server Build Target.
This is great for Simulators since we're not interested in rendering any graphics on these outside of local development. You will also get a leaner executable that is smaller and faster to be published in coherence Cloud.
When a room has only Simulators (no Clients) it shuts down automatically after a short period of time.
Refer to the .
$ ./Game --coherence-simulation-server--coherence-region // region where the simulator is started
--coherence-world-id // unique world id (in world mode)
--coherence-http-server-port // REST access for starting / stopping rooms
--coherence-auth-token // token to authorize access
--coherence-simulation-server // identify as simulation server
--coherence-simulator-type // Room or World
// the following should be used also when starting a local simulation server to
// successfully connect to the local replication server
--coherence-ip // address of the replication server (eg 127.0.0.1)
--coherence-port // port of the replication server
--coherence-room-id // room id when connecting to a room
--coherence-unique-room-id // unique room id to connect to in room mode
--coherence-room-tags // tags used when creating the room
--coherence-room-kv // key values supplied when creating the room
static class SimulatorUtility
{
    public enum Type
    {
        Undefined = 0,
        World = 1,
        Rooms = 2
    }

    public static Type SimulatorType;         // Type of simulator: Room / World.
    public string Region;                     // Region where simulator was spawned.
    public string Ip;                         // Ip of the replication server.
    public int Port;                          // UDP port of the replication server.
    public int RoomId;                        // RoomId for current session.
    public ulong UniqueRoomId;                // Unique RoomId.
    public ulong WorldId;                     // World Id (in worlds mode).
    public int HttpServerPort;                // Port used for REST commands.
    public string AuthToken;                  // Auth token used for authentication.
    public List<string> RoomTags;             // Tags for the room.
    public Dictionary<string,string> RoomKV;  // Key Values for the room.
    public bool IsInvokedAsSimulator;         // Whether the instance was invoked as a simulator.
    public bool IsInvokedInCommandLine;       // Whether the instance was invoked on the commandline.
    public bool IsSimulator;                  // Identify whether simulator.
}When using the Simulators tab in the coherence Hub, you can specify a Simulator slug. This is simply a unique identifier for a Simulator. This value is automatically saved in RuntimeSettings when an upload is complete, and Room creation requests will use this value to identify which Simulator should be started alongside your room.
The Simulator slug can be any string value, but we recommend using something descriptive. If the same slug is used between two uploads, the later upload will overwrite the previous Simulator.
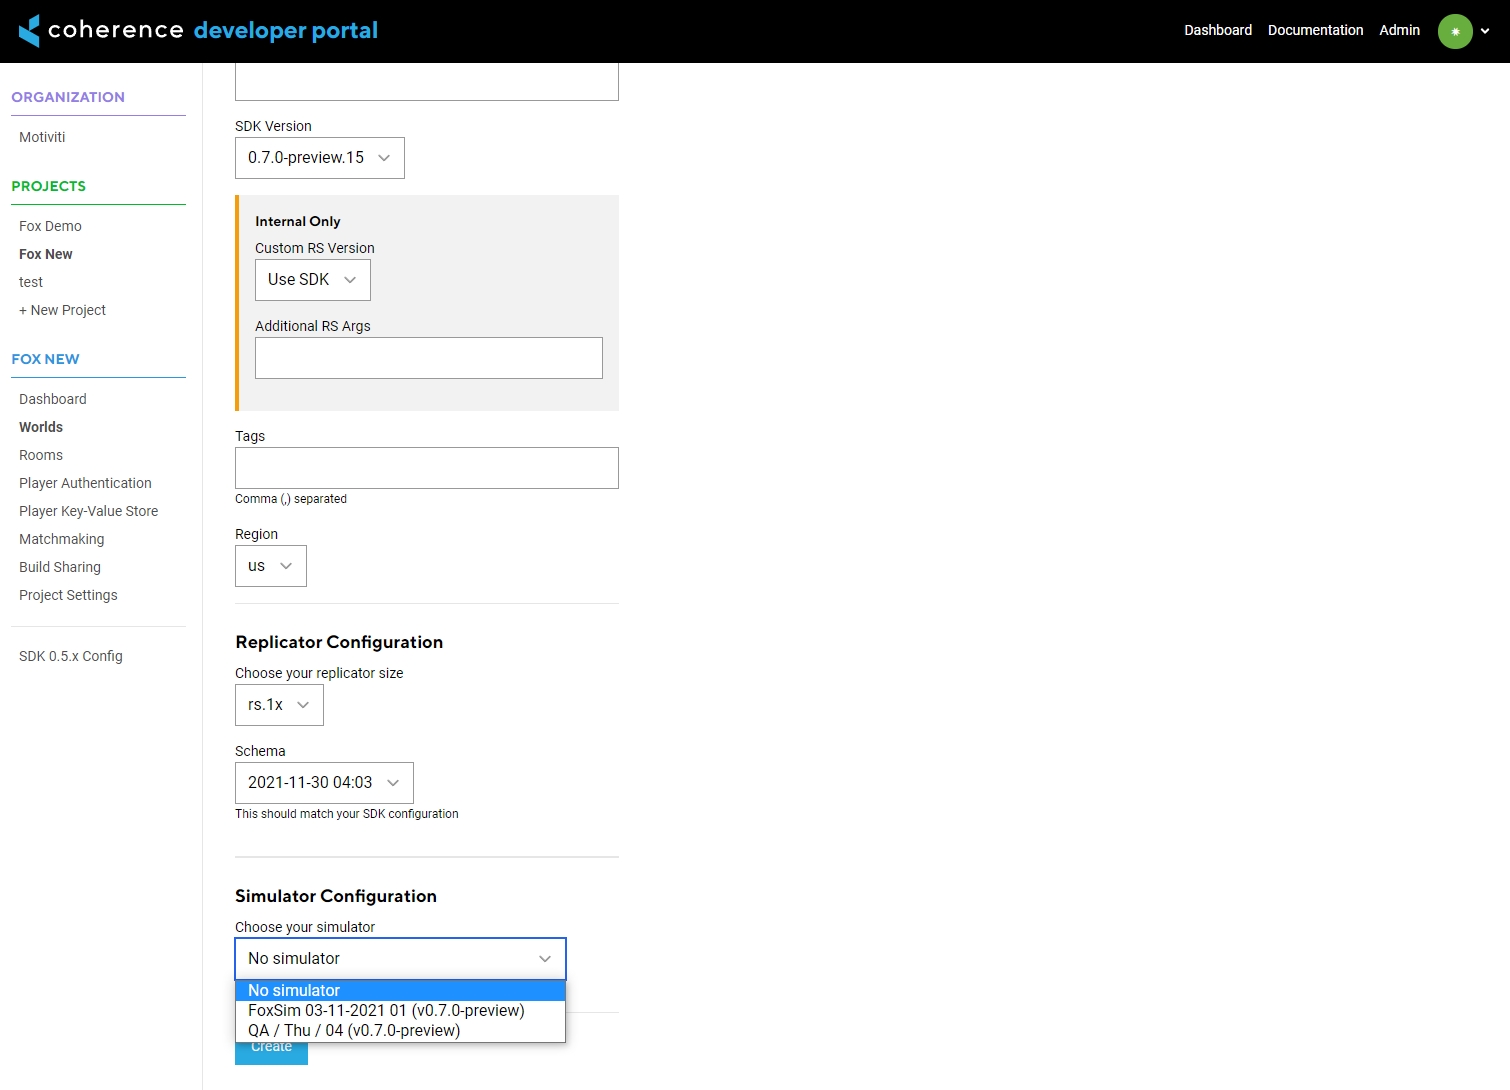
A list of uploaded Simulators and their corresponding slugs can be found in the Developer Portal:
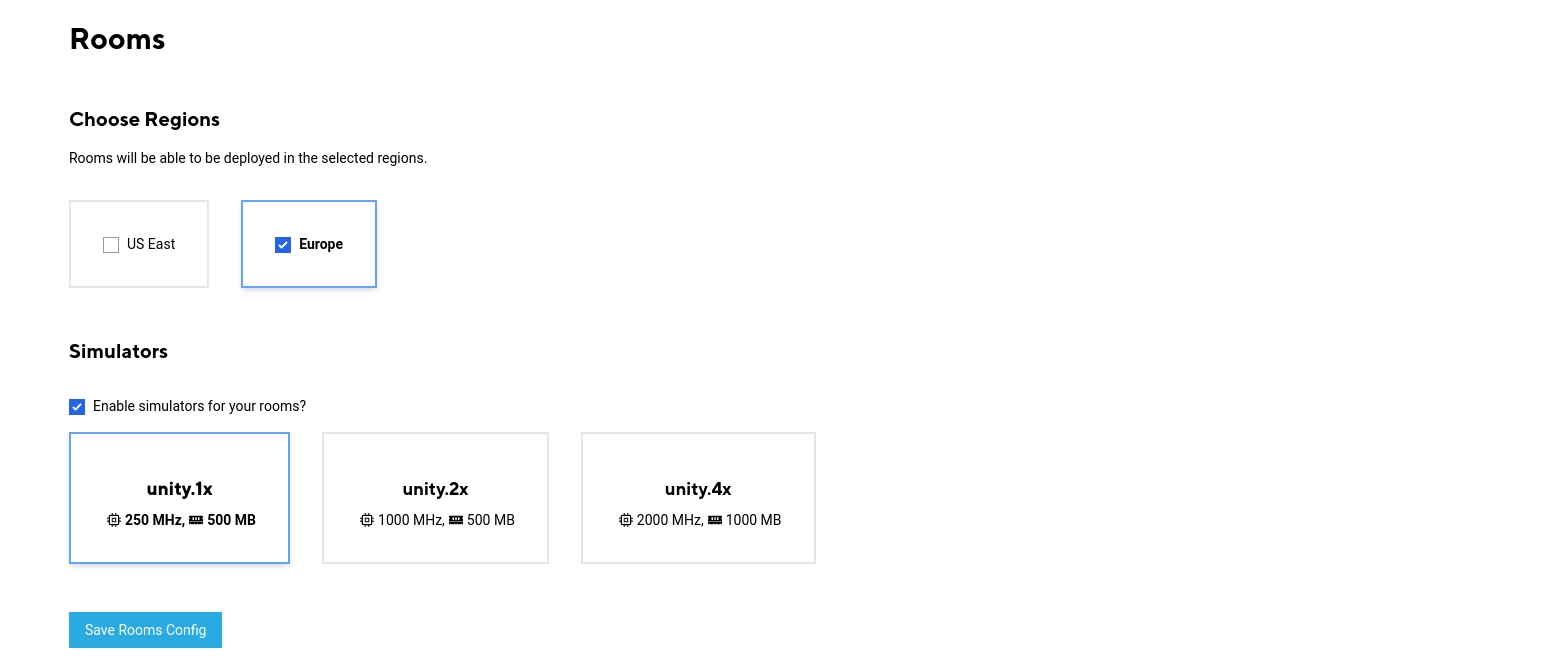
Simulators per room can be enabled in the dashboard for the project. The Simulator used is matched according to the Simulator slug in the RuntimeSettings scriptable object file. This is set automatically when you upload a Simulator.
For each new Room, a Simulator will be created with the command line parameters described in the Simulators section. The Simulator is shutdown automatically when the Room is closed.
World Simulators are started and shut down with the World. They can be enabled and assigned in the Worlds section of the Developer Portal.
World simulation servers are started with the command line parameters described in the section.
When scripting Simulators, we need mechanisms to tell them apart.
Ask Coherence.SimulatorUtility.IsSimulator.
There are two ways you can tell coherence if the game build should behave as a Simulator:
COHERENCE_SIMULATOR preprocessor define.
--coherence-simulation-server command-line argument.
Connect and ConnectionTypeThe Connect method on Coherence.Network accepts a ConnectionType parameter.
Whenever the project compiles with the COHERENCE_SIMULATOR preprocessor define, coherence understands that the game will act as a Simulator.
Launching the game with --coherence-simulation-server will let coherence know that the loaded instance must act as a Simulator.
You can define who simulates the object in the CoherenceSync inspector.
coherence includes an auto-connect MonoBehaviour out of the box for Room- and World-based Simulators. The Component its called AutoSimulatorConnection.
When you add the Component, it will parse the connection data passed with to connect to the given Replication Server automatically. This will also work for Simulators you upload to the coherence Cloud.
using Coherence;
using UnityEngine;

public class SimulatorClass : MonoBehaviour
{
    public void Awake()
    {
        if (SimulatorUtility.IsSimulator)
        {
            // I'm a simulator!
        }
    }
}
--coherence-ip <ip>
Specific IP to point to.
Ip
--coherence-port <port>
Specific port to point to.
Port
--coherence-room-id <room-id>
Specific Room to point to.
RoomId
--coherence-room-tags <base64-tags>
A base64 enconded string containing the Room tags (space-separated). Example: tag1 tag2 tag3
RoomTags
--coherence-room-kv-json <base64-json>
A base64 encoded string containing a JSON object literal with key-valure pairs. Example:
{"key1": "value1", "key2": "value2"}
RoomKV
--coherence-world-id <world-id>
Specific World ID to point to.
WorldId
--coherence-simulation-server
Connect and behave as a Simulator.
HasSimulatorCommandLineParameter
--coherence-simulator
Same as --coherence-simulation-server.
HasSimulatorCommandLineParameter
--coherence-region <region>
eu, us, usw, ap or local.
Region
using Coherence;
using Coherence.Connection;
using Coherence.Toolkit;
using UnityEngine;

public class ConnectAsSimulator : MonoBehaviour
{
    void Start()
    {
        var endpoint = new EndpointData
        {
            region = EndpointData.LocalRegion,
            host = "127.0.0.1",
            port = 32001,
            schemaId = RuntimeSettings.instance.SchemaID,
        };

        var bridge = FindAnyObjectByType<CoherenceBridge>();
        bridge.Connect(endpoint, ConnectionType.Simulator);
    }
}#if COHERENCE_SIMULATOR
// simulator-specific code
#endifClick the little info icon in the top right corner to learn more about Simulators and how to build them properly.
You can change your Simulator build options by editing the SimulatorBuildOptions object, or in the coherence Hub Simulators tab.
There are several settings you might want to change.
Specify the scenes you want to get in the build via the Scenes To Build field.
For a local build, you can choose to enable/disable the Headless Mode by ticking the checkbox. For a cloud build, Headless Mode is always enabled by default.
For more information about the options listed under Build Size Optimizations, see .
Make sure you meet the requirements:
You have to have Linux modules (Linux Build Support (IL2CPP), Linux Build Support (Mono), and Linux Dedicated Server Build Support) installed in Unity Editor. See Unity - Manual: Adding modules to the Unity Editor.
You have to be logged into the coherence Developer Portal, through the Unity Editor. See for more information.
Press the coherence Hub > Simulators > Build And Upload Headless Linux Client button.
When the build is finished, it will be uploaded to your currently selected organization and project in the Developer Portal.
You'll see in the developer dashboard when your Simulator is ready to be associated with a Room or World.
Target frame rate on Simulator builds is forced at 30.
This feature is experimental, please make sure you make a backup of your project beforehand.
You can set the values for the Build Size Optimizations in the drop-down list of the build configuration inspector. It looks like this:
Select the desired optimizations depending on your needs.
Replace Textures And Sounds With Dummies
Project's textures and sound files are replaced with tiny and lightweight alternatives (dummies). Original assets are copied over to <project>/Library/coherence/AssetsBackup. They are restored once the build process has finished.
Keep Original Assets Backup
The Assets Backup (found at <project>/Library/coherence/AssetsBackup) is kept after the build process is completed, instead of deleted. This will take extra disk space depending on the size of the project, but is a safety convenience.
Compress Meshes
Sets Mesh Compression on all your models to High.
Disable Static Batching
Static Batching tries to combine meshes at compile-time, potentially increasing build size. Depending on your project, static batching can affect build size drastically. Read more about .


Some games require enhanced security against cheating or player griefing. This is done by giving authoritative privileges to Simulators only.
Advanced Simulator Authority is a specific feature set meant for advanced use cases. Most projects should consider simpler setups first, like distributed authority or simple server-authoritative. This approach adds complexity, especially around object creation and error handling.
In the Project Settings section of the under Advanced Authority Config, you can select which Host Authority features are enabled for Rooms and Worlds separately, under Rooms Host Authority and Worlds Host Authority.
In the coherence , under Local Replication Server, you can select which Host Authority features are enabled for a locally run Replication Server World. If you are manually launching the Replication Server from the CLI, the --host-authority-features parameter should be passed into the command with comma-separated dash-cased-enabled features names.
For example:
replication-server worlds --host-authority-features=create-entities,validate-connection
To select which Host Authority features are enabled for a locally run Room, you need to set SelfHostedRoomCreationOptions.HostAuthority at Room creation time.
If any host authority feature is enabled, the Replication Server will not allow Clients to be connected without a Simulator being connected as well.
If a Client tries to connect before a Simulator, the connection will be denied with the ConnectionCloseReason.HostNotReady.
If a Simulator disconnects, while other Clients are connected to the server, the Replication Server will forcefully disconnect all other Clients as well with the ConnectionCloseReason.HostDisconnected.
The HostAuthority.CreateEntities feature is used to only allow Simulators to create entities. Once created, these entities can have their state authority transferred and their lifetime managed by non-simulators, but no Client is allowed to create entities while this restriction is active.
By default, all CoherenceSyncs have set to "Steal". This means that malicious players could steal the authority of any entity and break the game.
Instead of manually changing the AuthorityTransferType on every new CoherenceSync, you can change the default value of it in the coherence . See .
By default, when are active, the will automatically create a global query entity on behalf of the Client. If the Client is not authorized to create entities, this results in an error on the Replication Server indicating that an entity creation was rejected. To avoid these error logs, the auto creation of the global query can be disabled in the CoherenceBridge configuration:
as part of a prefab by using the component. This prefab can then be transferred to other clients from the simulator to give those clients access to the global client connections.
The HostAuthority.ValidateConnection feature is used to restrict who can connect to a World or a Room. Upon enabling this feature, the connected Simulator will receive a validation request on every connection attempt from a Client. The connection is allowed only if the Simulator responds with the accepted validation response.
To handle the connection validation requests, the Simulator can subscribe to CoherenceBridge.onValidateConnectionRequest. To respond to the validation request, call Respond() on the ConnectionValidationRequest provided, passing in the validation response:
If the Simulator rejects the connection, the Client will receive a with the ConnectionCloseReason.ConnectionRejectedByHost.
Before initiating the connection, the user can set an optional custom user payload which will be sent to the Simulator for validation. The payload is of type byte[], and can contain an access token or any other data. To send the payload for validation, you must set it before initiating the connection:
When responding to a connection validation request, the Simulator can also send a custom payload back to the user. This is done by passing the payload to the ConnectionValidationResponse when calling the Respond() method.
The payload size is limited to 512 bytes.
The Client can access the payload sent by the Simulator depending if the connection validation was accepted or rejected:
If the connection was accepted, the payload can be accessed by calling the function GetValidatedHostPayload() after the connection was established.
Or, if the connection was rejected, the payload is contained inside the together with the ConnectionCloseReason.ConnectionRejectedByHost.
A Simulator can forcefully disconnect other Clients by kicking them. When kicking a Client, the Simulator can also send an optional host payload of type byte[] which will be sent to the kicked Client, together with the ConnectionCloseReason.KickedByHost.
It is sometimes useful for the Client creating a room to pass information to the Simulator handling that room. If the information is public and can be seen by other Clients, using room Tags or a Key-Value dictionary is the best way to pass it.
If, however, the information is secret and should be known only to the Simulator, then we can use the Simulator Payload:
The system is not fully operable when Entity creation restriction is enabled. While connections will be registered and their ClientIDs are available, the Client connection objects' state won't be synced and no commands can be sent for those objects. This applies only to the client-side connection objects. This limitation is slated to be removed in the future.
using Coherence.Brisk;
using Coherence.Toolkit;
using UnityEngine;

public class Example : MonoBehaviour
{
    public CoherenceBridge bridge;

    private void Awake()
    {
        bridge.onValidateConnectionRequest.AddListener(OnValidateConnectionRequest);
    }

    private void OnValidateConnectionRequest(ConnectionValidationRequest request)
    {
        // Your own validation logic goes here.
        var accept = true;

        // Call request.Respond() to accept or reject the connection.
        // This could be done later on (not on this frame), if needed.
        request.Respond(new ConnectionValidationResponse(accept));
    }
}bridge.SetConnectionValidationPayload(new CustomPayload(myToken));
bridge.JoinRoom(roomData); // or bridge.Connect(...);using Coherence.Brisk;
using Coherence.Common;
using Coherence.Connection;
using Coherence.Toolkit;
using UnityEngine;
[RequireComponent(typeof(CoherenceBridge))]
public class ConnectionValidationHandler : MonoBehaviour, IConnectionValidationHandler
{
public string Password; // Set in the editor
private void Start() {
var bridge = GetComponent<CoherenceBridge>();
bridge.ConnectionValidationHandler = this;
bridge.onConnectionError.AddListener((_, exception) => {
if (exception is ConnectionDeniedException deniedException)
{
Debug.Log("Connection denied. " +
$"Reason: {deniedException.CloseReason}, " +
$"Message: {deniedException.HostPayload.AsString}");
}
});
}
public void OnValidateConnectionRequest(ConnectionValidationRequest request) {
if (request.UserPayload.AsString == Password) {
request.Respond(new ConnectionValidationResponse(true));
} else {
var message = new CustomPayload("Invalid password");
request.Respond(new ConnectionValidationResponse(false, message));
}
}
}// On simulator
var payload = new CustomPayload("Kicked for griefing.");
bridge.KickConnection(clientID, payload);
// On client
bridge.onConnectionError.AddListener((bridge, exception) =>
{
if (exception is ConnectionDeniedException deniedException &&
deniedException.CloseReason == ConnectionCloseReason.KickedByHost)
{
var message = deniedException.HostPayload.AsString;
Debug.Log($"Kicked with message: {message}");
}
});// On the client
var roomCreationOptions = new RoomCreationOptions {
SimPayload = roomPassword,
};
var roomsService = PlayerAccount.Main.Services.Rooms;
roomsService
.GetRoomServiceForRegion("eu")
.CreateRoom(OnRoomCreated, roomCreationOptions);
// On the simulator
string password = SimulatorUtility.Payload;


Before deploying a Simulation Server, testing and debugging locally can significantly improve development and iteration times. There are a few ways of accomplishing this.
Using the Unity Editor as a Simulator allows us to easily debug the Simulator. This way we can see logs, examine the state of scenes and GameObjects and test fixes very rapidly.
To run the Editor as a Simulator, run the Editor from the command line with the proper parameters:
--coherence-simulation-server: used to specify that the program should run as a coherence Simulator.
--coherence-simulator-type: tells the Simulator what kind of connection to make with the Replication Server, can be Rooms or World.
--coherence-region: tells the Simulator which region the Replication Server is running in: EU, US or local.
--coherence-ip: tells the Simulator which IP it should connect to. Using 127.0.0.1 will connect the Simulator to a local server, if one is running.
--coherence-port: specifies the port the Simulator will use.
--coherence-world-id: specifies the World ID to connect to, used only when set to Worlds.
--coherence-room-id: specifies the Room ID to connect to, used only when set to Rooms.
--coherence-unique-room-id: specifies the unique Room ID to connect to, used only when set to Rooms.
For example:
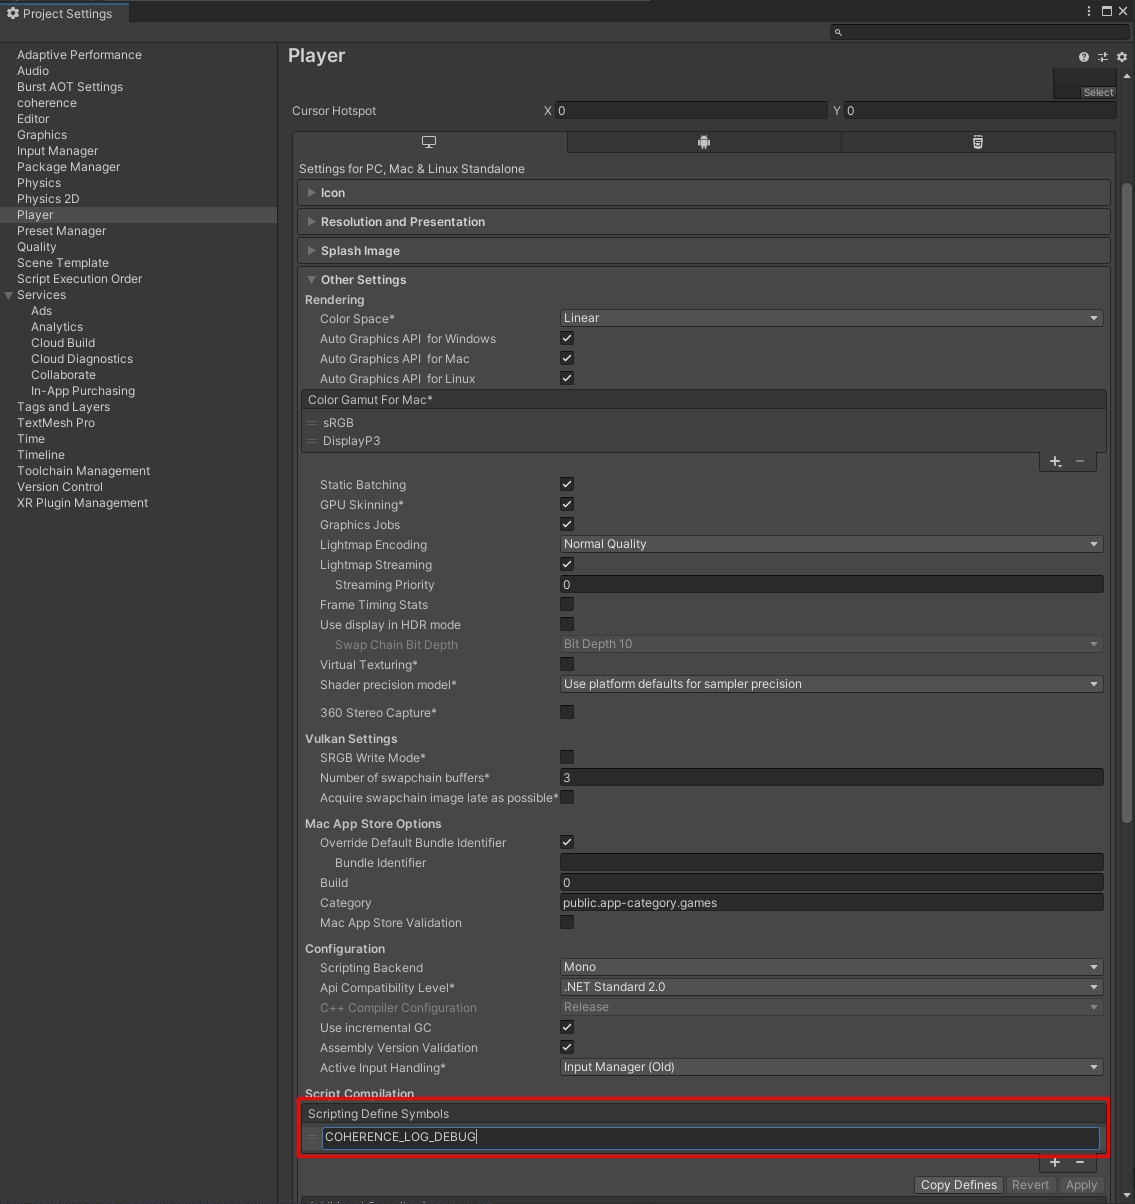
If you're not sure which values should be used, adding a COHERENCE_LOG_DEBUG define symbol will let you see detailed logs. Among them are logs that describe which IP, port and such the Client is connecting to. This can be done in the Player settings: Project Settings > Player > Other Settings > Script Compilation > Scripting Define Symbols.
Another option is making a Simulator build and running it locally. This option emulates more closely what will happen when the Simulator is running after being uploaded.
You can run a Simulator executable build in the same way you run the Editor.
This allows you to test a Simulator build before it is uploaded or if you are having trouble debugging it.
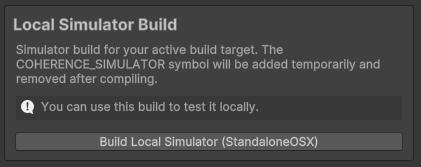
Local simulator builds require the Dedicated Server for your version on Unity.
Once installed, you can create a local simulator build by clicking the 'Build Local Simulator (target)' button from coherence > Simulator > Simulator Build Wizard where target is the operating system on your local machine.
The COHERENCE_SIMULATOR symbol is added during the local simulator build. Symbols can be examined in the Player Settings and can be found at Edit > Project Settings... in the Player tab under Script Compilation.
Local simulator builds can be run from coherence > Simulator > Run Simulator Locally.
Use the Fetch Last Endpoint button to autofill the required fields.
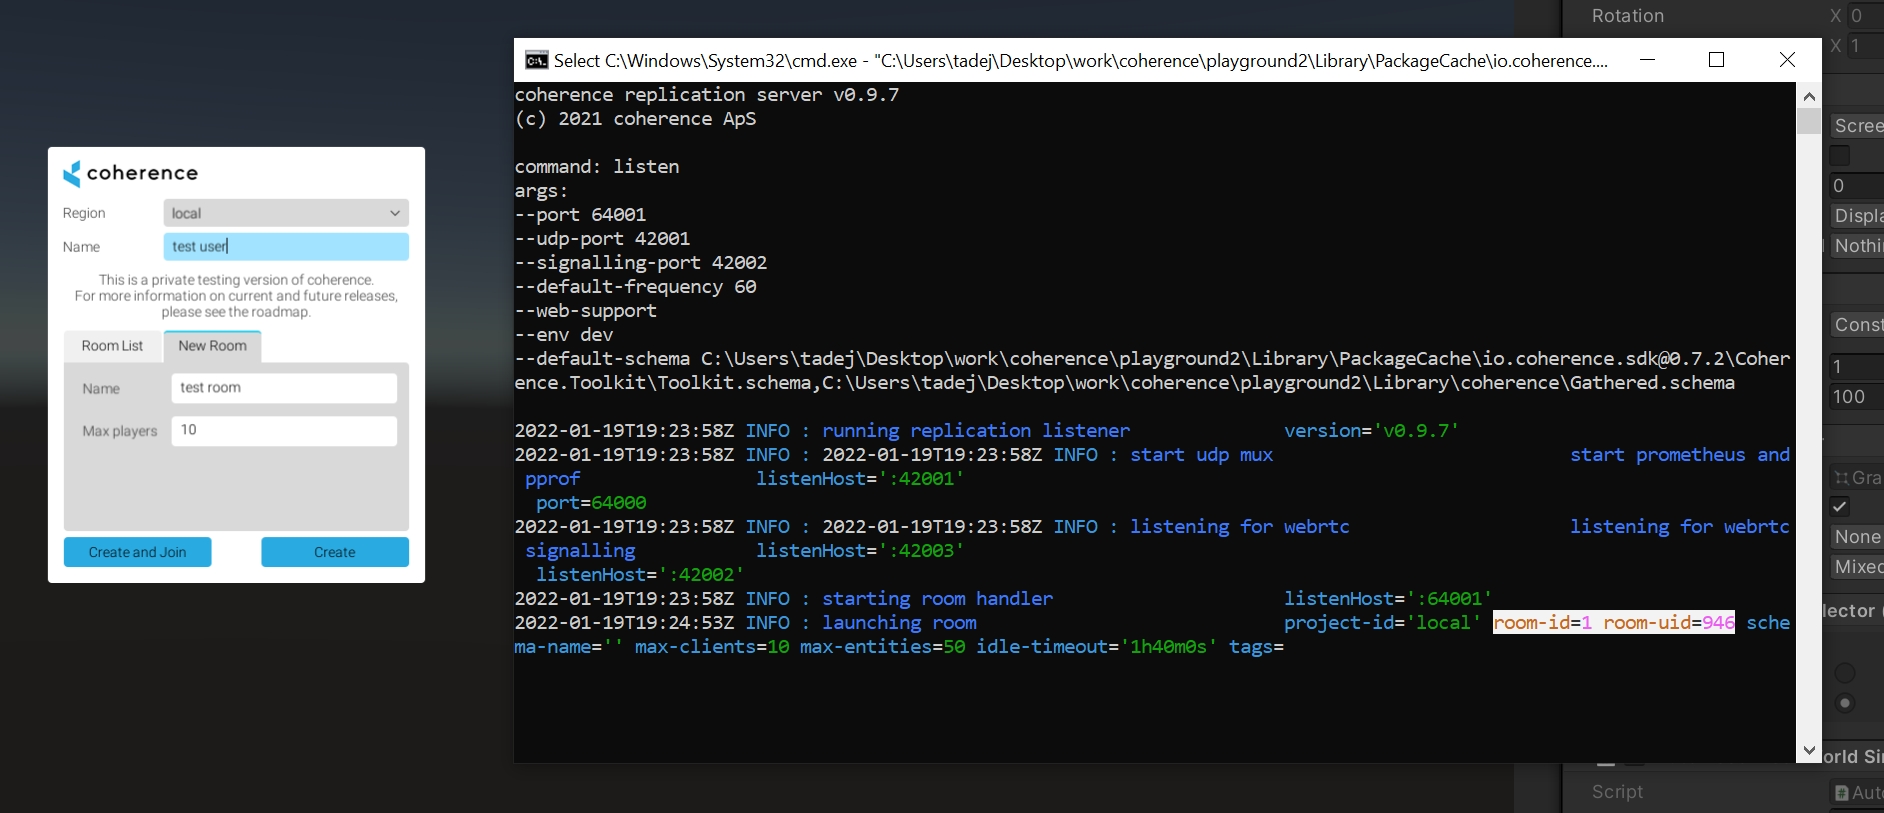
When using a Rooms-based setup, you first have to create a Room in the local Replication Server (e.g. by using the connect dialog in the Client).
The local Replication Server will print out the Room ID and unique Room ID that you can use when connecting the Simulator.
<Editor path> -projectPath <project path>
--coherence-simulation-server
--coherence-simulator-type rooms
--coherence-region local
--coherence-ip 127.0.0.1
--coherence-port 32001
--coherence-room-id [room-id]
--coherence-unique-room-id [room-uid]
"simulator build path"
--coherence-simulation-server
--coherence-ip 127.0.0.1
--coherence-port 32001
--coherence-world-id 0
--coherence-room-id [room-id]
--coherence-unique-room-id [room-uid]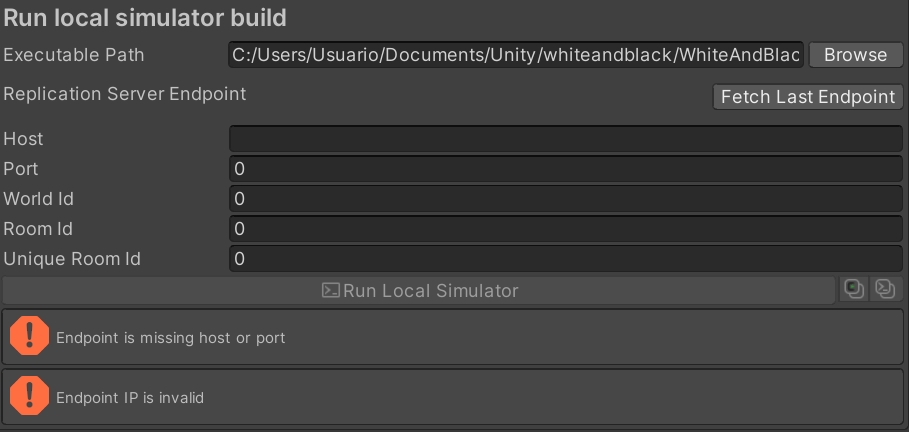


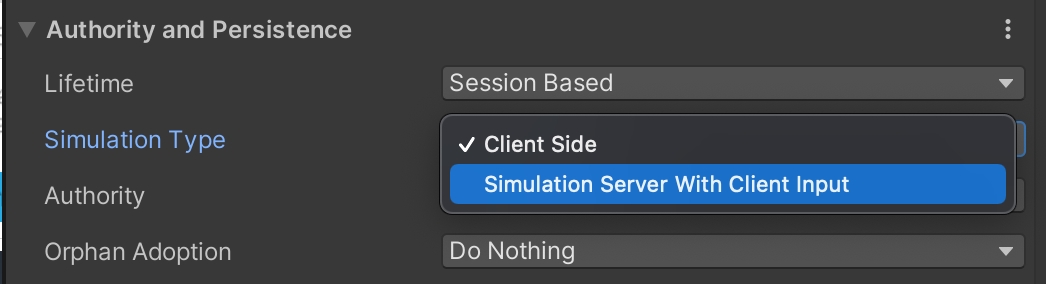
In an advanced Simulator setup, where entity creation is restricted to the Simulator, it is not possible for a Client to create their own queries. In an unrestricted setup you can create a live query Prefab that has a CoherenceSync behaviour with the Simulate On property set to Server Side with Client Input. However, in order to provide a Client with a live query in an entity-restricted setup, the Simulator has to create the live query on behalf of the Clients and transfer the input authority back.
Constructing a Prefab that has Simulator authority but benefits a Client with the area of interest is simple. It requires that the Authority Transfer mode is Request and that there is a Coherence Live Query component. It is also possible to add any kind of query to these Prefabs or multiple types and the Client will benefit from them all.
Note that the Simulate In field is set to Client Side. This is appropriate for this setup even though the state authority of this entity is a Simulator, since from the point of view of the Replication Server all Simulators are Clients as well.
using UnityEngine;
using System.Collections.Generic;
using Coherence.Connection;
using Coherence.Toolkit;

public class SimulatorConnectionHandler : MonoBehaviour
{
    public CoherenceBridge bridge;
    public CoherenceSync liveQueryPrefab;

    private Dictionary<ClientID, CoherenceSync> clientQueries = new();

    public void Start()
    {
        bridge.ClientConnections.OnCreated += HandleClientCreated;
        bridge.ClientConnections.OnDestroyed += HandleClientDestroyed;
    }

    public void OnDestroy()
    {
        bridge.ClientConnections.OnCreated -= HandleClientCreated;
        bridge.ClientConnections.OnDestroyed -= HandleClientDestroyed;
    }

    private void HandleClientCreated(CoherenceClientConnection client)
    {
        if (client.IsMyConnection)
        {
            // This example is only creating live queries for other clients.
            return;
        }

        // Create a live query for the client and transfer the input authority so
        // they get the benefit of the query, but are not allowed to modify it
        // directly.
        var clientQuery = Instantiate(liveQueryPrefab);
        clientQuery.TransferAuthority(client.ClientId, Coherence.AuthorityType.Input);

        clientQueries.Add(client.ClientId, clientQuery);
    }

    private void HandleClientDestroyed(CoherenceClientConnection client)
    {
        if (client.IsMyConnection)
        {
            return;
        }

        // Destroy the query that belonged to the disconnected client.
        var clientQuery = clientQueries[client.ClientId];
        Destroy(clientQuery.gameObject);

        clientQueries.Remove(client.ClientId);
    }
}