> For the complete documentation index, see [llms.txt](https://docs.coherence.io/llms.txt). Markdown versions of documentation pages are available by appending `.md` to page URLs; this page is available as [Markdown](https://docs.coherence.io/getting-started/setup-a-project/scene-setup.md).
# 1. Scene setup
{% hint style="info" %}
If you prefer a video tutorial, refer to the first minute of [Part 2](https://youtu.be/kyUSiBpZ2Bc) of our Getting Started series.
{% endhint %}
One of the first steps in adding coherence to a project is to setup the scene that you want the networking to happen in.
### **Add a CoherenceBridge**
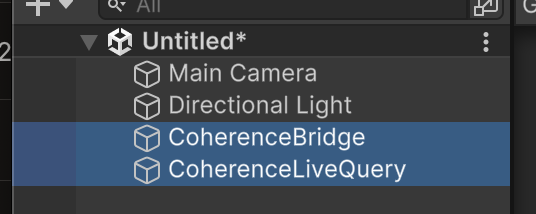
In the top menu: *GameObject > coherence > Bridge*
A GameObject with a `CoherenceBridge` component will be created in the scene, that we will refer to as CoherenceBridge or *the bridge*.
CoherenceBridge manages the connection with coherence's relay (i.e., the [Replication Server](/manual/replication-server.md)) and is the centre of many connection-related events.
No particular setup is required now, but feel free to explore the options in its Inspector.
### **Add a CoherenceLiveQuery**
In the top menu: GameObject *> coherence > Live Query*
A GameObject with a `CoherenceLiveQuery` component will be created in the scene, that we will refer to as CoherenceLiveQuery or *the live query*.
A [CoherenceLiveQuery](/manual/components/coherence-live-query.md) defines what part of the world the Client is interested in when requesting data from the Replication Server. When **Constrained**, it covers limited volume. The **Extent** property specifies how far it reaches. Anything that is **outside** the area defined by the LiveQuery **will not be synced**.
For a big game world, it makes sense to use a small range and parent the LiveQuery to the player character or the camera, so it can move with it. But for now, let's just position it at the centre of the world (unparented), and keep it as **Infinite** (no spatial constraints).
{% hint style="warning" %}
While LiveQueries are an optimisation tool, having at least one LiveQuery is **necessary**.
{% endhint %}
### **Add** a Connect Dialog
We'll be using coherence's Sample UI since it has everything we need to get kickstarted.
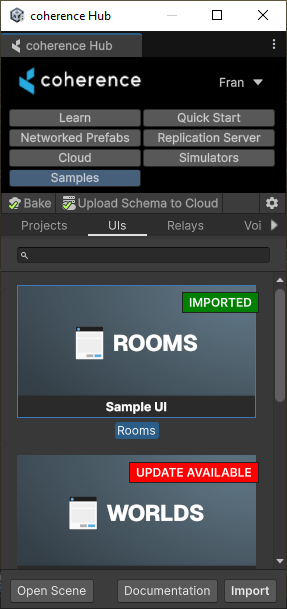
In the top menu: *coherence > Hub*
Within the Hub, go to the Samples tab. Within UIs you will find the Rooms Sample UI
The imported sample has a demo scene, but what matters to us now is the `Room Connection Dialog.prefab`, which we can drop on our scene.
{% hint style="info" %}
This sample uses Unity GUI (UGUI). For input events to be forwarded properly, you'll need at least an EventSystem (GameObject > UI > Event System)
{% endhint %}
A Connect dialog UI provides an interface for the player to connect to the Replication Server, once the game is running. You can create your own connection dialog, but we provide a few examples as a quick way to get started and for prototyping. Read more in the section dedicated to [Sample UIs](/getting-started/samples-and-tutorials/samples-connection-uis.md).
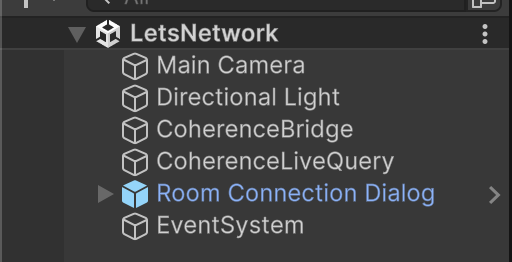
This is how your scene should look like
***
{% hint style="success" %}
**In this section, we:**
* Added a [CoherenceBridge](/manual/components/coherence-bridge.md) to the scene to facilitate connection to the [Replication Server](/manual/replication-server.md)
* Used a [CoherenceLiveQuery](/manual/components/coherence-live-query.md) to ensure we receive network updates
* Added an in-game UI to allow players to connect over the network
Next: time to [setup some Prefabs](/getting-started/setup-a-project/prefab-setup.md)!
{% endhint %}