Loading...
Loading...
Loading...
Loading...
Loading...
Loading...
Loading...
Loading...
Loading...
Loading...
Loading...
Loading...
Loading...
Loading...
Loading...
Loading...
Loading...
Loading...
Loading...
Loading...
Loading...
Loading...
Loading...
Loading...
Loading...
Loading...
Loading...
Loading...
Loading...
Loading...
Loading...
Loading...
Loading...
Loading...
Loading...
Loading...
Loading...
Loading...
Loading...
Loading...
Loading...
Loading...
Loading...
Loading...
Loading...
Loading...
Loading...
Loading...
Loading...
Loading...
Loading...
Loading...
Loading...
Loading...
Loading...
Loading...
Loading...
Loading...
Loading...
Loading...
Loading...
Loading...
Loading...
Loading...
Loading...
Loading...
Loading...
Loading...
Loading...
Loading...
Loading...
Loading...
Loading...
Loading...
Loading...
Loading...
Loading...
Loading...
Loading...
Loading...
Loading...
Loading...
Loading...
Loading...
Loading...
Loading...
Loading...
Loading...
Loading...
Loading...
Loading...
Loading...
Loading...
Loading...
Loading...
Loading...
Loading...
Loading...
Games are better when we play together.
coherence is a network engine, platform and a series of tools to help anyone create a multiplayer game. Our mission is to give any game developer, regardless of how technical they are, the power to make a connected game.
If you would like to get started right away, you can check the Installation page to learn how to install coherence in Unity, set up your Scene, Prefabs, interactions, as well as deploy your project to be shared with your friends.
To learn how to use coherence, we recommend you start by exploring the package Samples included right inside the Unity SDK. Or download one of our pre-made Unity projects First Steps or Campfire, which both come with extensive documentation explaining the thinking behind them.
If you enjoy learning with videos, we have a playlist of videos dedicated to getting started with the Unity SDK.
Finally, if you're new to networking you might enjoy our Beginner's Guide to Networking. This high-level introduction is not coherence-specific, but rather is applicable to any networking technology.
If you are an existing user and looking to update, check out the latest Release Notes. And maybe the SDK Upgrade Guide as well!
Get help, ask questions and suggest features in our Community
Chat with us on Discord
Contact us at devrel@coherence.io
Once you have installed the Unity SDK, you can start using coherence in a project.
We recommend for first-time users of coherence to go through this flow in an empty project at least once, before trying to network an existing game. This will give you a good understanding of the different aspects that make up the coherence toolset.
This section provides an example of the general coherence workflow in most projects.
It covers how to:
Prepare a Unity scene for network synchronization. This requires a CoherenceBridge, at least one CoherenceLiveQuery, and an in-game UI for connecting (see: Sample UIs).
Configure Prefabs to sync over the network using the CoherenceSync component.
Test your game locally.
Try the game live with coherence Cloud.
In the sub-pages of this section we'll go through all of them. Let's begin!
Here is the roadmap of the coherence SDK, engine and backend. We're constantly listening to your feedback to improve coherence. Please reach out on our forum and discord if you have suggestions.
Better API reference documentation
Channels (ordered/unordered, reliable/unreliable)
Synchronizing Lists
Improvements to Uniqueness
Performance improvements
Scene transitioning improvements
Fully authoritative Simulator
Improvement to online dashboard logs
More code samples
Inventory
Voice
Matchmaking
Leaderboards
Console-specific updates
Mobile-specific updates
Platform-specific accounts
Debug tools
Built-in network condition simulation
Network profiler
Global KV store
Support for multiple Simulators and Replicators in a single project
More logging and diagnostics tools
Additional server regions
Support for lean pure C# clients and simulators without Unity
Bare-metal and cloud support
Unreal Engine SDK
The first step to use coherence in Unity is to install the coherence SDK.
Latest Unity LTS releases are officially supported. As of now, we support:
Unity 6 LTS (min. 6000.0.23f1)
Unity 2022 LTS (min. 2022.2.5f1)
Unity 2021 LTS (min. 2021.3.18f1)
You can conveniently download the SDK from the Unity Asset Store:
As an alternative to the Asset Store download, you can manually install coherence from our package repository. The rest of this page describes the steps to do so.
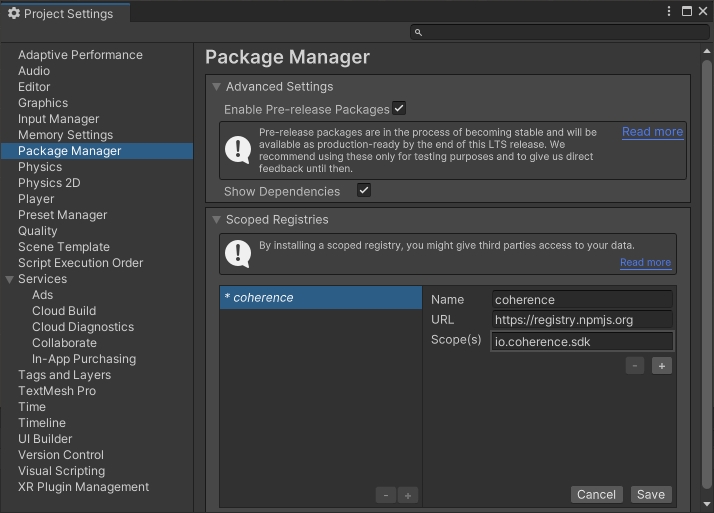
First, go to Edit > Project Settings. Under Package Manager, add a new Scoped Registry with the following information:
Name: coherence
URL: https://registry.npmjs.org
Scope(s): io.coherence.sdk
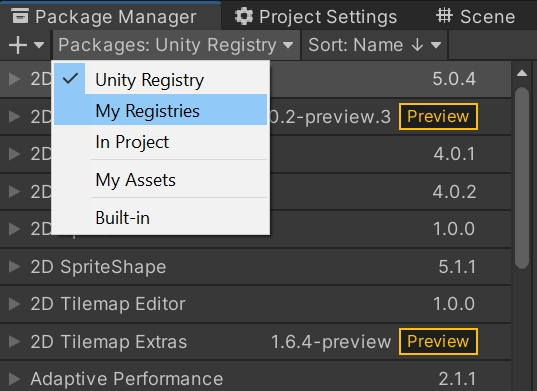
Now open Window > Package Manager. Select My Registries in the Packages dropdown.
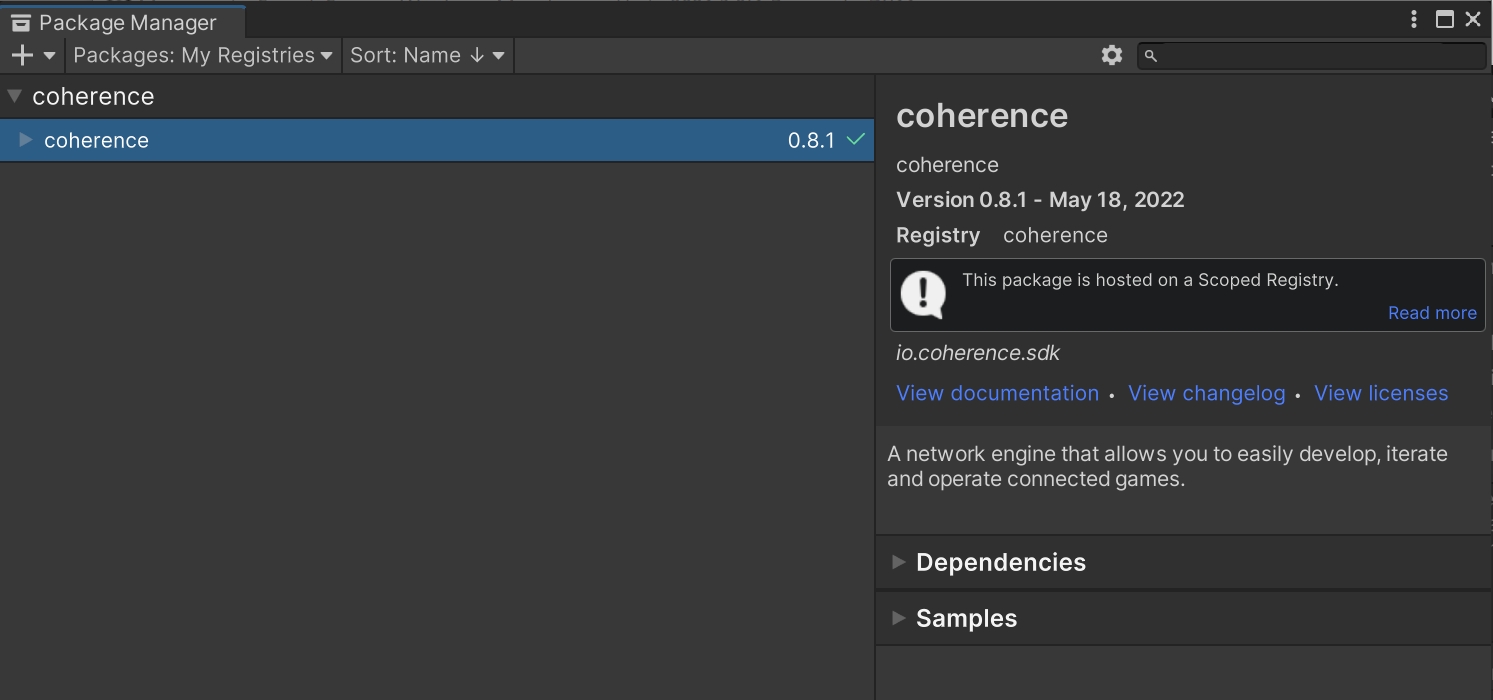
Highlight the coherence package, and click Install.
As an alternative to the step-by-step process above, you can directly edit your package manifest.
Refer to Unity's instructions on modifying your project manifest.
Add an entry for the coherence SDK under the dependencies object
Add one for the scoped registry in the scopedRegistries array
You can see an example below:
You will then see the package in the Package Manager under My Registries.
When you successfully install the coherence SDK, after code compilation, you should see the Welcome window.
coherence is a network engine, platform, and a series of tools to help anyone create a multiplayer game.
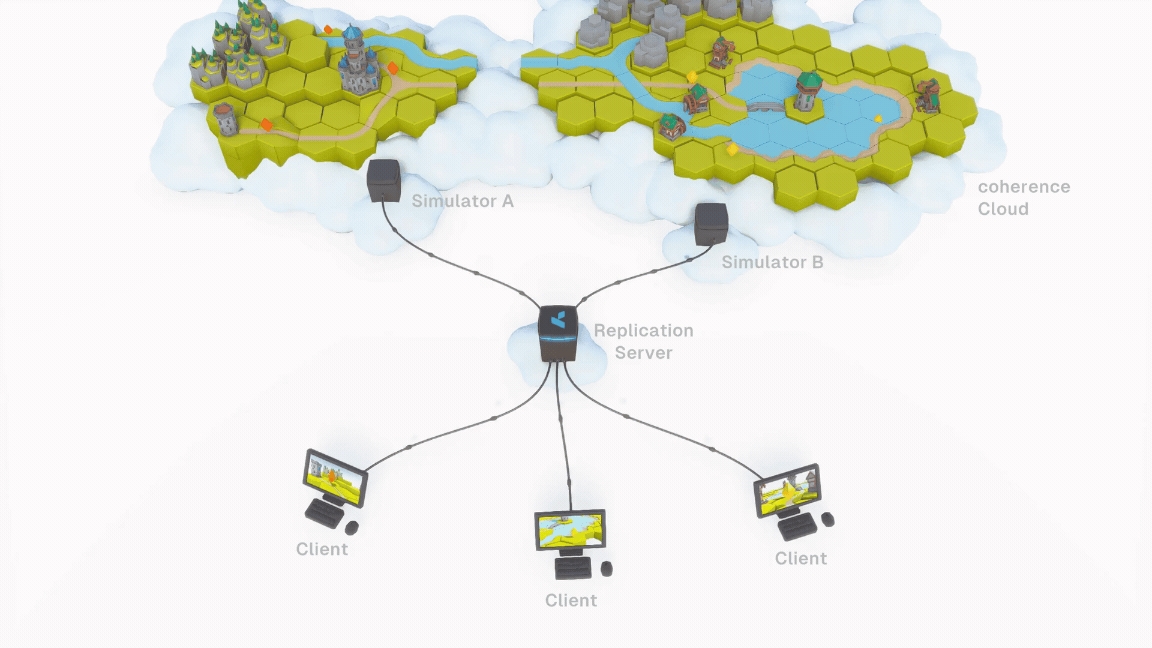
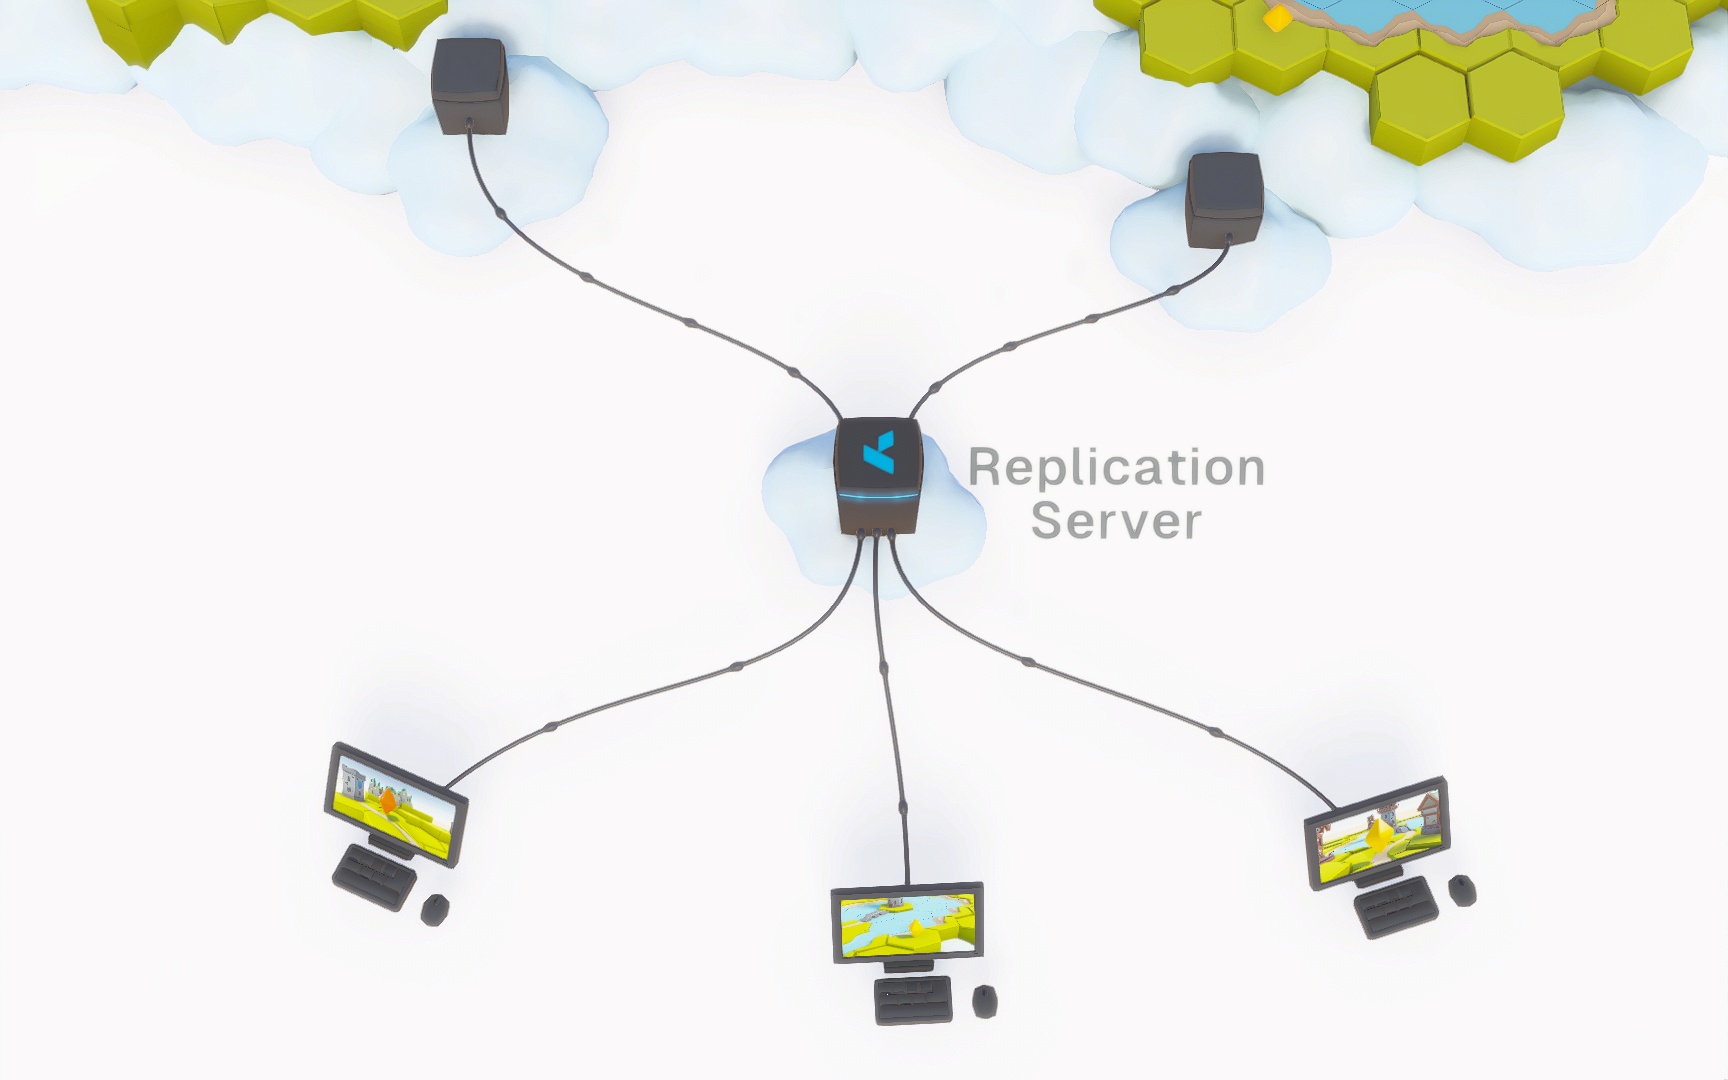
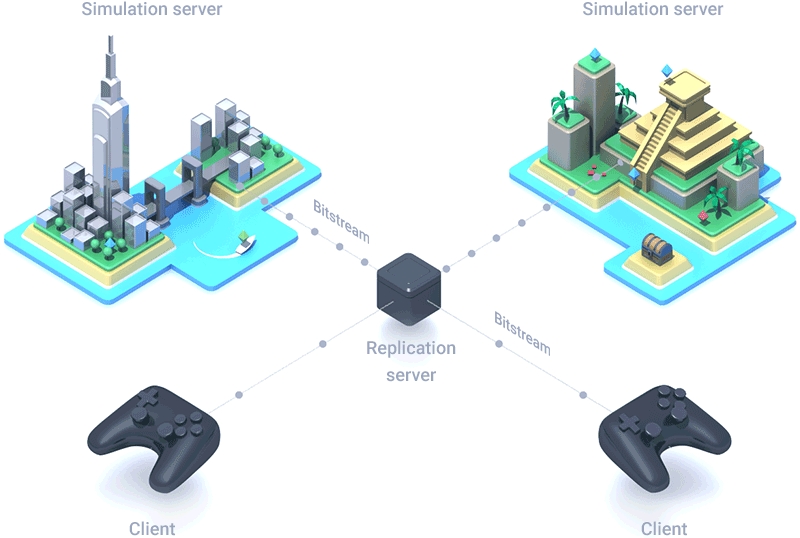
Our network engine is our foundational tech. It works by sharing game world data via the and passing it to the connected Clients. The Clients, in this context, can be regular game Clients (where a human player is playing the game) or a special version of the game running in the cloud, which we call "Simulator".
While coherence's network engine is meant to be , we offer SDKs to integrate with popular engines (for instance, Unity).
The coherence Unity SDK provides a suite of tools and pre-made Unity components, and a designer-friendly interface to easily configure . It also takes care of generating via a process called "Baking". In fact, simple networking can be setup completely without code.
But coherence is not just an SDK.
For more information about how a network topology is structured in coherence, check out this video:
A lean and performant smart relay that keeps the state of the world, and replicates it efficiently between various Simulators and game Clients.
A special version of the Game Client without graphics (a "headless client"), optimized and configured to perform server-side simulation of the game world. When we say something is simulated "server-side", we mean it is simulated on one or several Simulators.
An easy-to-manage platform for hosting and scaling the backend for your multiplayer game. The coherence Cloud can host a Replication Server, but also Simulators.
Our cloud-backed dashboard, where you can control all of the aspects of a project, configure matchmaking, Rooms, Worlds, and keep an eye on how much traffic the project is generating.
Edit /Packages/manifest.json
The is a platform that can handle scaling, matchmaking, persistence and load balancing, all automatically. And all using a handy . The coherence Cloud can be used to launch and maintain live games, as well as a way to quickly test a game in development together with remote colleagues.
The Replication Server usually runs in the , but developers can start it locally from the command line or the Unity Editor. It can also be run on-premise, hosted on your servers; or be hosted by one of the Clients, to create a scenario (Client-hosting).
A regular build of the game. To connect to coherence, it uses our.
Clients (and Simulators) can define (Live Queries), levels of detail, varying simulation and replication frequencies and other to control how much bandwidth and CPU is used in different scenarios.
This is the process of specific to the game engine that takes care of network synchronization and other network-specific code. This is also known as "baking", and it's a completely automated process in coherence, triggered by just pressing a button. You can however for very advanced use cases.
In addition, every project can have a showcase page where you can host !
For more coherence terminology, visit the .
Fast network engine with cloud scaling, state replication, persistence and auto load balancing.
Easy to develop, iterate and operate connected games and experiences.
SDK allows developers to make multiplayer games using Windows, Linux or Mac, targeting desktop, console, mobile, VR or the web.
Game engine plugins and visual tools will help even non-coders create and quickly iterate on a connected game idea.
Scalable from small games to large virtual worlds running on hundreds of servers.
Game-service features like user account and key-value stores.
At the core of coherence lies a fast network engine based on bitstreams and a data-oriented architecture, with numerous optimization techniques like delta compression, quantization and network LOD-ing ("Level of Detail") to minimize bandwidth and maximize performance.
The network engine supports multiple authority models:
Client authority
Server authority
Server authority with client prediction
Authority handover (request, steal)
Distributed authority (multiple simulators with seamless transition)
Deterministic client prediction with rollback ("GGPO") - experimental
Different authority models can be mixed in the same game.
coherence supports persistence out of the box. This means that the state of the world is preserved no matter if clients or simulators are connected to it or not. This way, you can create shared worlds where visitors have a lasting impact.
The coherence SDK only supports Unity at the moment. Unreal Engine support is planned. For more specific details, please check the Unreal Engine Support page. For custom engine integration, please contact our developer relations team.
Custom UDP transport layer using bit streams with reliability
WebRTC support for WebGL builds
Smooth state replication
Server-side, Client-side, distributed authority
Connected entity support
Fast authority transfer
Remote messaging (RPC)
Persistence
Verified support for Windows, macOS, Linux, Android, iOS and WebGL
Support for Rooms and Worlds
Floating Origin for extremely large virtual Worlds
TCP Fallback
Support for Client hosting through Steam Datagram Relay
Unity SDK with an intuitive no-code layer
Per-field adjustable interpolation and extrapolation
Input queues
Easy deployment into the cloud
Multi-room Simulators
Multiple code generation strategies (Assets/Baking, automated with C# Source Generators)
Extendable object spawning strategies (Resources, Direct References, Addressables) or implement your own
Per-field compression and quantization
Per-field sampling frequency adjustable at runtime
Unlimited per-field levels of detail
Areas of interest
Accurate Simulation Frame tracking
Network profiler
Online Dashboard for management and usage statistics
Automatic server deployment and scaling
Multiple regions in the US, Europe and Asia
Player accounts with a persistent key/value store
Matchmaking and lobby rooms
If you need to support your game in mainland China, please contact us for a custom solution.
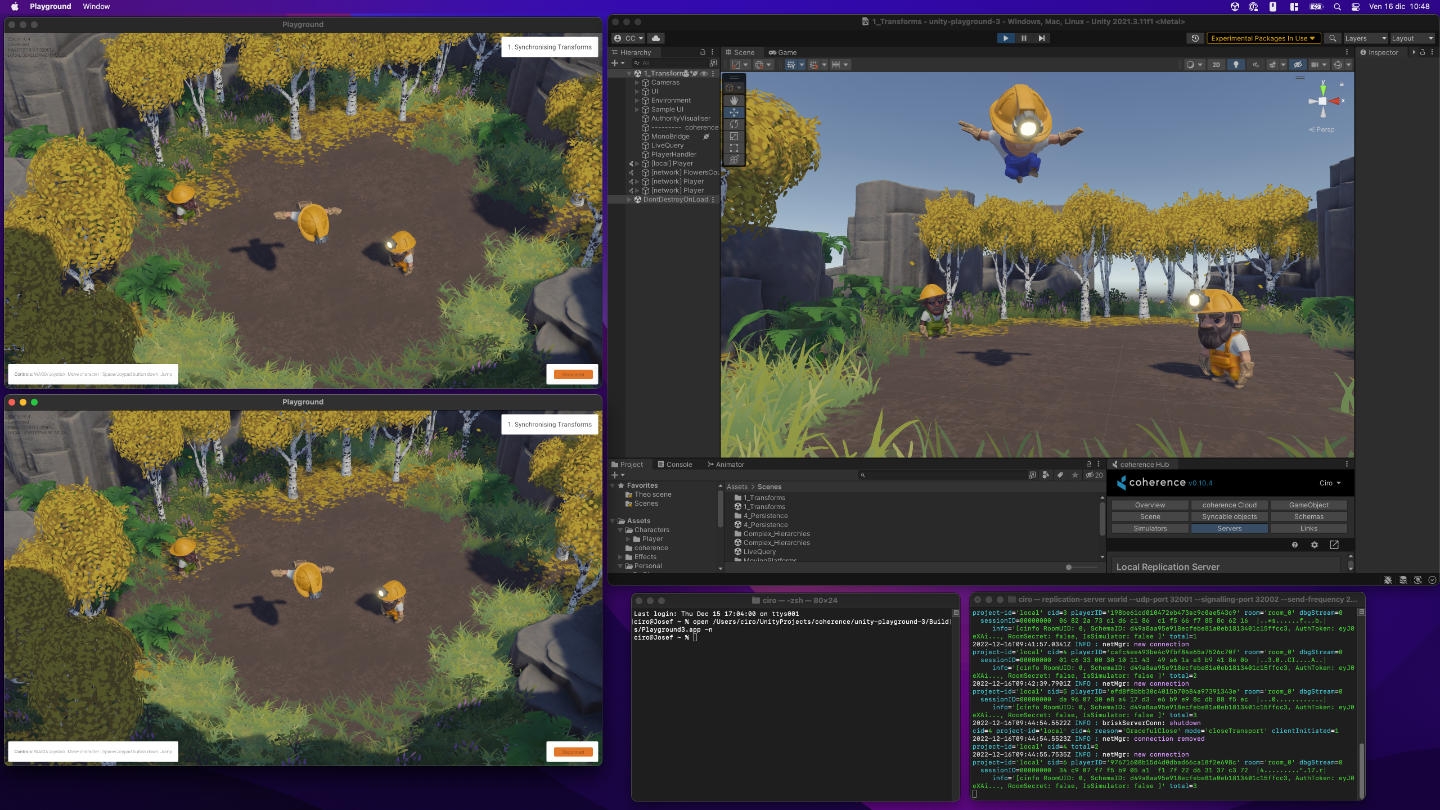
An easy way to test your game locally is to simply create a build, and open several instances of it.
You can also connect the Editor alongside the builds, with the extra benefit of being able to inspect the hierarchy and the state of its GameObjects.
Pros
Easy to distribute amongst team members and testers
Well-understood workflow
Can test with device-specific constraints (smartphones, consoles, ...)
Cons
Not the shortest iteration time, as you need to continuously make builds
Harder to debug on the builds (requires custom tooling on your side to do so)
Make sure you've read through Local Development and have started a Local Replication Server.
Let's create a standalone build. Before we do so, check a few settings:
In Project Settings > Player make sure that the Run in Background option is checked.
Go to Project Settings > Player and change the Fullscreen Mode to Windowed and enable Resizable Window. This will make it much easier to observe standalone builds side-by-side when testing networking.
With these in place, we're ready to build.
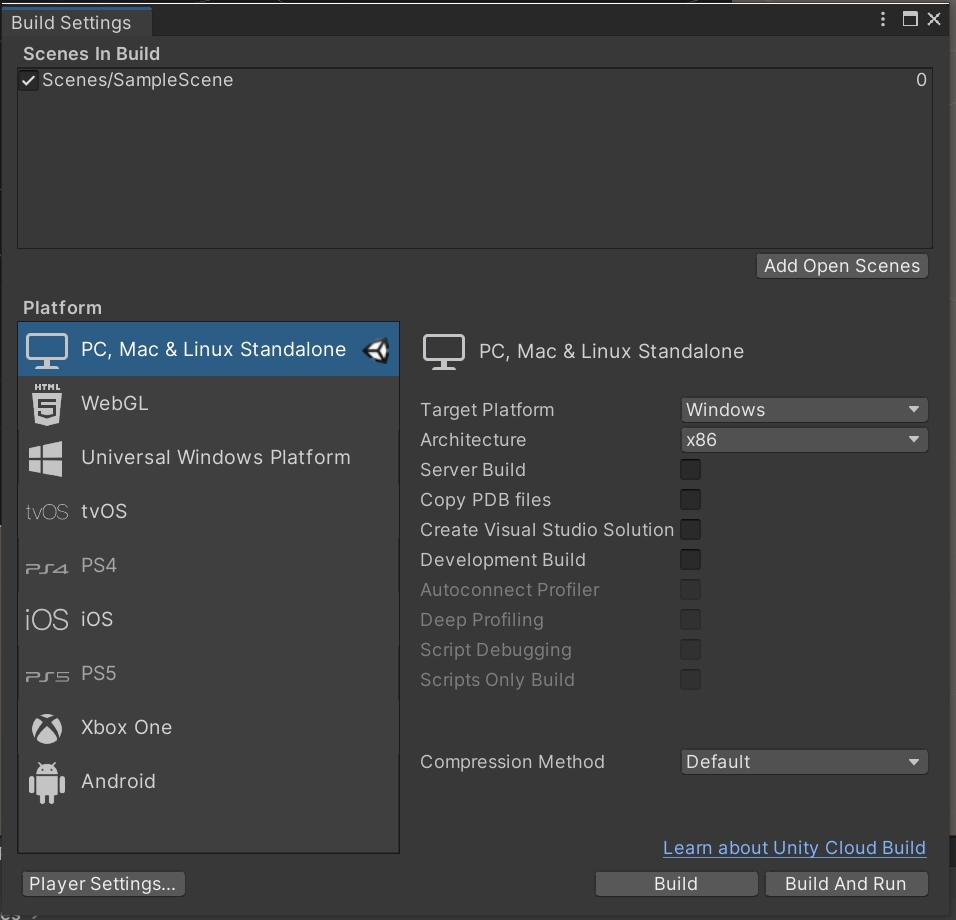
Open the Build Settings window (File > Build Settings). Click on Add Open Scenes to add the current scene to the build.
Click Build and Run.
When the build is done, start another instance of the executable (or run the project in Unity by just hitting Play).
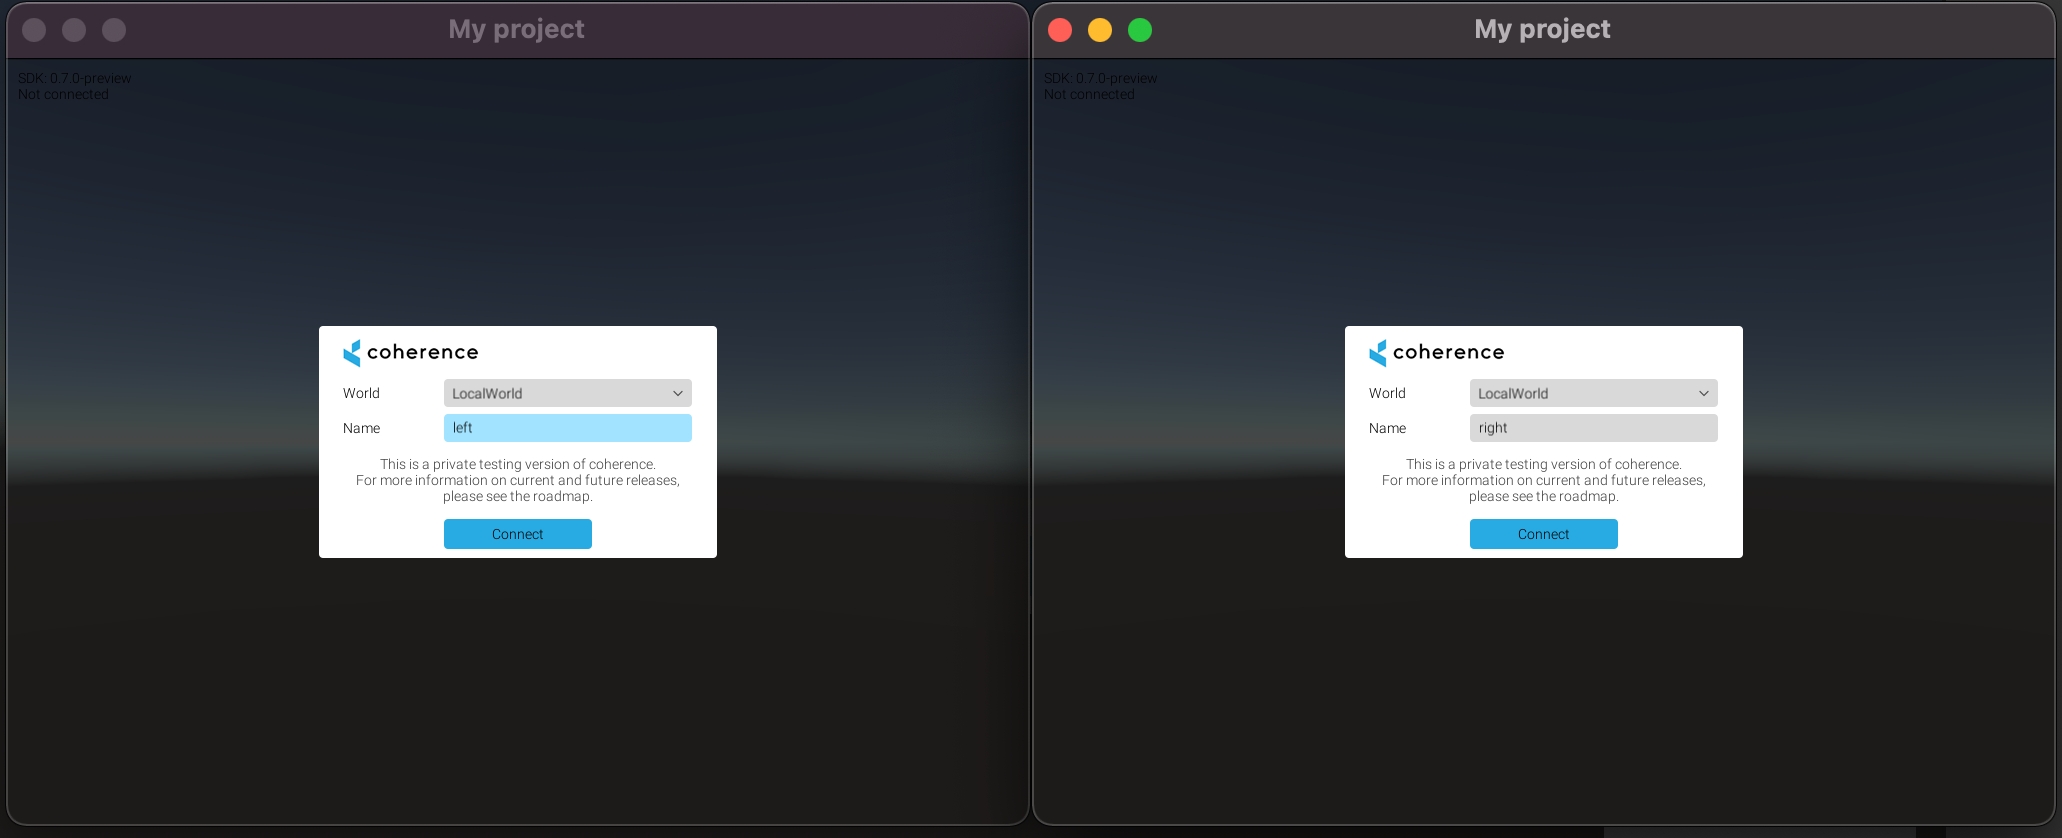
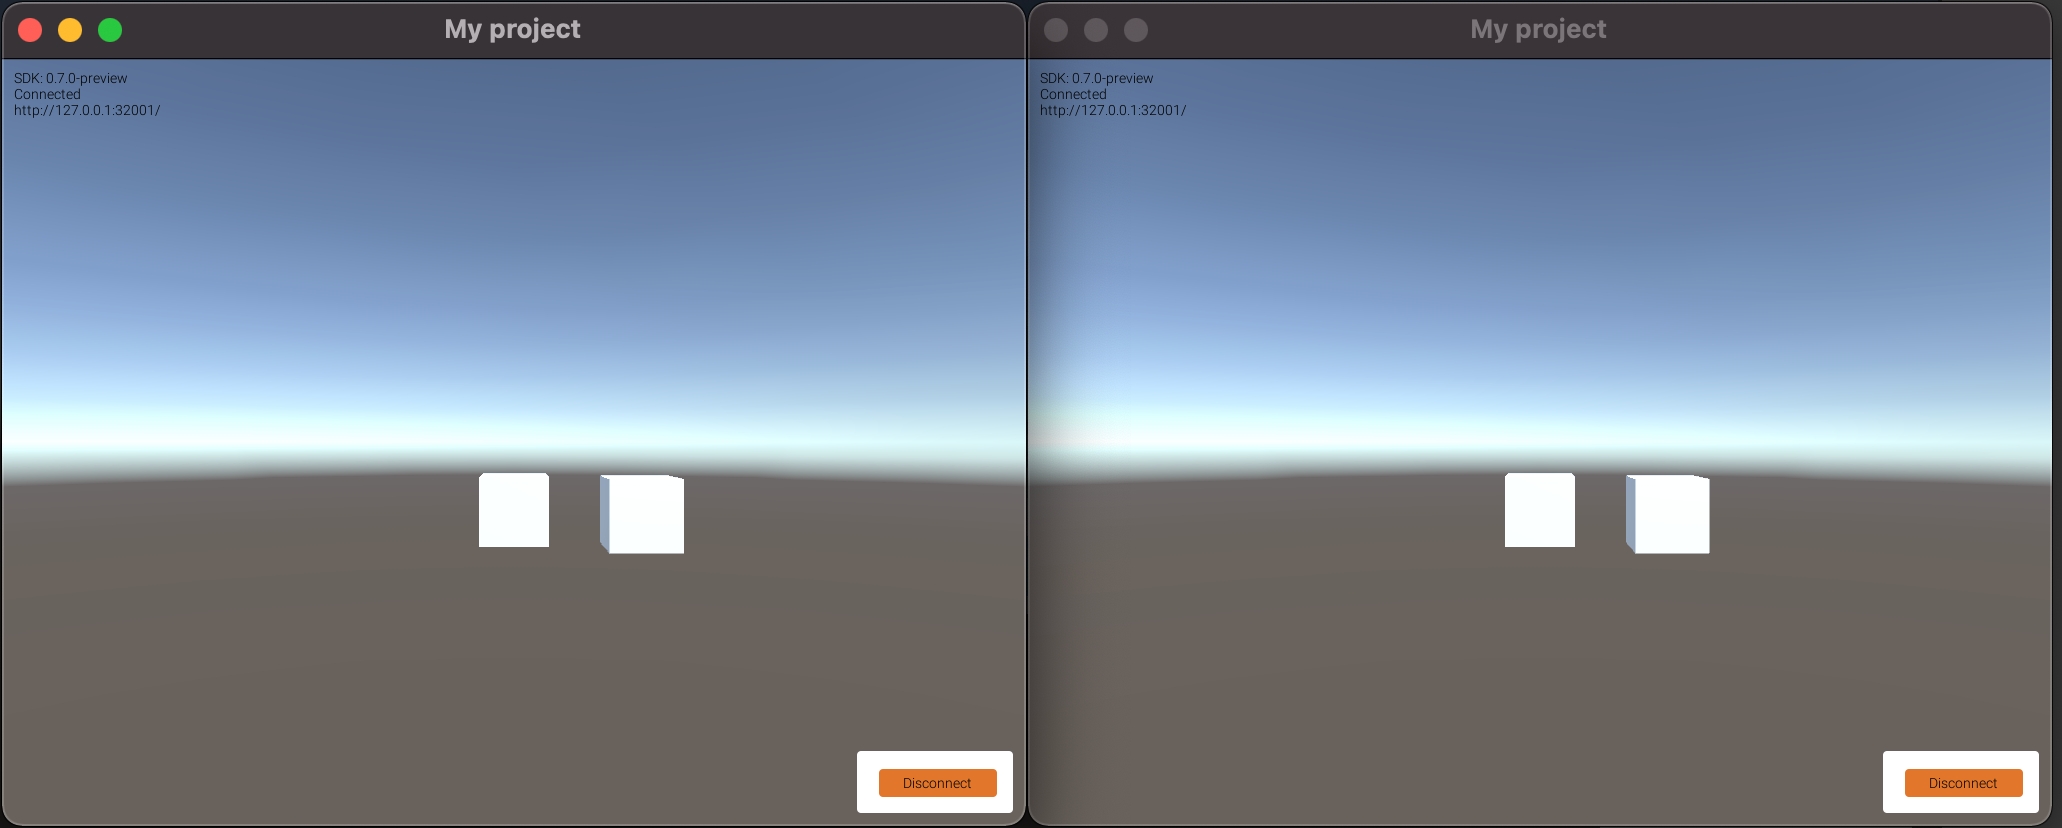
Click Connect in the connection UIs on both clients. Now, try focusing on one and using WASD keys. You will see the box move on the other side as well.
One of the first steps in adding coherence to a project is to setup the scene that you want the networking to happen in.
The topics of this page are covered in the first minute of this video:
Preparing a scene for network synchronization requires to add three fundamental objects:
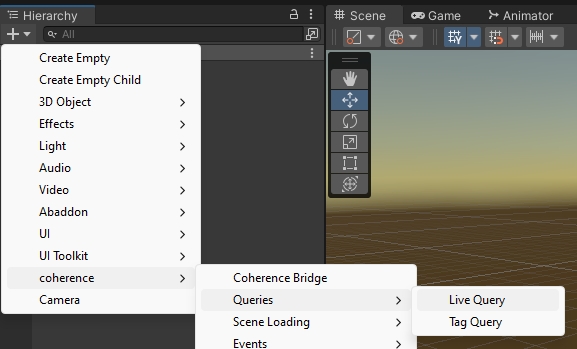
In the top menu: coherence > Scene Setup > Create CoherenceBridge
A GameObject with a CoherenceBridge script will be created.
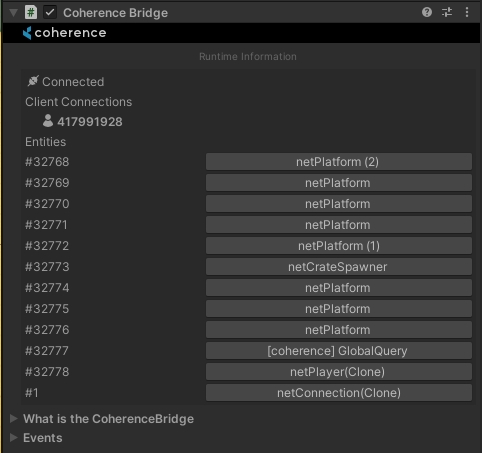
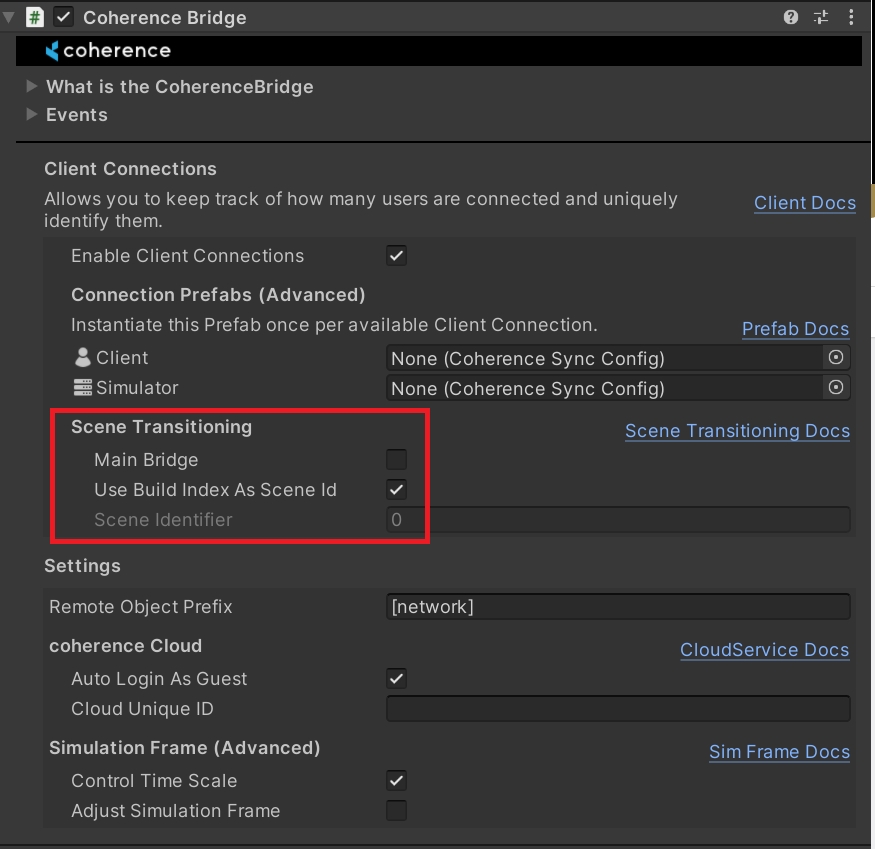
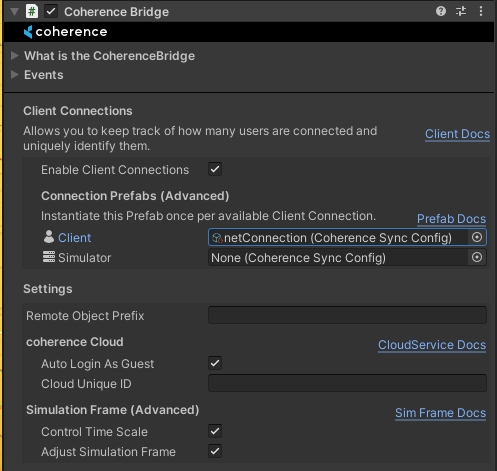
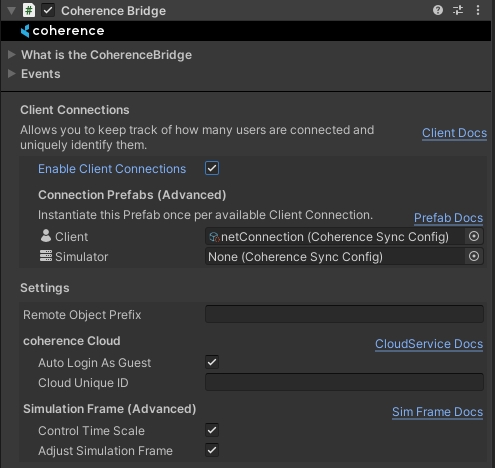
This object manages the connection with coherence's relay, the Replication Server, and is the centre of many connection-related events.
No particular setup is required now, but feel free to explore the options in its Inspector.
In the top menu: coherence > Scene Setup > Create LiveQuery
A GameObject with a LiveQuery script will be created.
A LiveQuery defines what part of the world the Client is interested in when requesting data from the Replication Server. When Constrained, it covers limited volume. The Extent property specifies how far it reaches. Anything that is outside the area defined by the LiveQuery will not be synced.
For a big game world, it makes sense to use a small range and parent the LiveQuery to the player character or the camera, so it can move with it. But for now, let's just create a LiveQuery, position it at the centre of the world, and keep it as Infinite (no spatial constraints).
While LiveQueries are an optimisation tool, having at least one LiveQuery is necessary.
In the top menu: coherence > Explore Samples
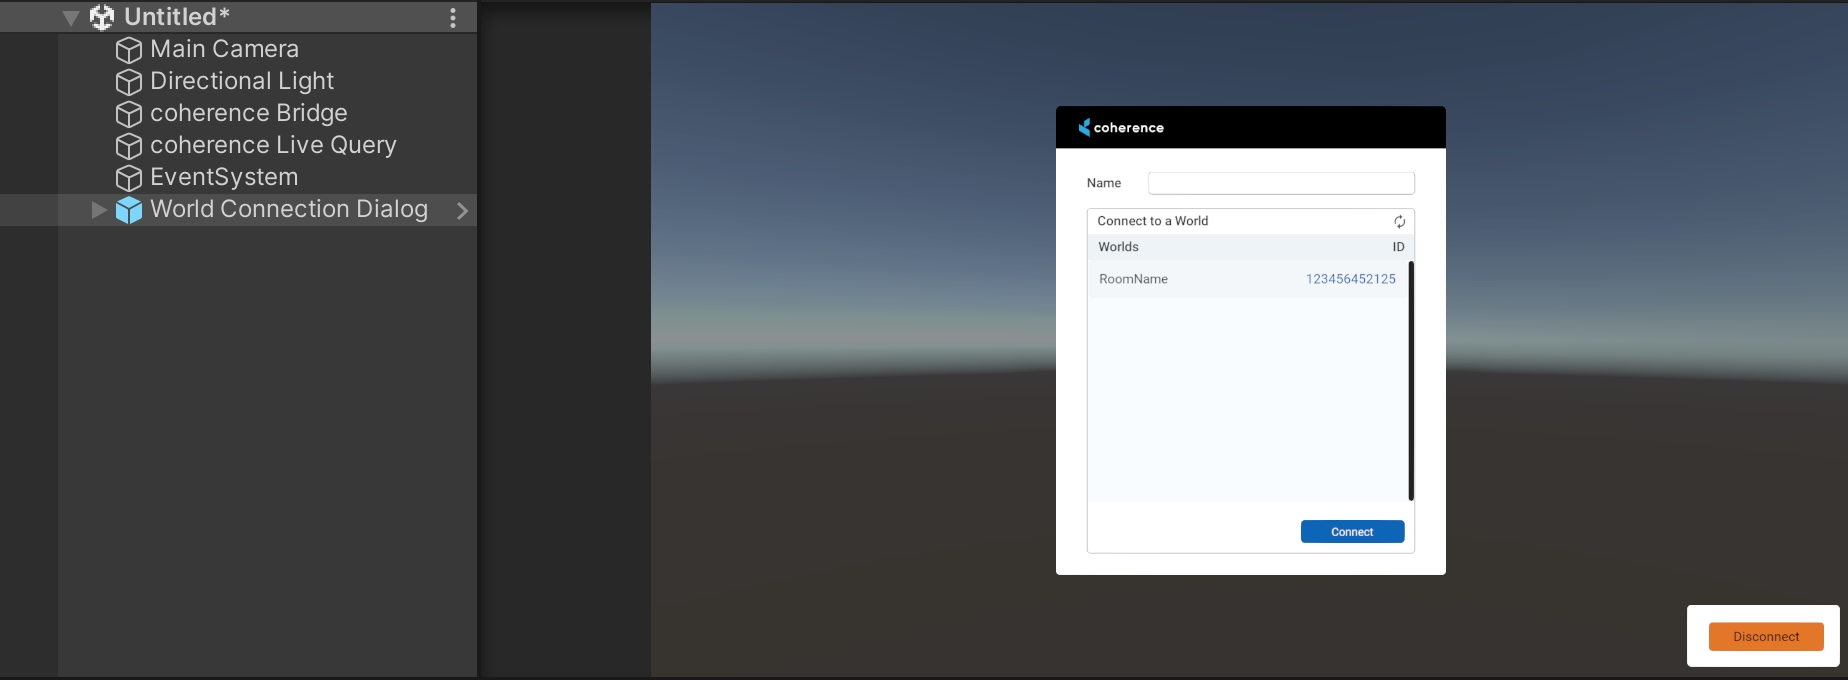
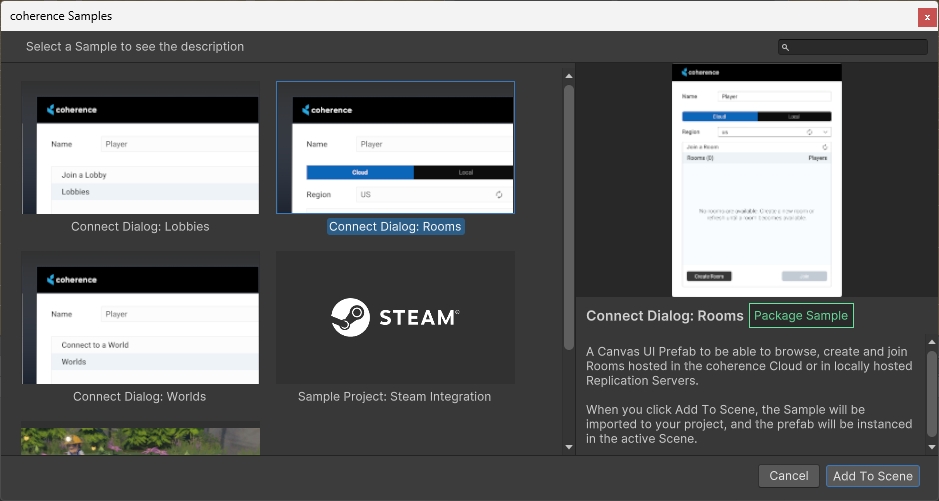
From the Explore Samples menu, choose Connect Dialog: Rooms. The Prefab will be instantiated in your scene.
A Connect dialog UI provides an interface for the player to connect to the Replication Server, once the game is running. You can create your own connection dialog, but we provide a few examples as a quick way to get started and for prototyping. Read more in the section dedicated to Sample UIs.
In this section, we:
Added a CoherenceBridge to the scene to facilitate connection to the Replication Server
Used a LiveQuery to ensure we receive network updates
Added an in-game UI to allow players to connect over the network
Next: time to setup some Prefabs!
Now we can build the project and try out network replication locally. To do so, we need to launch and connect to a Replication Server.
You can run a local Replication Server directly on your machine! You can either:
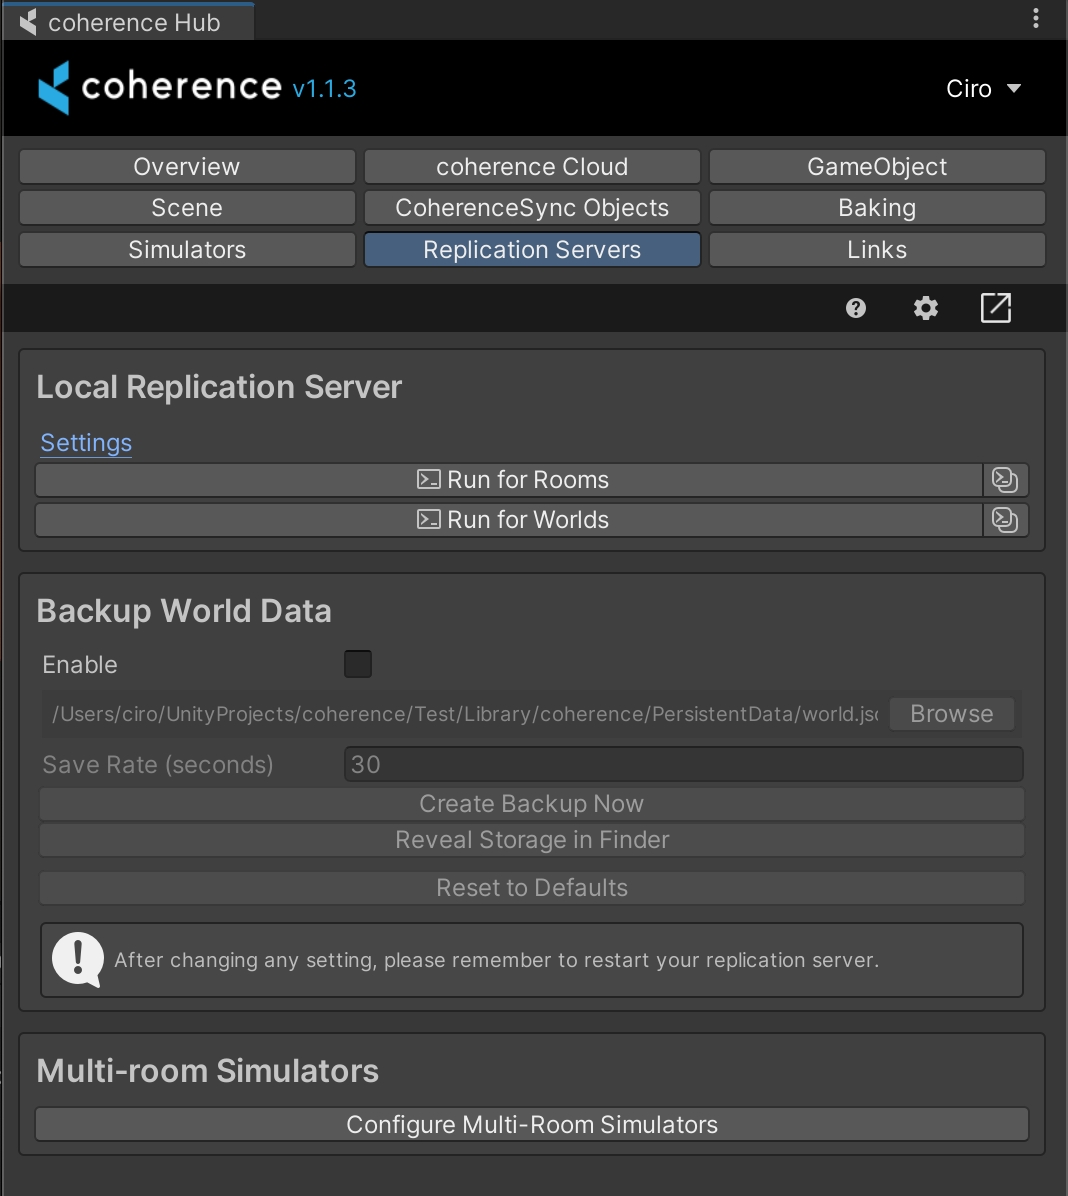
Go to: coherence > Local Replication Server > Run for Rooms or Run for Worlds
In the coherence Hub, open the Replication Servers tab. From here, you can run a server for Rooms or Worlds:
Whether you run a Replication Server for Rooms or for Worlds depends on which setup you plan to use, which in turn requires the correct corresponding Sample UI.
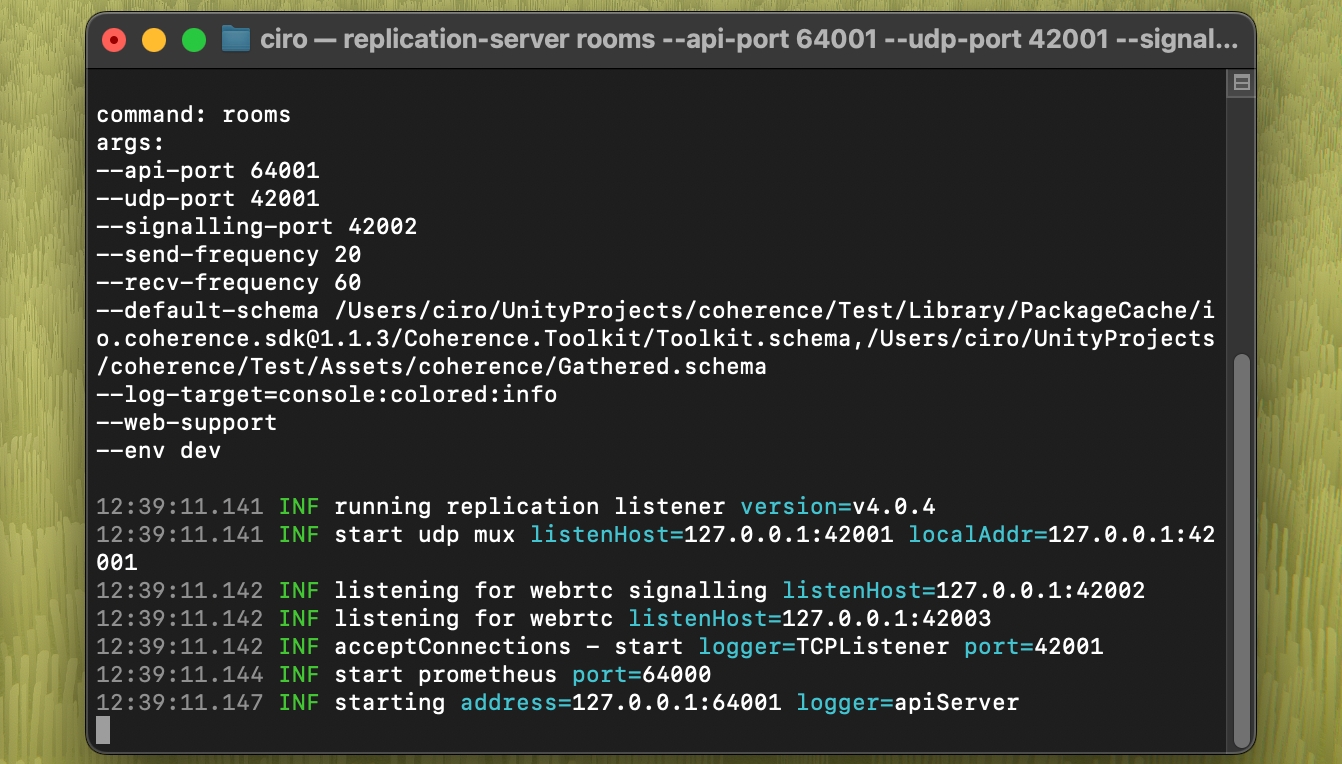
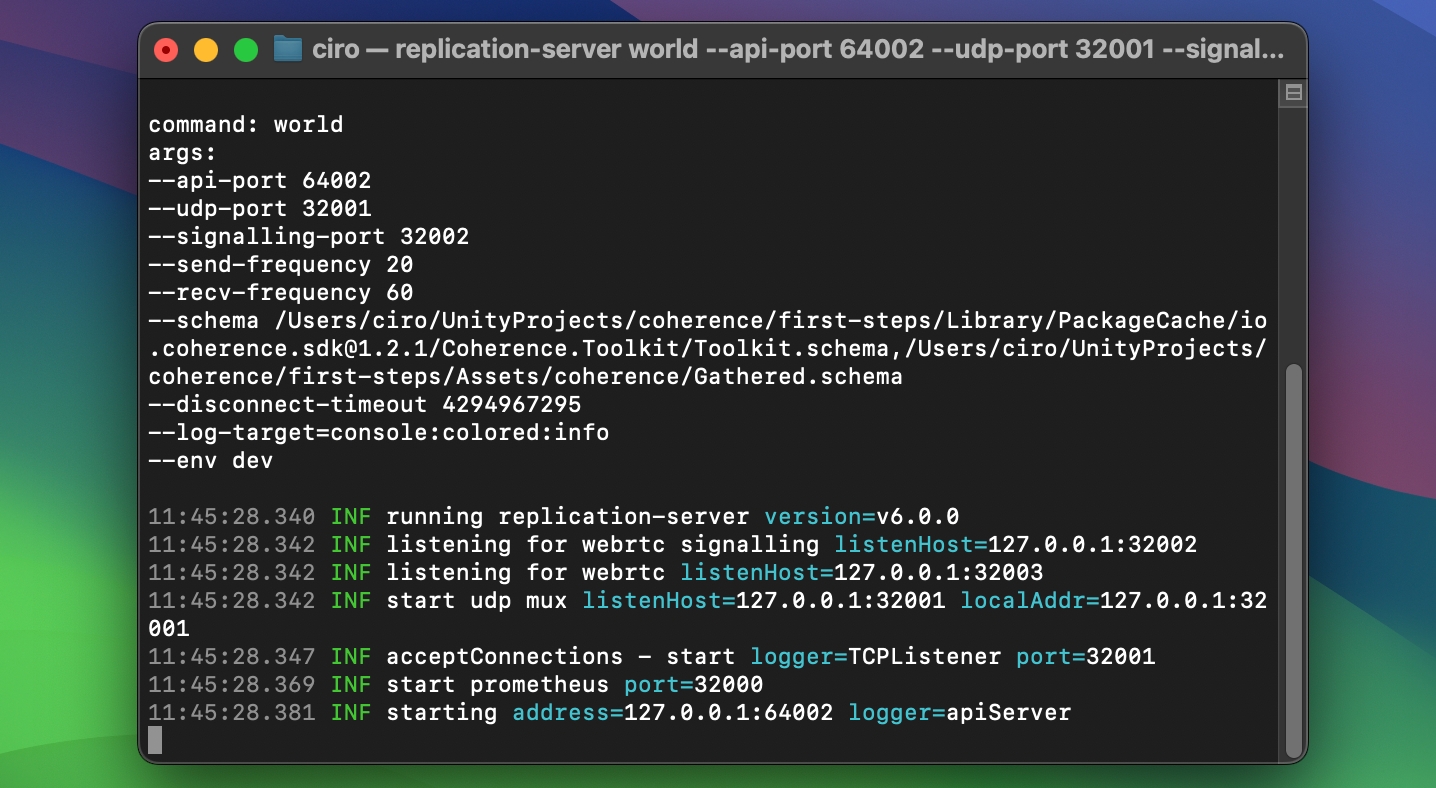
Regardless of how you launch it, a new terminal window will open and display the running Replication Server:
If the console opens correctly and you don't see an error line (they show up in red), it means your Replication Server is running! Now you should be able to connect to it, in the game.
It is often useful to be able to run multiple instances of your game on the same device. This allows you to simulate multiple player connections.
There are multiple ways to do this:
Make a build of the game
Use the Multiplayer Play Mode package (recommended, only available in Unity 6)
Use a third-party plugin, such as ParrelSync
Dive into the individual pages to see our recommendation for each option.
Connecting is done using our API. For now, use one of the Sample UIs we provide. You should already have one in the scene if you followed the steps in the Scene Setup section.
With the game and the RS running, you can now connect and play the game.
If you can't connect
Did you change something in the configuration of your connected Prefabs? You have to bake again, and restart the Replication Server.
Time to bake!
In this section, we:
Ran a local Replication Server
Saw how to run multiple instances of the game
Connected to the Replication Server
Now that we know things work locally, it's time to test the game in the coherence Cloud!
Multiplayer Play Mode (MMPM) is Unity's official solution for local multiplayer testing, available from Unity 6.
Pros
Short iteration times
Tighter integration within the Editor, doesn't require multiple (standalone) Editors open
Cons
Requires Unity 6+
Can be more resource demanding than just running builds
Install MPPM as described in their Installation Instructions
Open Window > Multiplayer Play Mode
Enable up to 4 virtual Players
Make sure that the baked data is up-to-date before starting to test, and that the Replication Server is running with the latest schema
Enter Play Mode
coherence tells apart virtual Players from the main Editor, so it's easier for you to not edit assets in clones by mistake.
In this section, we will learn how to prepare a Prefab for network replication.
Setting up basic syncing is explained in this video, from 1:00 and onwards:
Menu: coherence > coherence Hub
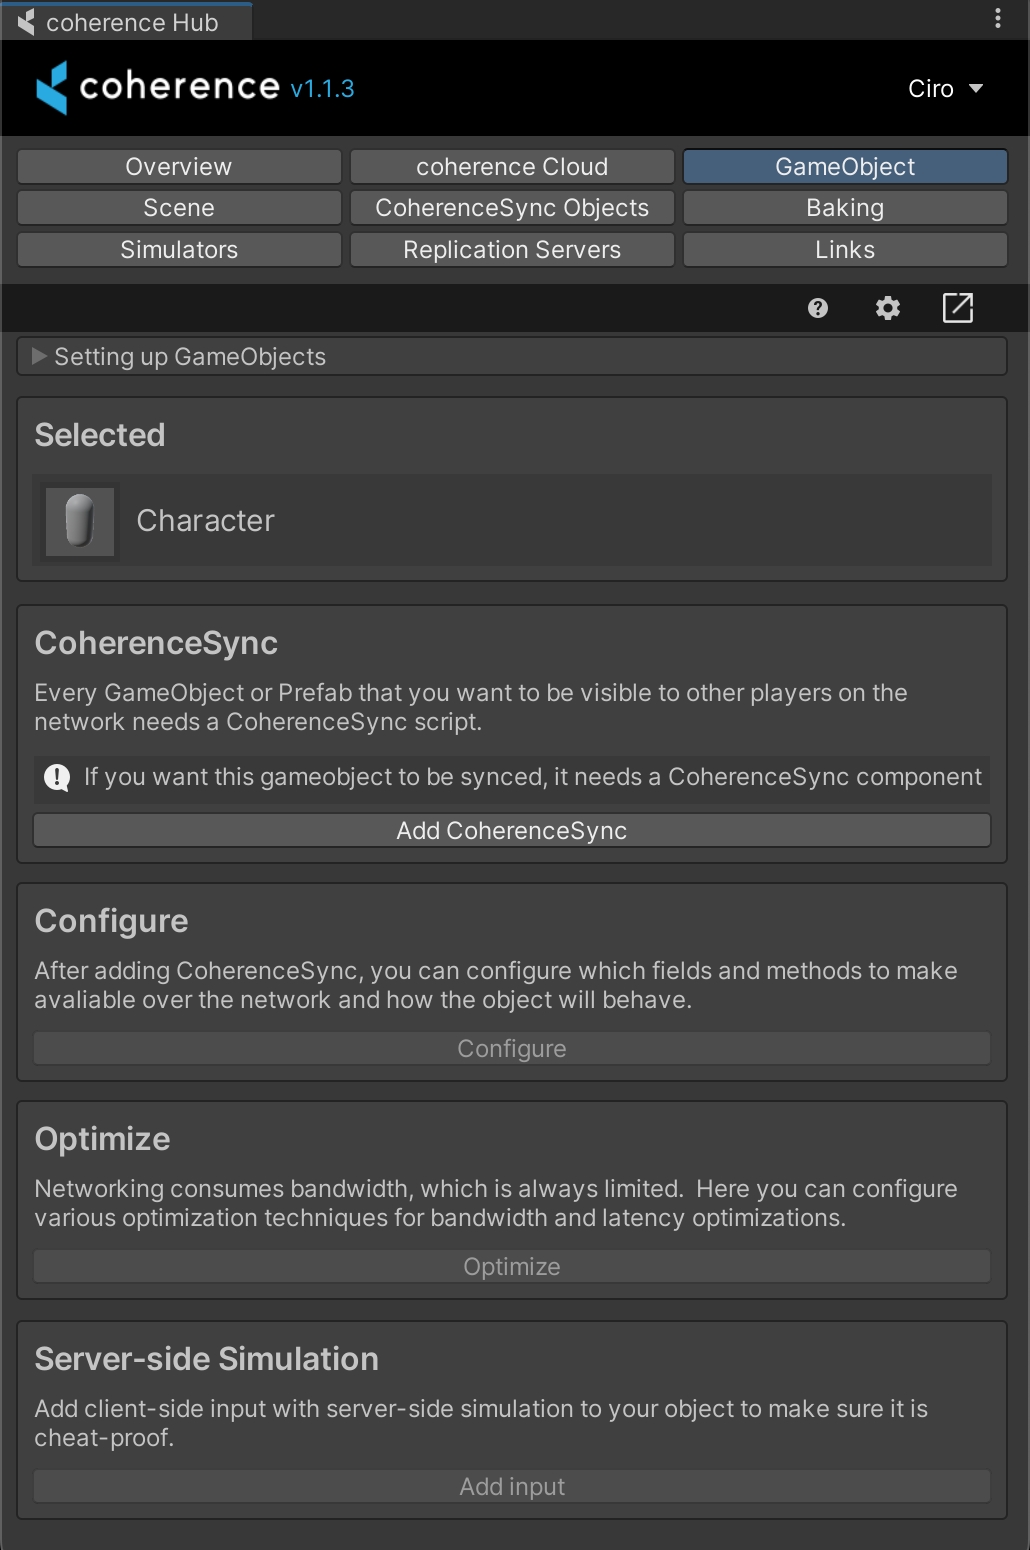
You can let the coherence Hub guide you through your Prefab setup process. Simply select a Prefab, open the GameObject tab and follow the instructions.
You can also follow the detailed step-by-step text guide below.
CoherenceSync componentFor an object to be networked through coherence, it needs to have a CoherenceSync component attached, and be a Prefab.
Currently, only Prefabs can be networked.
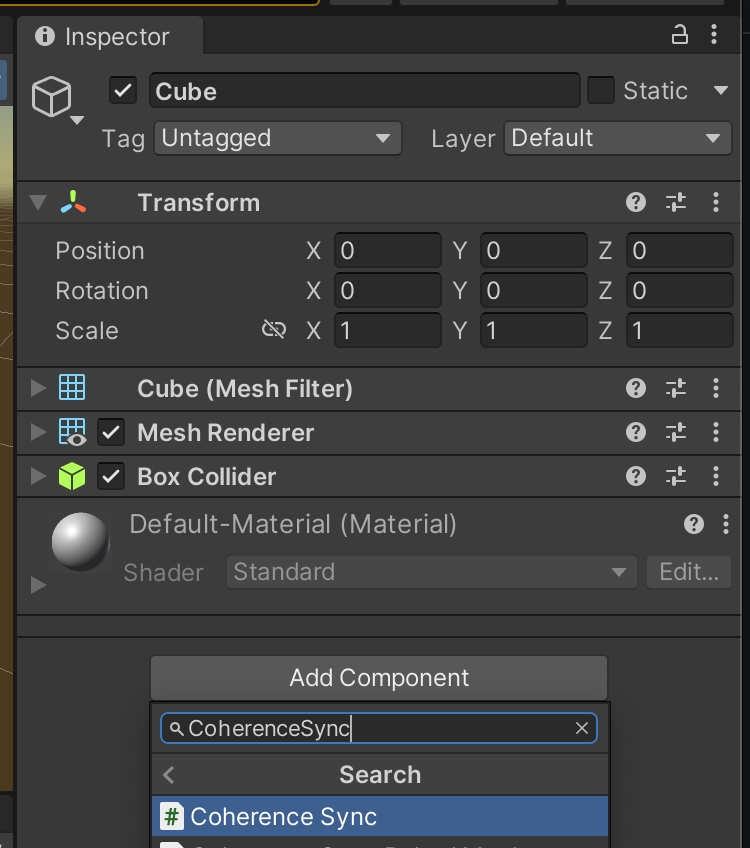
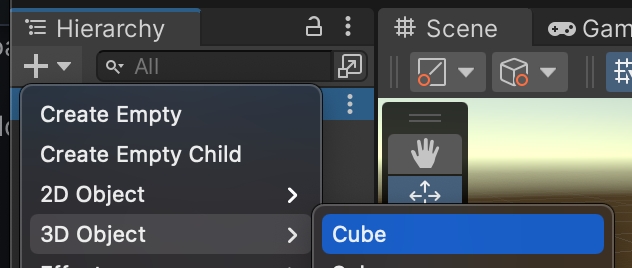
First, create a new GameObject. In this example, we're going to create a cube.
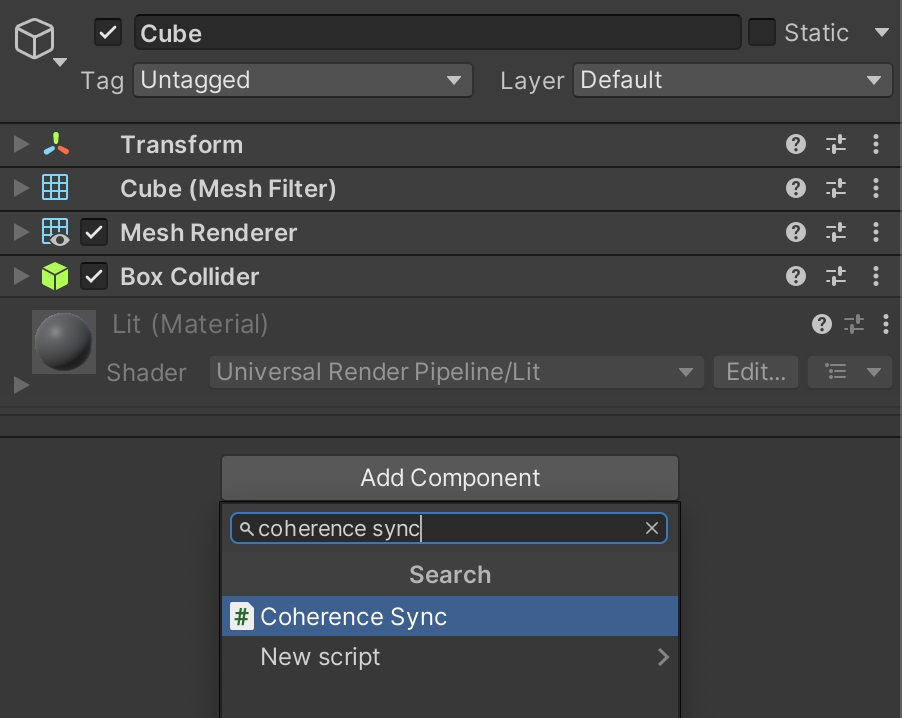
Next, we add the CoherenceSync component to Cube.
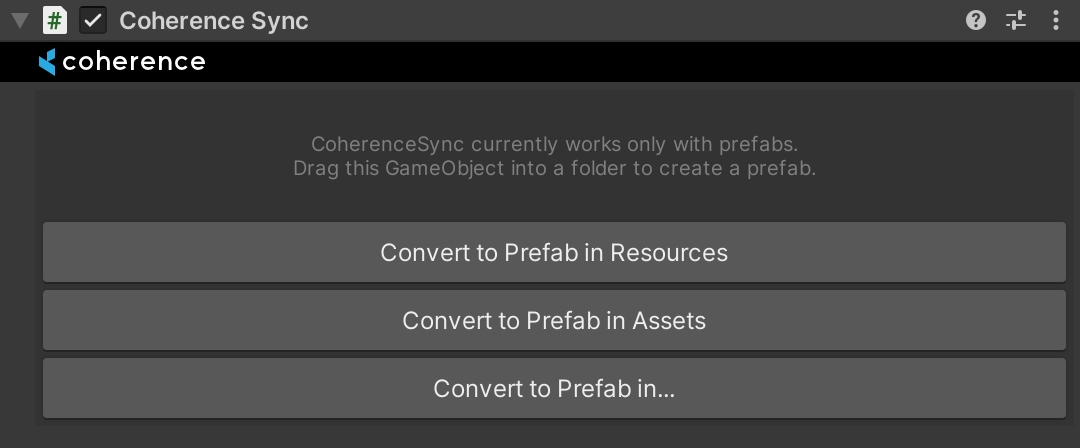
The CoherenceSync inspector now tells us that we need to make a Prefab out of this GameObject for it to work. We get to choose where to create it:
Now you can either:
Click on the Sync with coherence checkbox at the top of the Prefab inspector.
Manually add the CoherenceSync component.
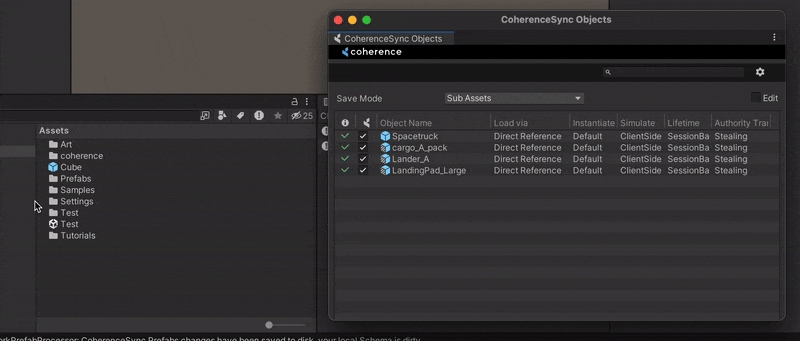
Drag the Prefab to the CoherenceSync Objects window. You can find it in coherence > CoherenceSync Objects.
One way to configure a pre-existing Prefab for networking, instead of just adding CoherenceSync to it, is to derive a Prefab variant and add the component to that instead.
In our Cube example, instead of adding CoherenceSync to Cube, you can create a Cube (Networked) Prefab and add the component to it:
This way, you can retain the original Prefab untouched, and build all the network functionality separately, in its own Prefab.
Another way to use Prefab variants to our advantage is to have a base Prefab using CoherenceSync, and create Prefab variants off that one with customizations.
For example, Enemy (base Prefab) and Enemy 1, Enemy 2, Enemy 3... (variant Prefabs, using different models, animations, materials, etc.). In this setup, all of the enemies will share base networking settings stored in CoherenceSync, so you don't have to manually update every one of them.
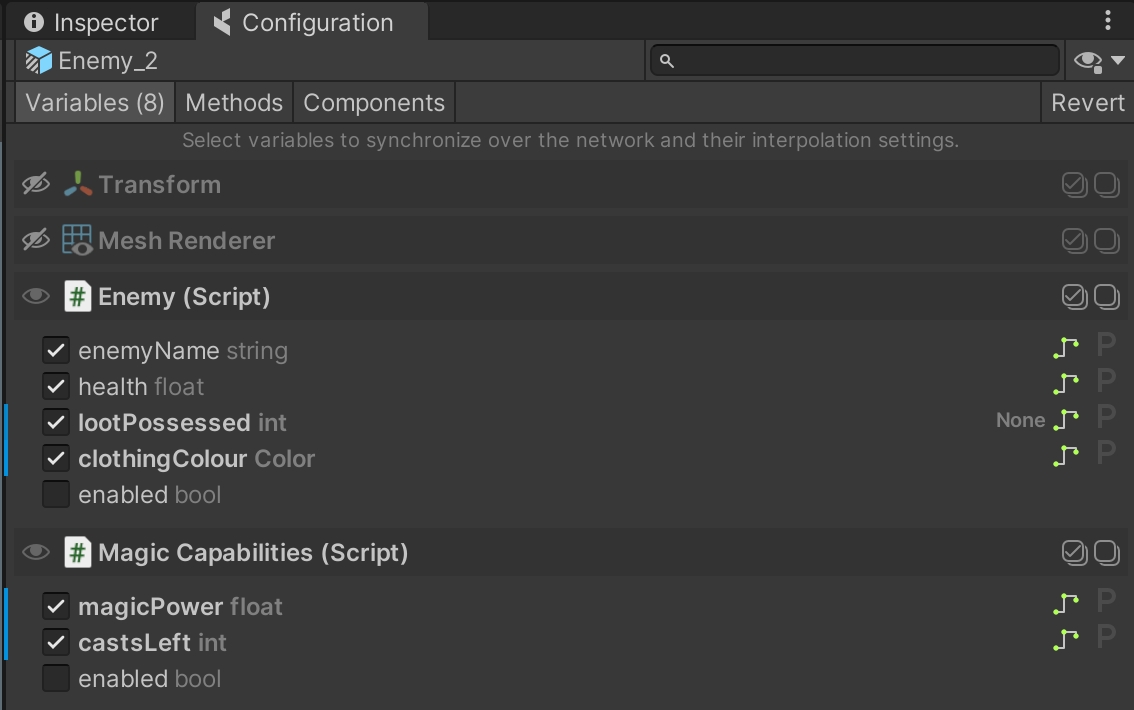
The Prefab variants inherits the network settings from their base, and you change those with overrides in the Configuration window. When a synced variable, method or component action is present in the variant and not in the parent, it will be bolded and it will have the blue line next to it, just like any other override in Unity:
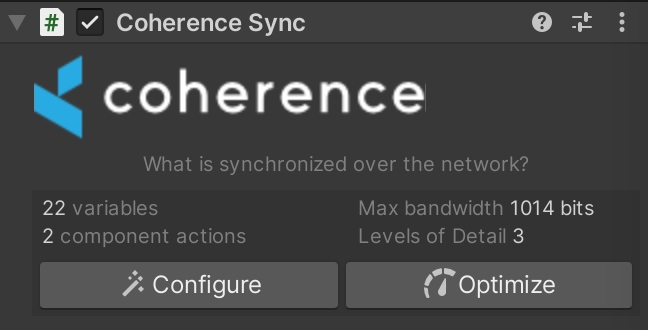
CoherenceSyncThe CoherenceSync component will help you prepare an object for network synchronization during design time. It also exposes APIs that allow to manipulate the object during runtime.
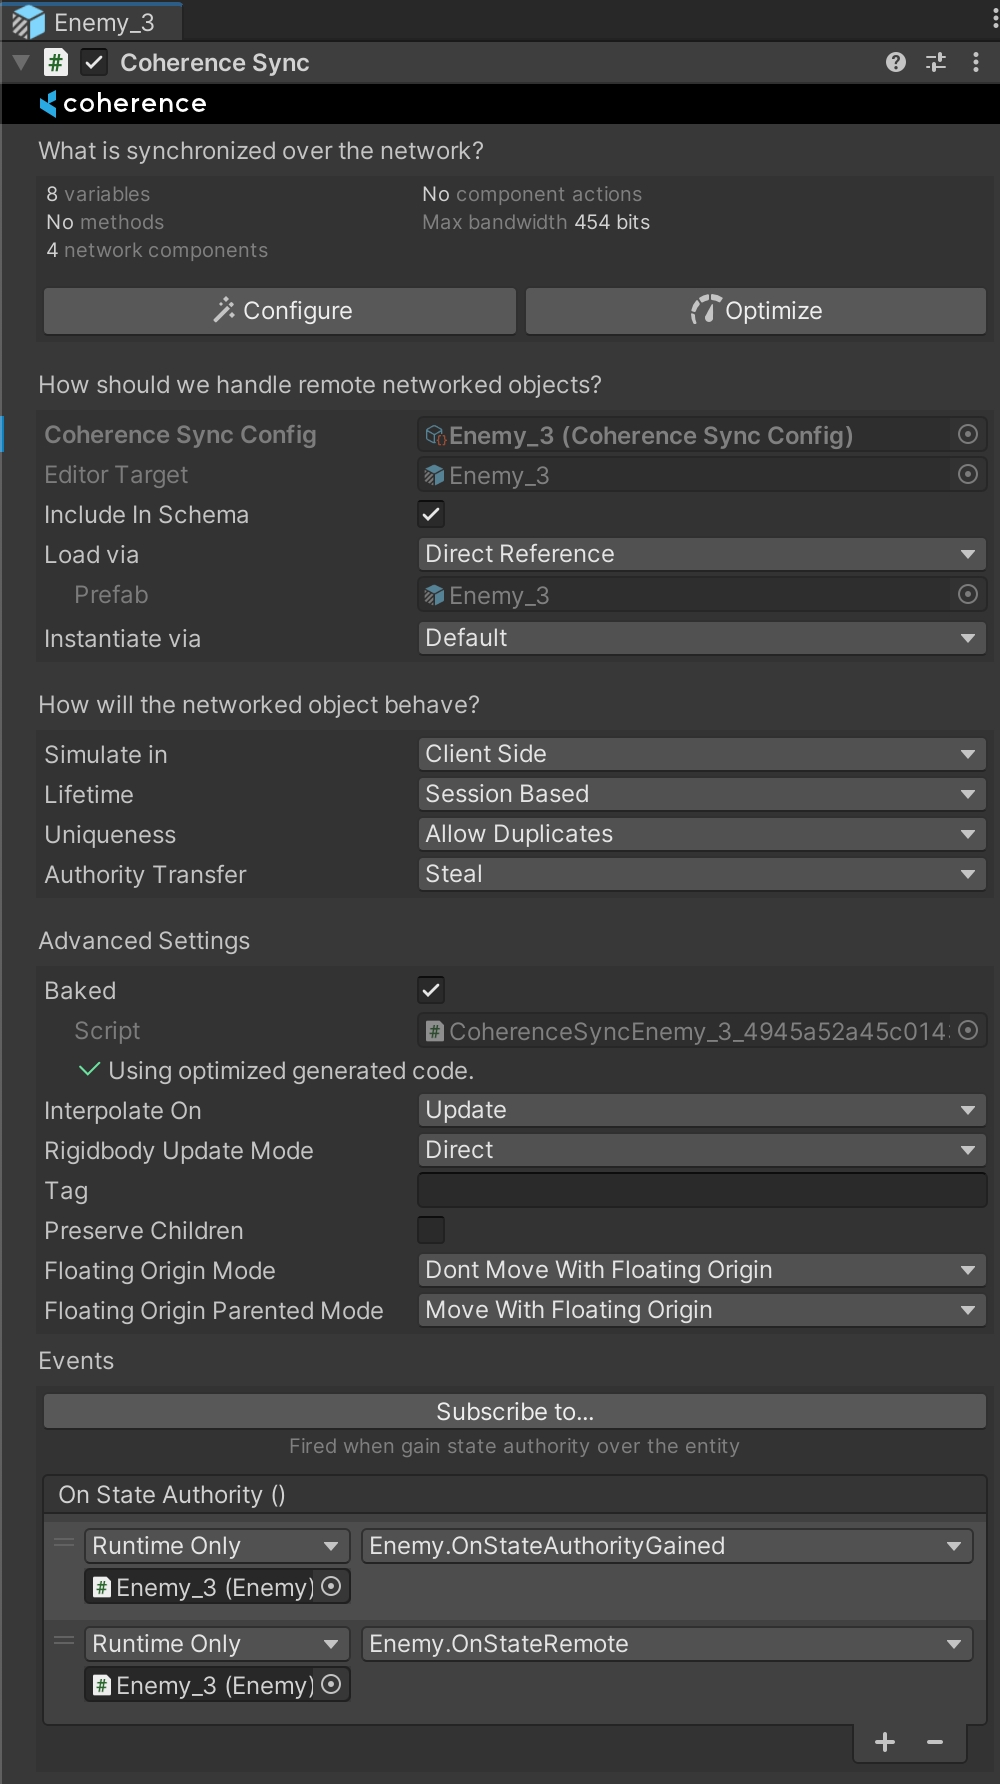
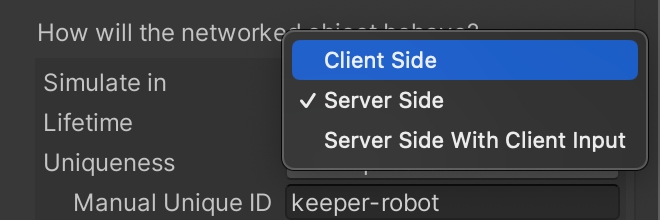
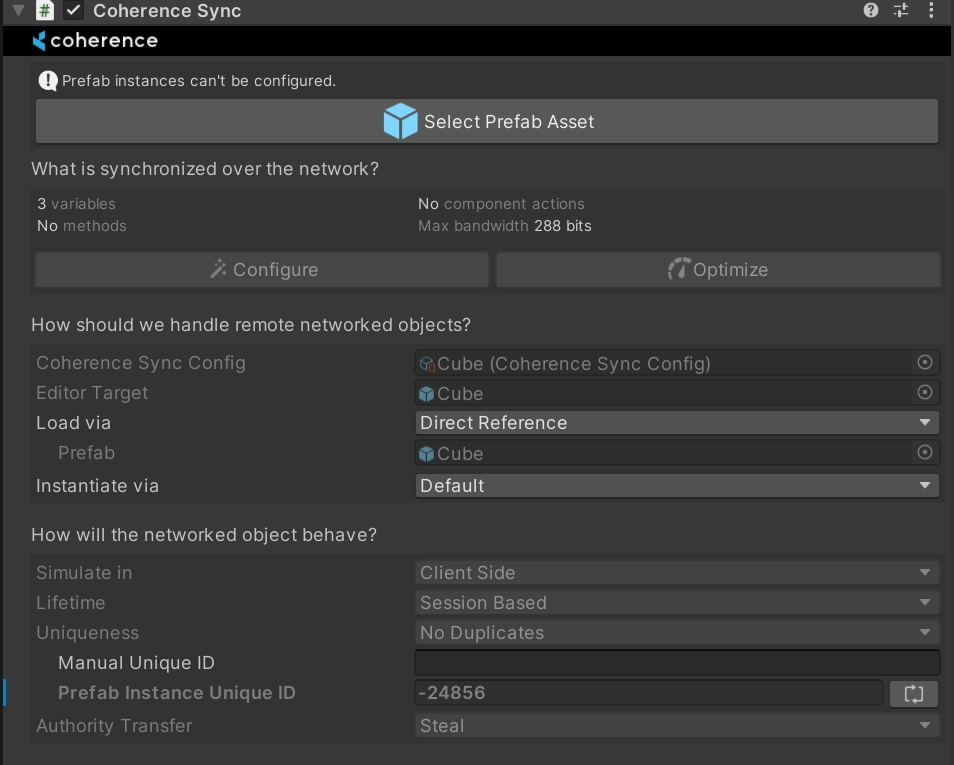
In its Inspector you can configure settings for Lifetime (Session-based or Persistent), Authority transfer (Not Transferable, Request or Steal), Simulate In (Client-side, Server-side or Server-side with Client Input) and Adoption settings for when persistent entities become orphaned, and more.
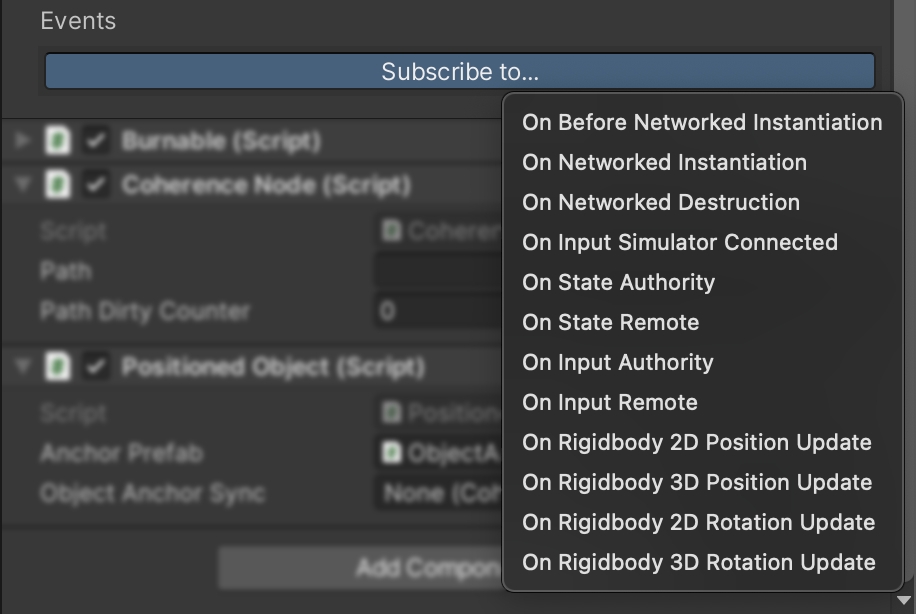
There are also a host of Events that are triggered at different times.
For now, we can leave these settings to their defaults.
CoherenceSync allows you to automatically network all public variables and methods on any of the attached components, from built-in Unity components such as Transform, Animator , etc. to any custom script, including scripts that came with the Asset Store packages that you may have downloaded.
Make sure the variables you want to network are set to public. coherence cannot sync non-public variables.
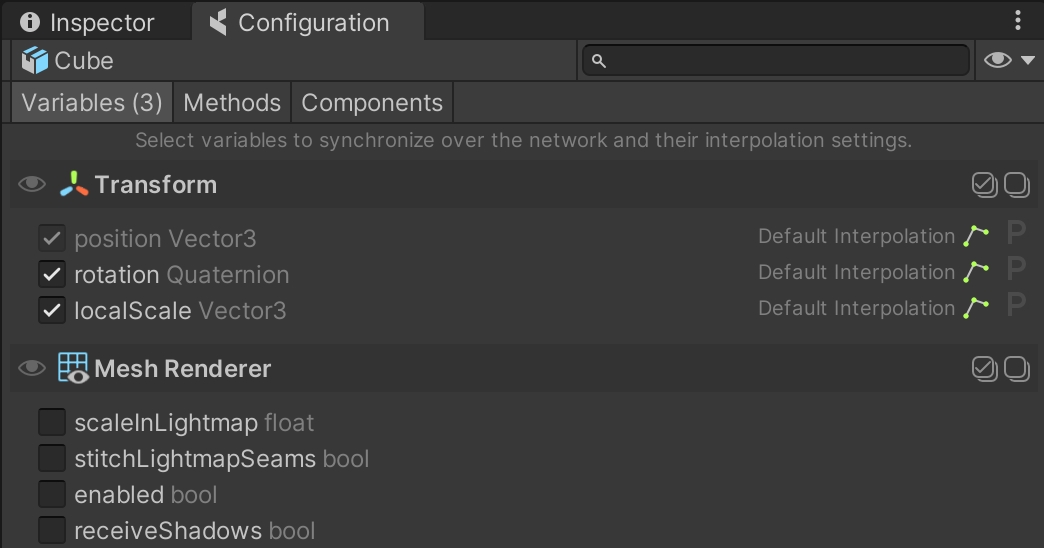
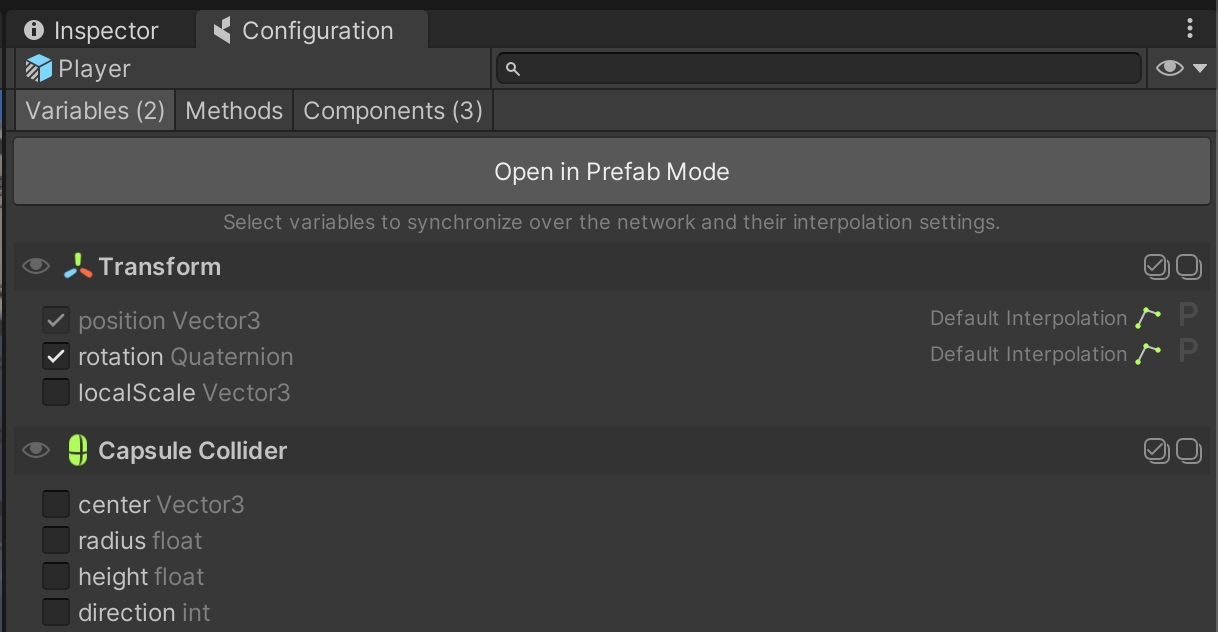
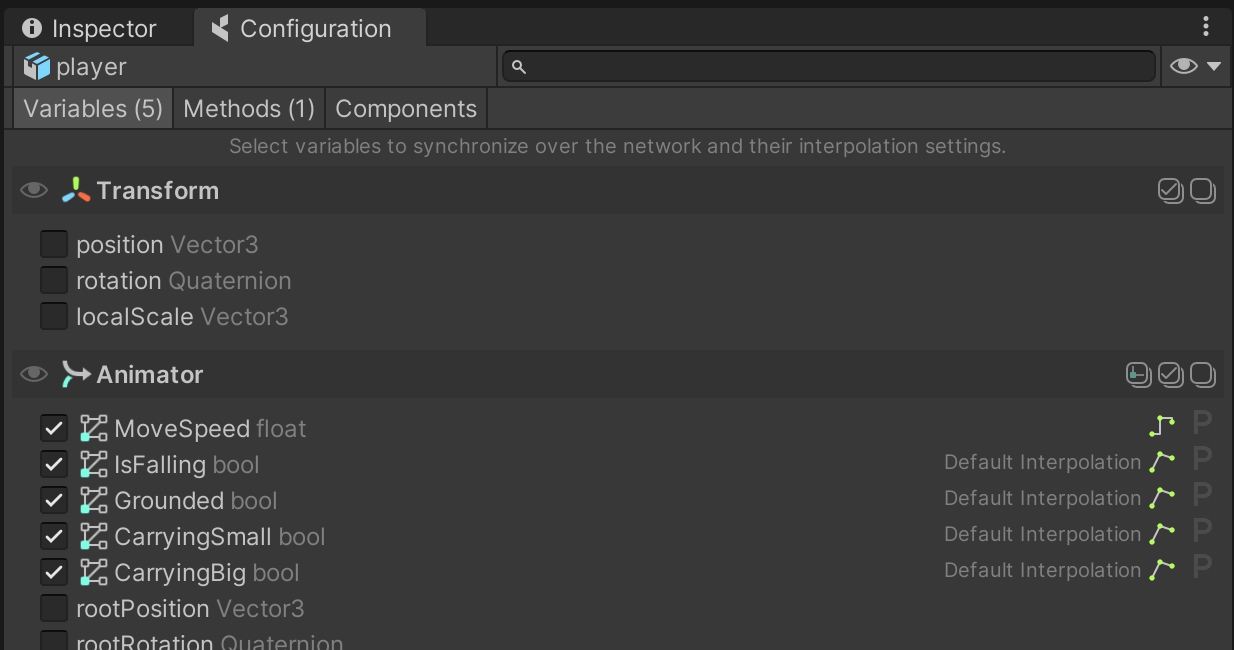
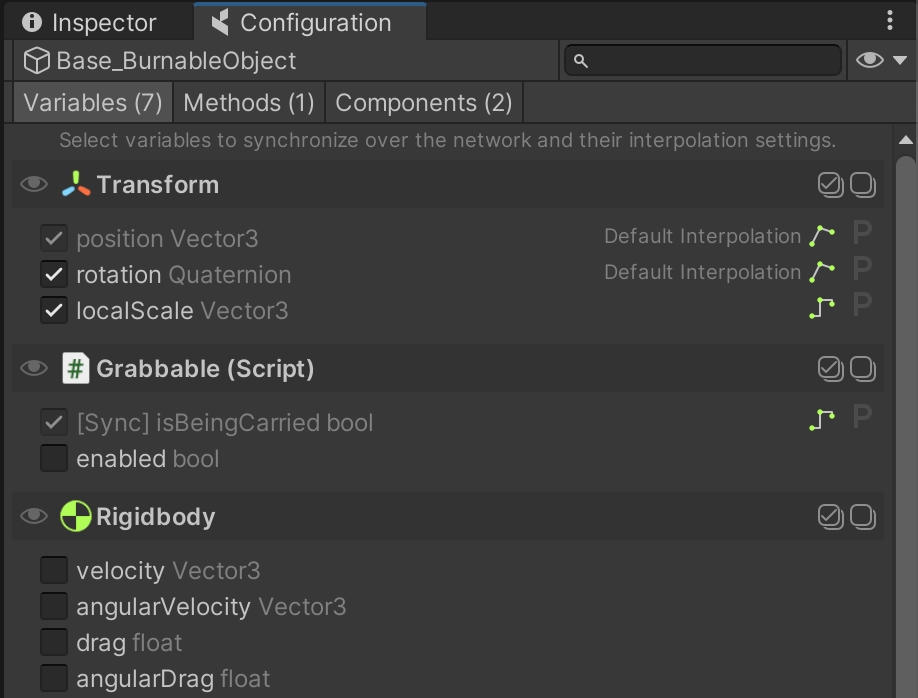
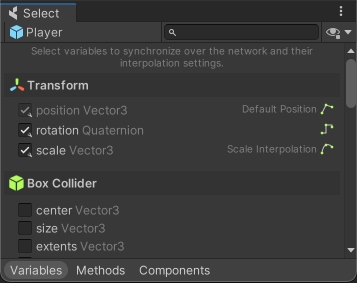
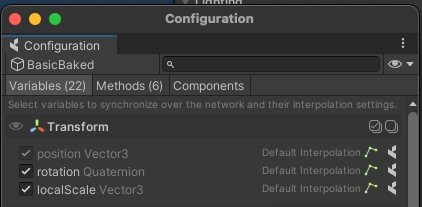
To set it up, click on the Configure button in the CoherenceSync's Inspector. This brings up the Configuration window. Here you can select which variables you would like to sync across the network:
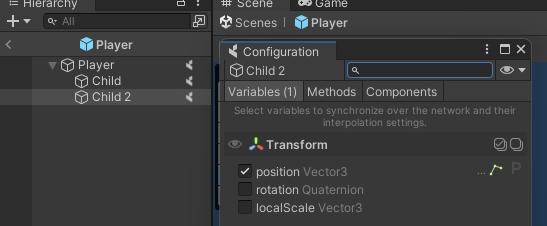
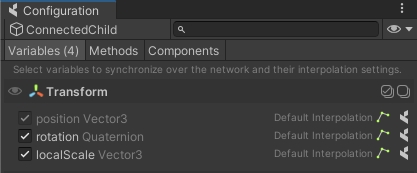
You will notice that position is already selected, and can't be unchecked. For our use case, let's also add rotation and localScale.
Close the Configuration dialog.
Let's add a simple movement script that uses WASD or Arrow keys to move the Prefab in the scene.
Click on Assets > Create > C# Script. Name it Move.cs.
Copy-paste the following content into the file:
Wait for Unity to compile, then attach the script to the Prefab.
We have added a Move script to the Prefab. This means that if we just run the scene, we will be able to use the keyboard to move the object around.
But what happens with Prefab belonging to other Clients? We don't have authority over them, they just need to be replicated. We don't want our keyboard input interfering with them, we just want the position coming from the network to be replicated.
For this reason, we need the Move component to be disabled when the object is remote. coherence has a quick way to do this.
In the Configuration window, click the Components tab:
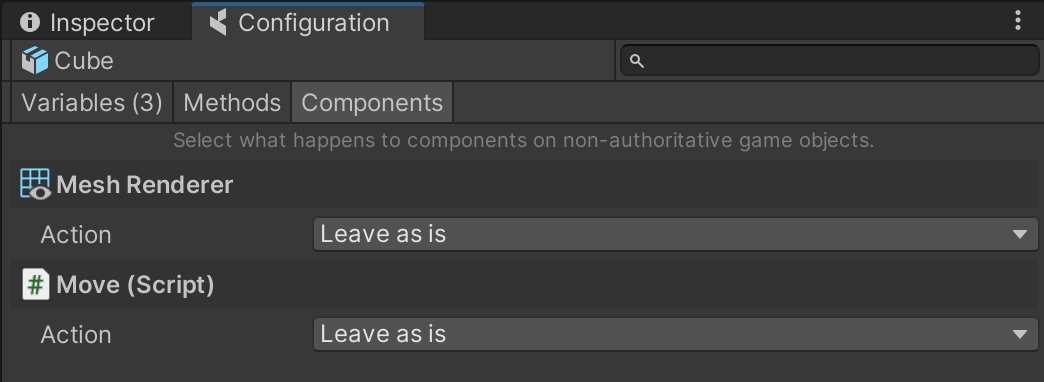
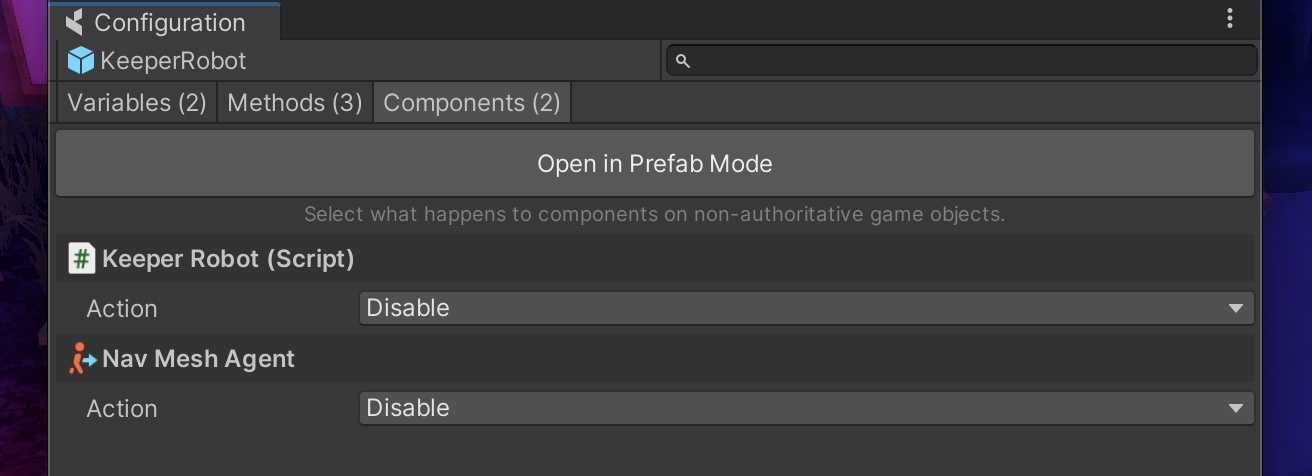
Here you will see a list of Component Actions that you can apply to non-authoritative entities that have been instantiated by coherence over the network.
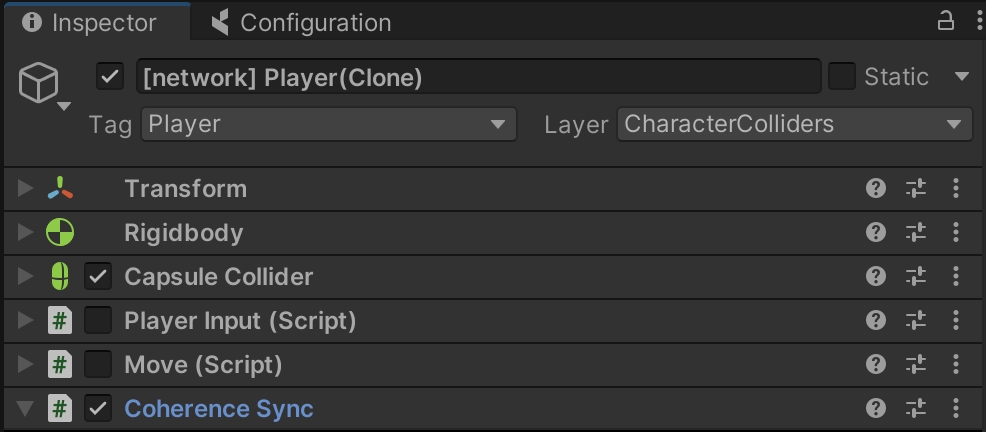
Selecting Disable for your Move script will make sure the Component is disabled for network instances of the Prefab:
This ensures that if a copy of this Prefab is instantiated on a Client with no authority, this script will be disabled and won't interfere with the position that is being synced.
This process is very quick, and can be done in different ways:
From the menu item coherence > Bake
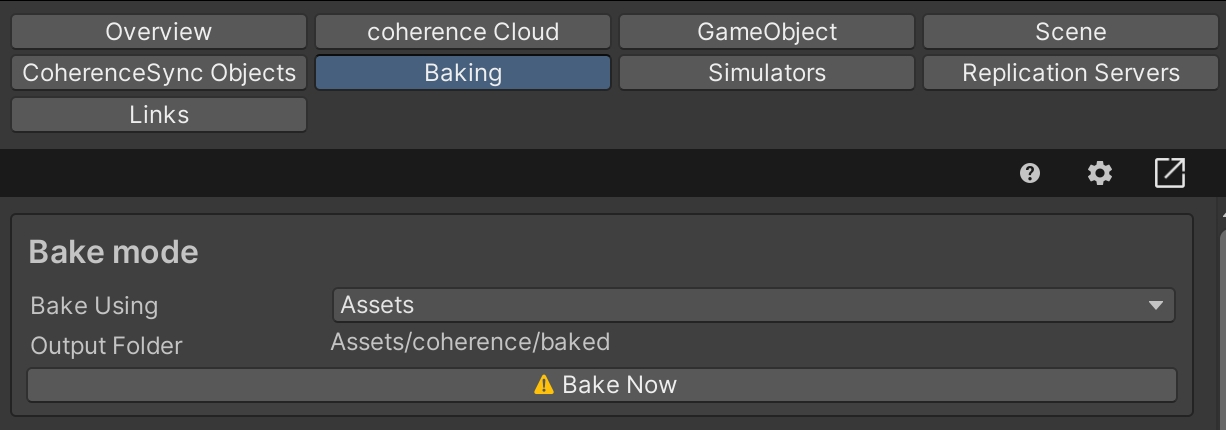
Within the coherence Hub, in the Baking tab, using Bake Now:
When a Prefab contains changes that need baking, its Inspector will warn you. Pressing Bake here will actually bake all code for all Prefabs:
To recap
This is it! Setting up an object to be networked doesn't require additional steps:
A Prefab with a CoherenceSync on it
Configuring what to sync in the Configure window
Disabling components on remote entities, in the Configure > Components tab
Baking the netcode
is an open-source project which allows you to open multiple Unity Editor instances, all pointing to the same Unity project (using Symbolic links).
Pros
Short iteration times
Easy to debug since every client is an Editor
Works with Unity versions prior to Unity 6
Cons
Can be more resource demanding than just running builds
Each clone requires the whole project to be duplicated on disk (1 clone means 2x the disk space, and so on). This might be a lot for huge projects.
Install as described in their
UPM Package installation is preferred as coherence supports it out-of-the-box
If installed via .unitypackage, you need to set by yourself. One way is by adding the following script to an Editor folder in your project:
Open ParrelSync > Clones Manager. Create a new clone, and open it
Continue development in the main Editor. Don't edit files in clone Editors
Enter Play Mode in each Editor
coherence tells apart ParrelSync clones from the main Editor, so it's easier for you to not edit assets in clones by mistake.
A collection of frequently asked questions, and where to find the answers
All Clients have to connect to a Replication Server, which can or .
There is no specific place to designate a special . Any script can create it, by just instantiating a Prefab.
Spawning is done by simply instantiating a Prefab that has a CoherenceSync, using the Instantiate() API. Same for removing entities, using the Destroy() API. Read more about .
Syncing individual values of the can simply be done using the . If a type is not supported, you can send the value using a as an index, or by reducing it to a byte array, and reconstructing it on arrival.
provide a view on who is connected at any given time.
Now that we have tested our project locally, it's time to upload it to the cloud and share it with our friends and colleagues. To be able to do that, we need to with coherence.
At this point, you can create a free account, which will grant you a number of credits that are more than sufficient to go through developing and testing your game in the cloud.
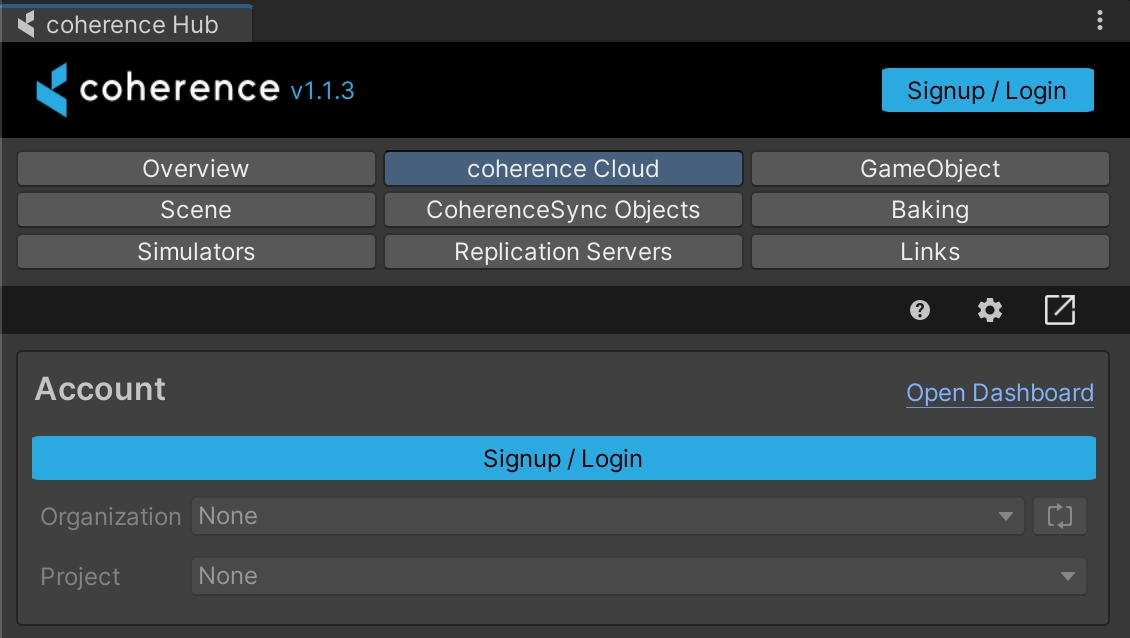
Open the coherence Hub window. Then open the coherence Cloud tab.
After pressing Login you will be taken to the login page. Simply login as usual, and return to Unity.
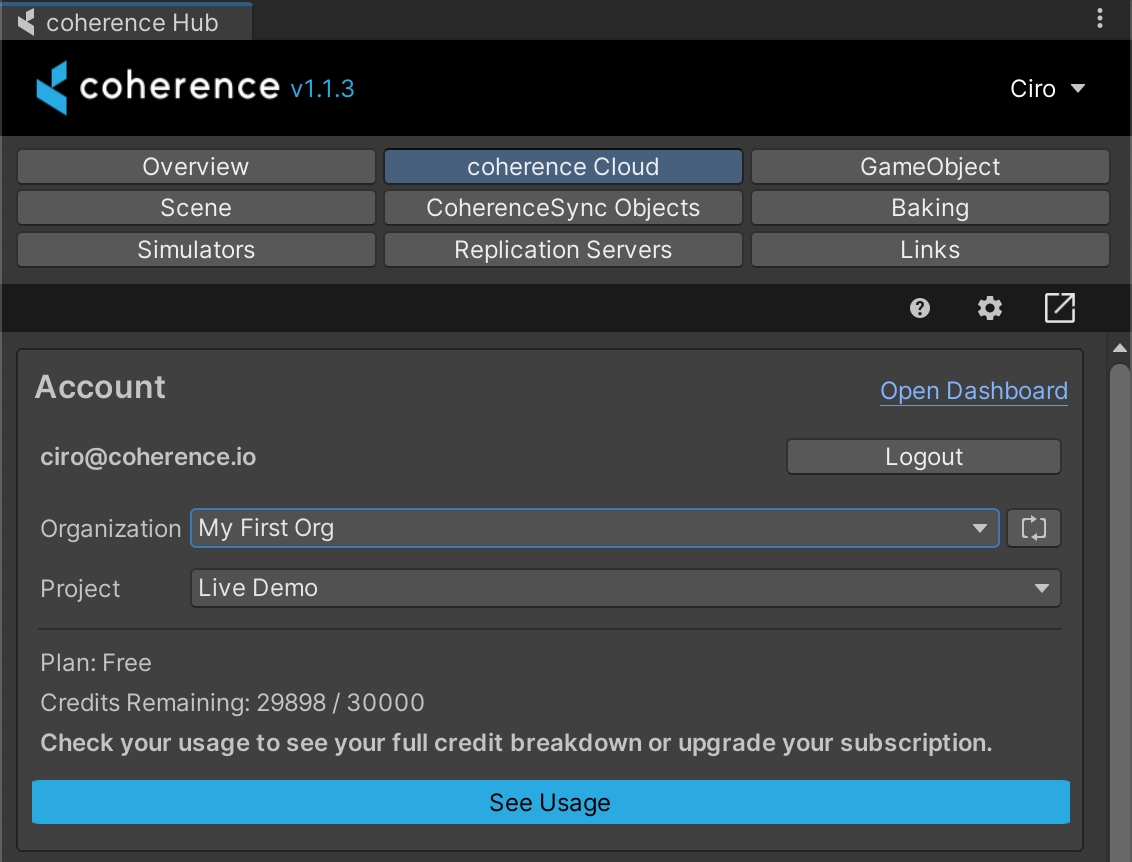
You are now logged into the Portal through Unity. Select the correct Organization and Project, and you are ready to start creating.
To recap
We created a coherence account and connected in the Unity, so now we can see our orgs and projects directly within the Editor and link to them.
coherence allows you to upload and share the builds of your games to your team, friends or adoring fans via an easy-access play link.
Right now we support desktop (PC, Mac, Linux) and also WebGL, where you can host and instantly play your multiplayer game and share it around the world.
If you want an example of WebGL builds, try out our sample projects or (make sure to use Chrome!)
First, you need to build your game to a local folder on your computer as you normally would. Ensure to bake before doing so!
In the coherence Hub window, select the coherence Cloud tab.
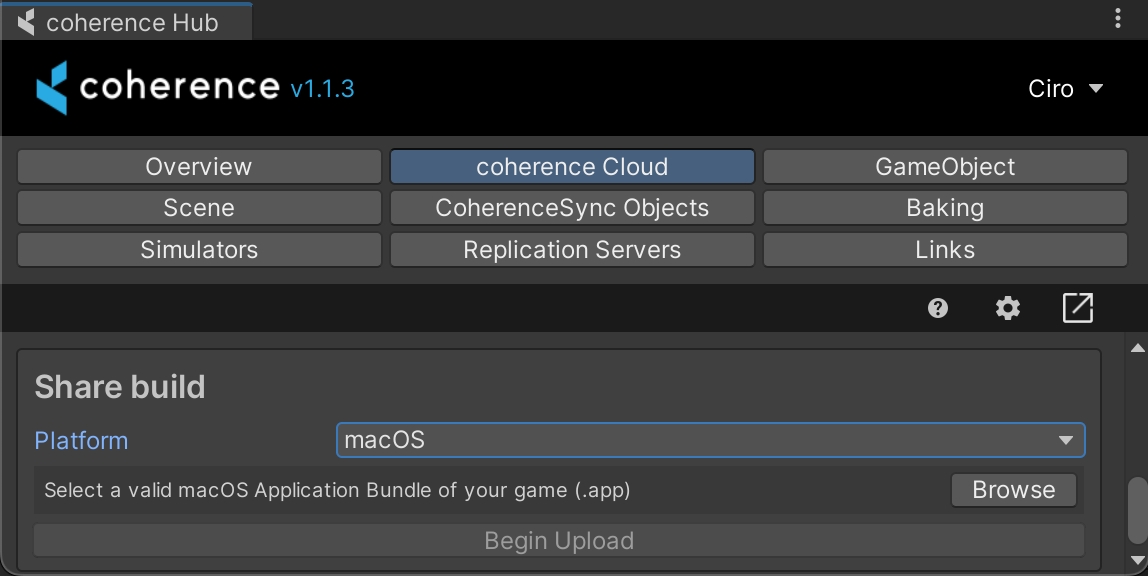
You can upload your build from the Share Build section of the tab. Select the platform, browse for the previously-created build, and click on the Begin Upload button.
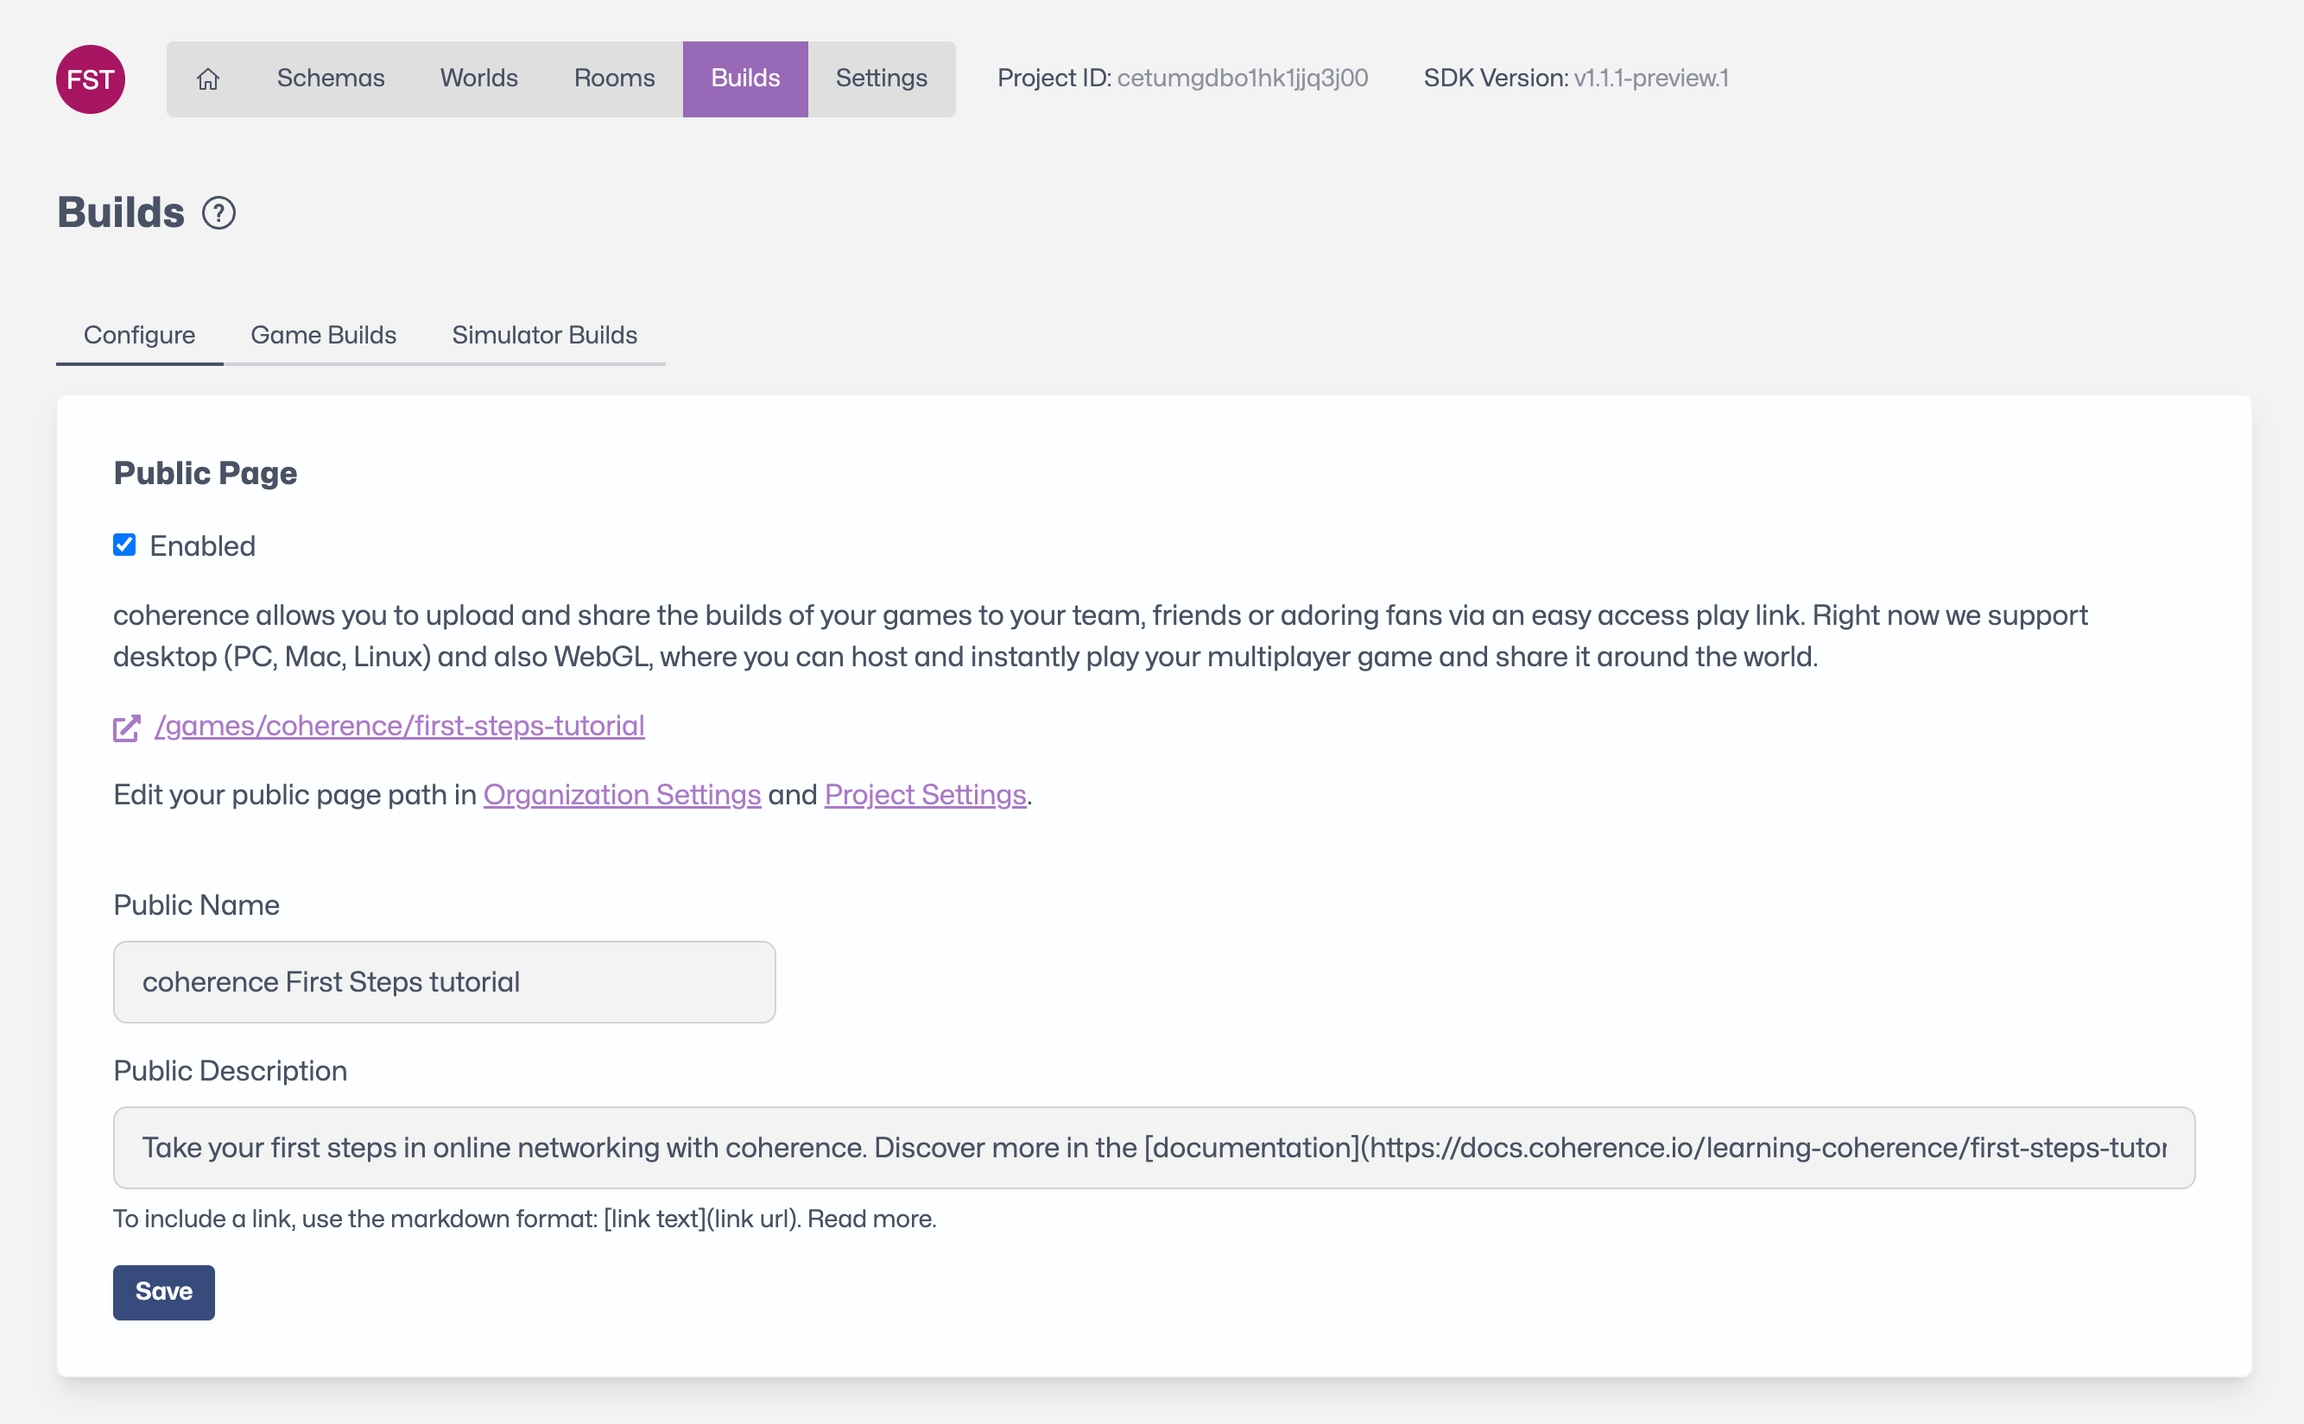
Now that build has been uploaded, you can share it by enabling and sharing the public URL on the coherence Cloud Dashboard:
Here you can customise the page to a degree. Don't forget to include instructions in the description, if your game doesn't have any!
By unchecking the Enabled option, you can obscure the page altogether, without having to remove builds.
Click on the Game Builds tab to manage builds for different platforms.
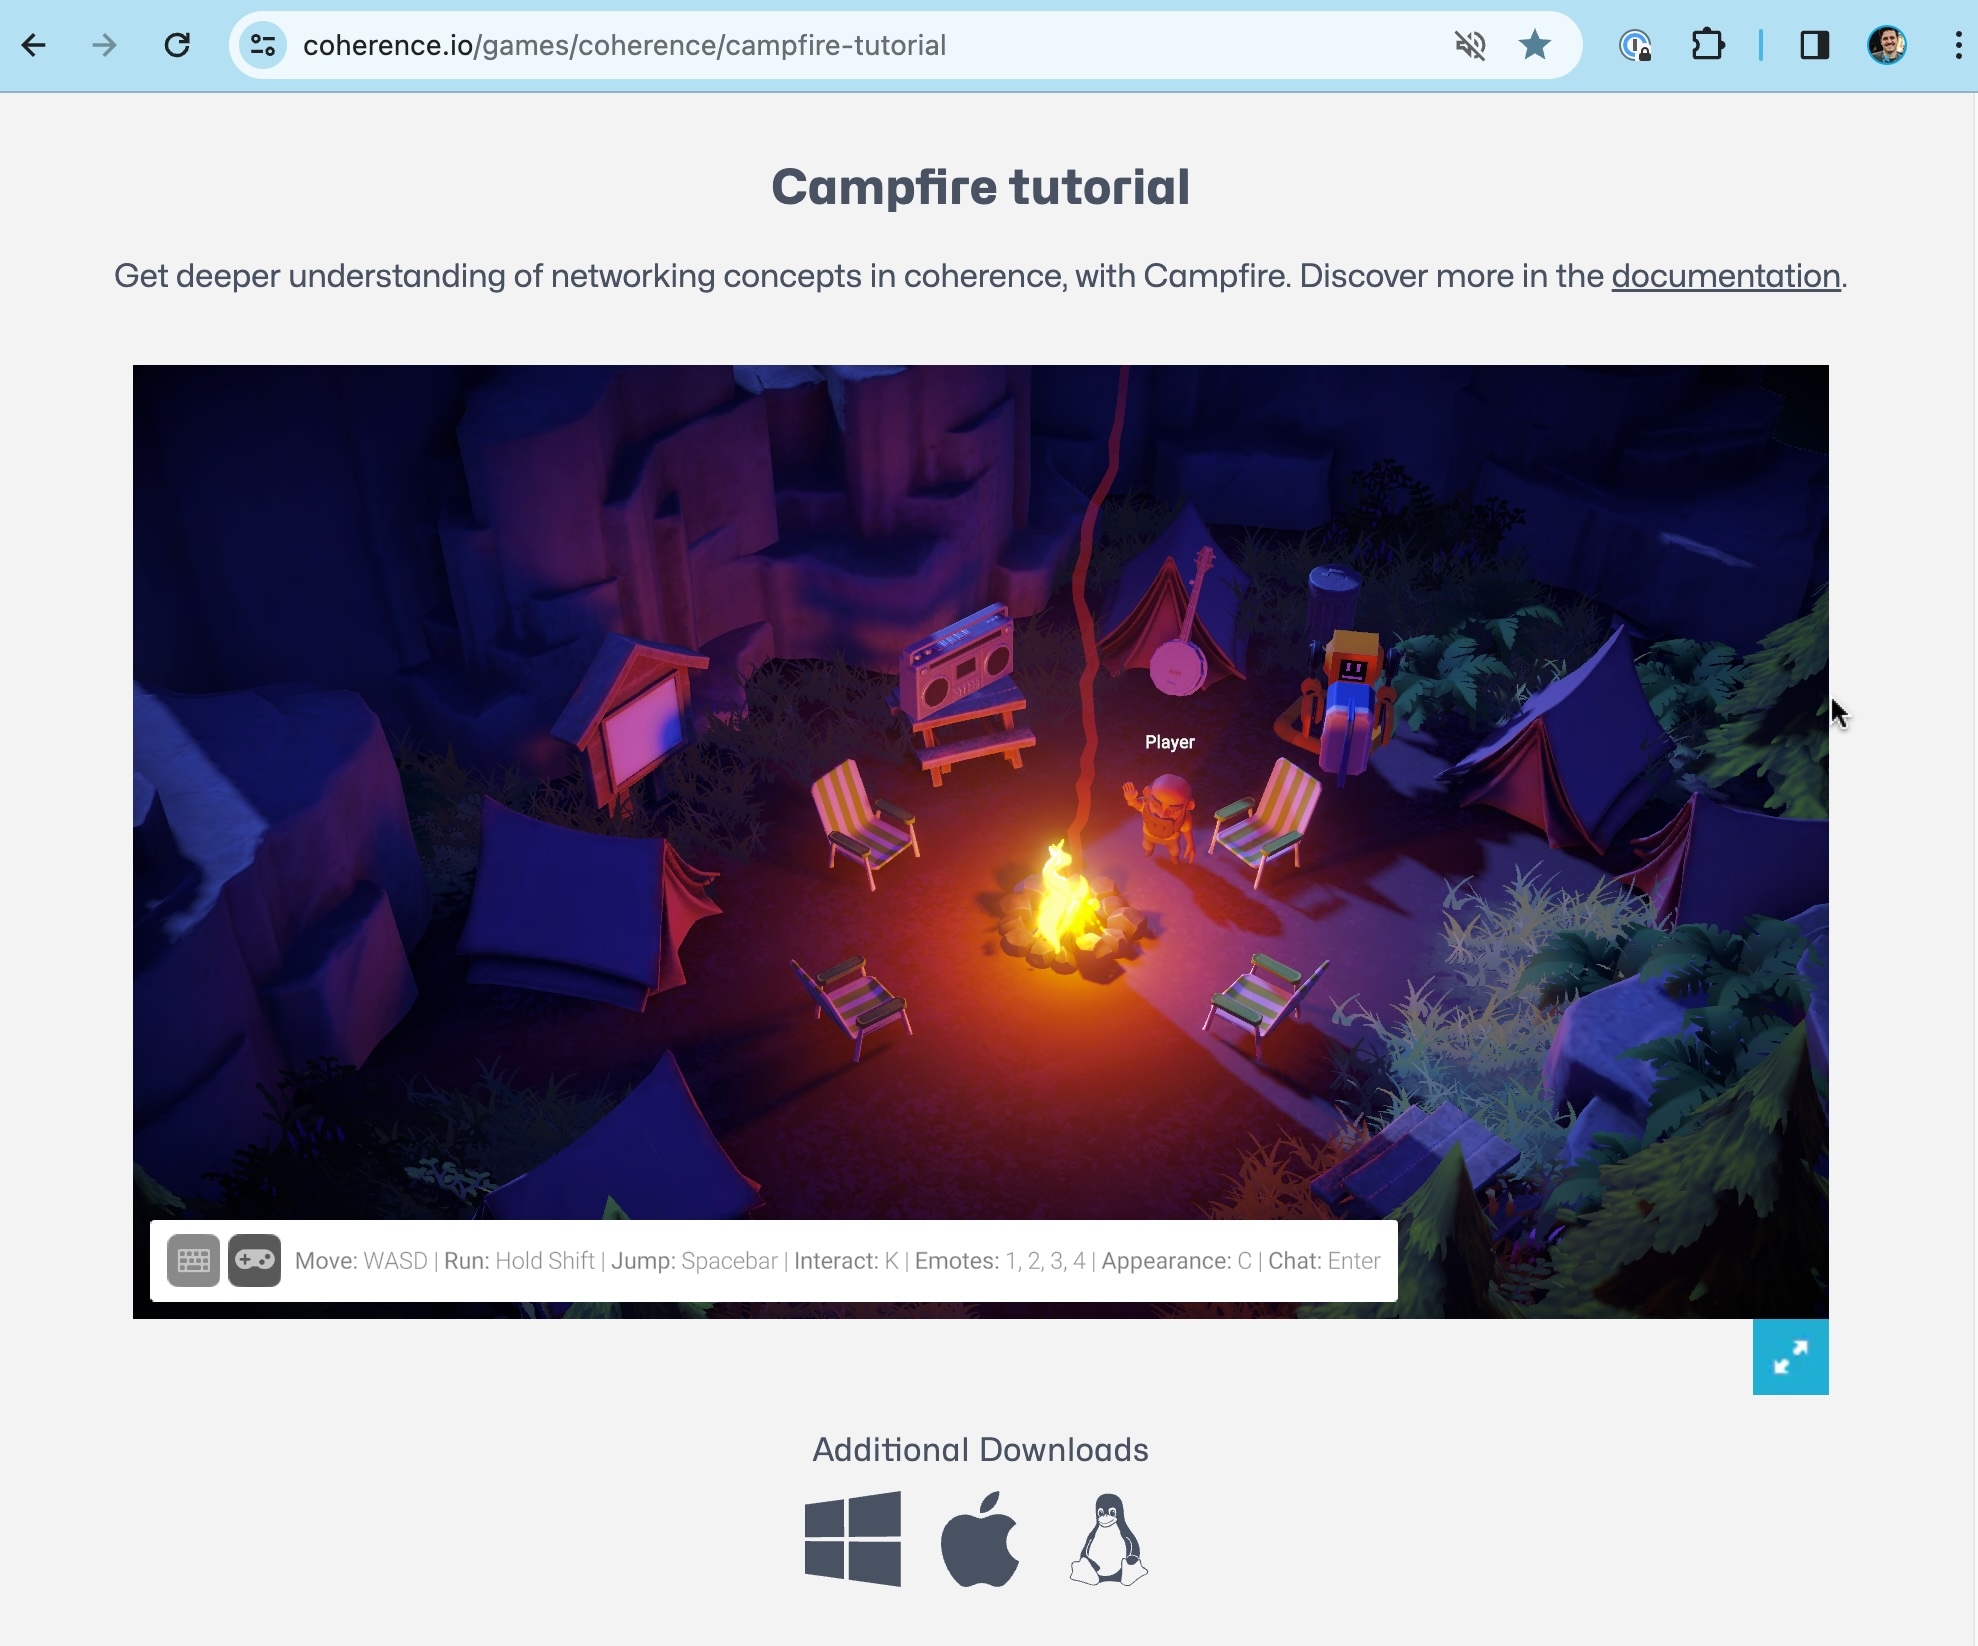
If you uploaded a WebGL build, the public link now allows for instant play directly in the browser:
If you uploaded builds for other platforms, they will be downloadable by clicking on the icons right below the WebGL build.
That's it! You made and shared a multiplayer game, hosted in the cloud. Surely it's simple for now, but now that the technical aspects are out of the way, you can focus on fun gameplay.
Now we can finally deploy our schema and Replication Server to the coherence Cloud.
In this example we're working with Worlds. Make sure you have created a World before trying to deploy the Replication Server. To create a World, follow the steps described in .
The topics on this page start from around 1:00 in the video below:
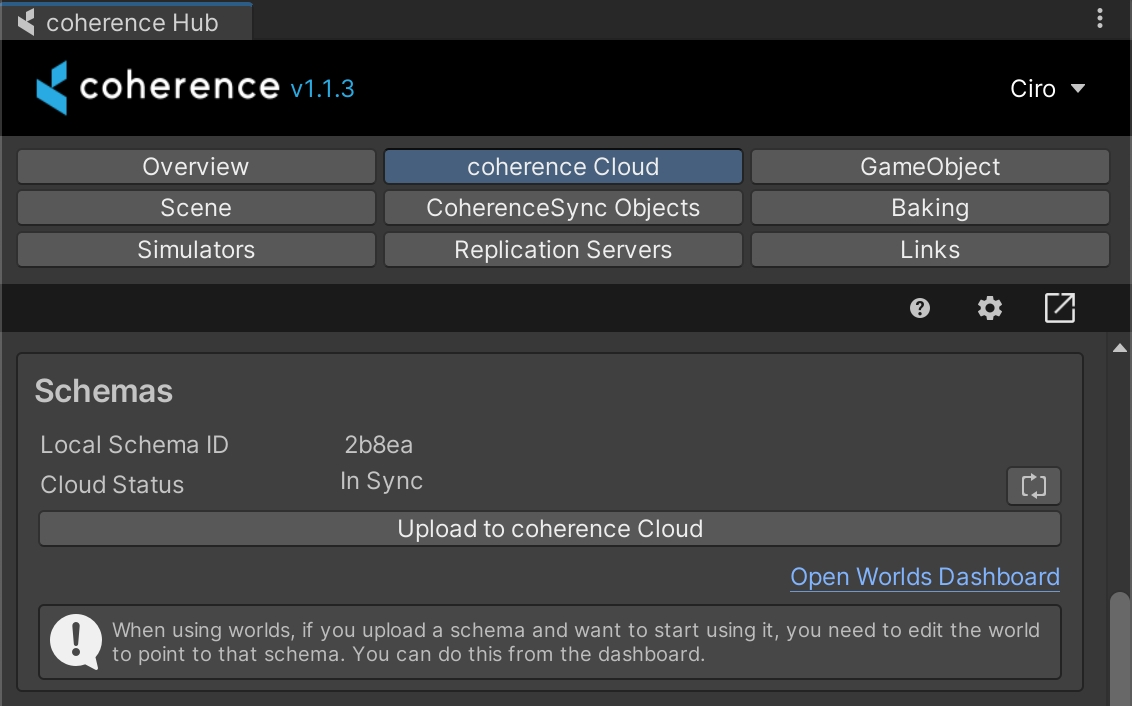
In the coherence Hub window, select the coherence Cloud tab, and click on Upload to coherence Cloud in the Schemas section.
The Cloud Status in the Schemas section should now be In Sync.
Your project schema is now deployed with the correct version of the Replication Server already running in the cloud. You will be able to see this in your cloud dashboard status.
You can now build the project and send the build to friends or colleagues for testing.
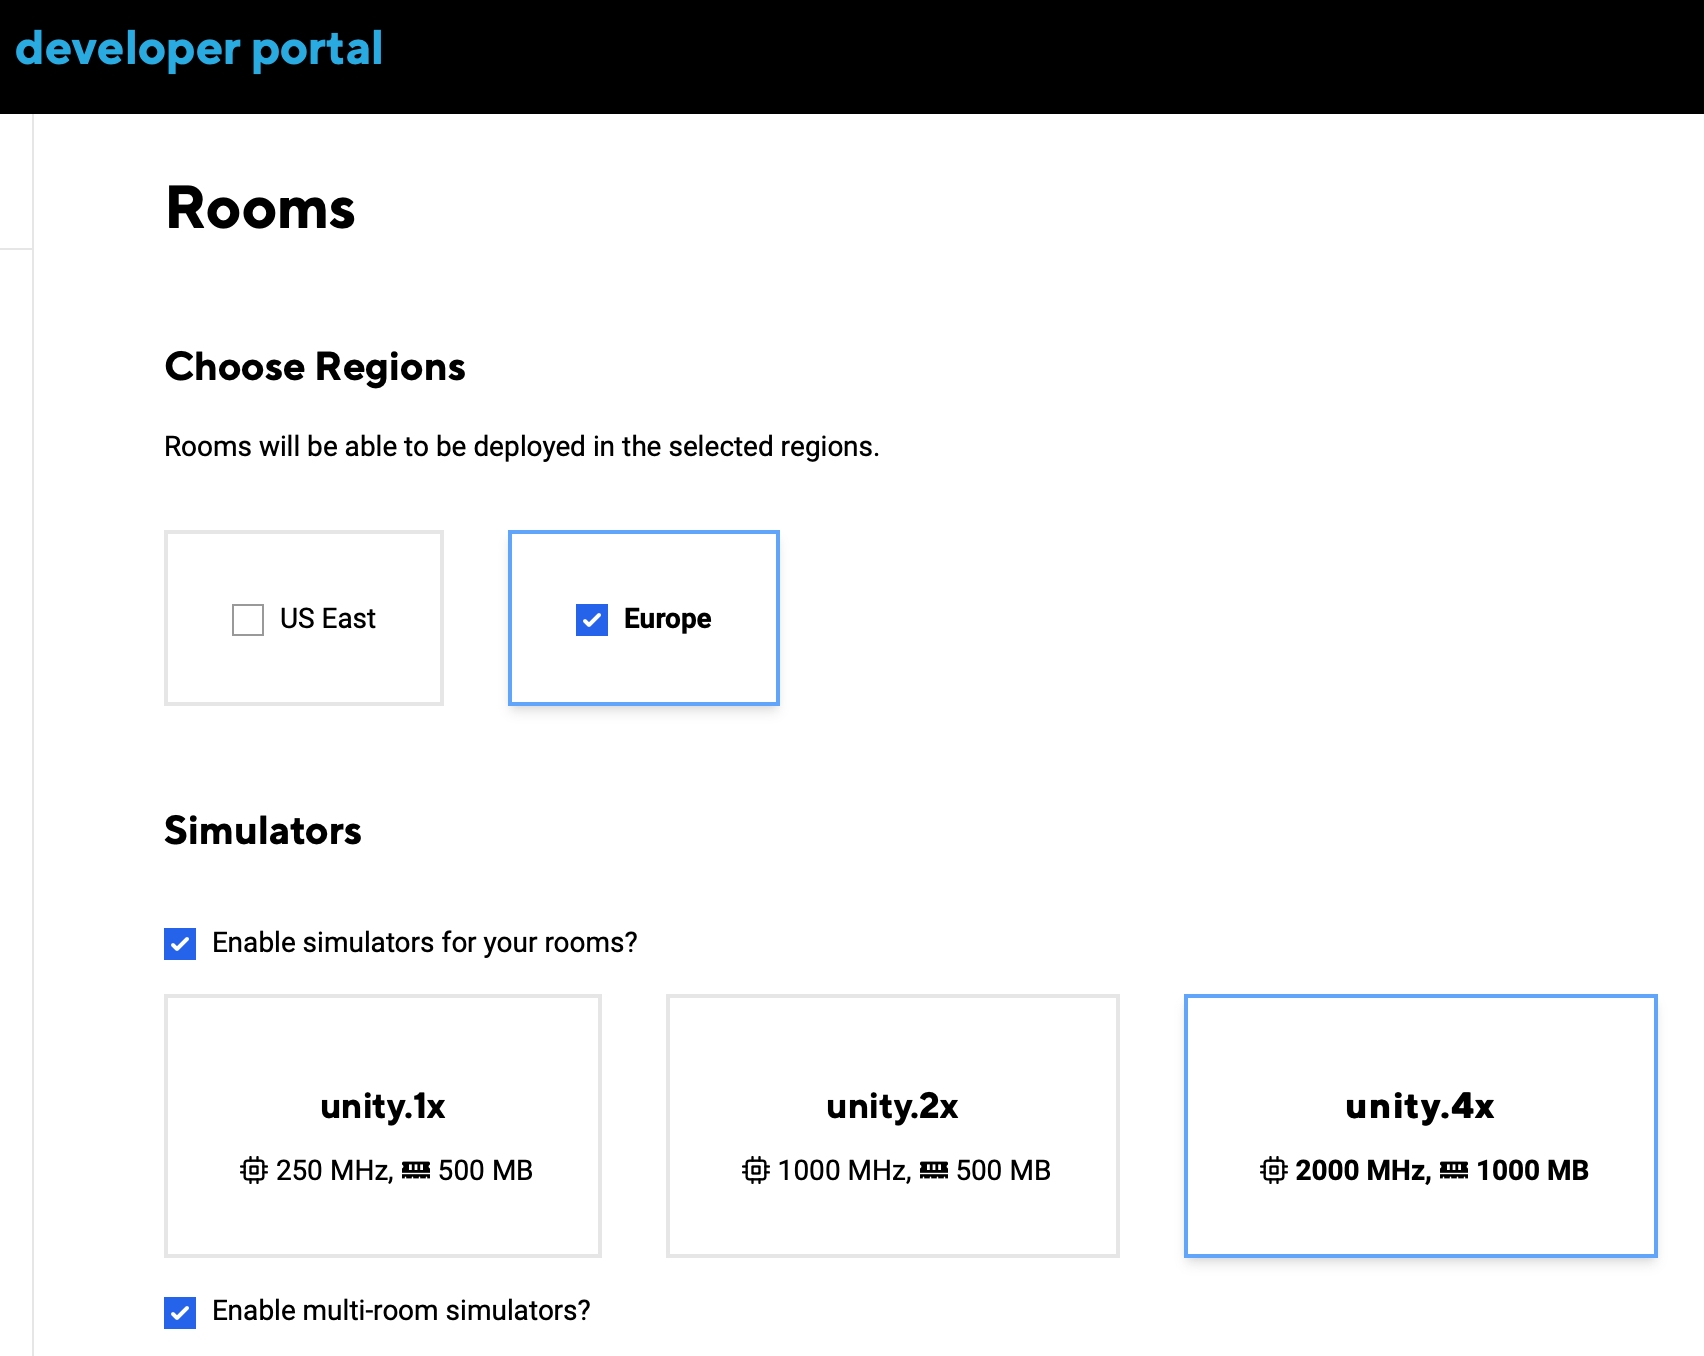
If you used one of the Connection Dialog samples, once you play the game it will fetch all the regions available for your project. This depends on the project configuration (e.g., the regions that you have selected for your project in the Dashboard).
You will be able to play over the internet without worrying about firewalls and local network connections.
Select a folder (e.g. Builds) and click OK.
You will notice it because there will be a little chef's hat next to the coherence folder, or a warning sign on Bake buttons:
The steps below all do this, but from different starting points: a new (1a), a (1b), or a (1c).
First, ensure you enter , as we don't want to add the component as an override.
Ensure you're in Isolation Prefab editing mode, not In Context. Read about .
Ensure you're in Isolation Prefab editing mode, not In Context. Read about .
Learn how to create and use Prefab variants in the .
Its Inspector has quite a number of settings. For more information on them, refer to .
Note that you can configure variables, methods and components not only on the root, but also .
Once everything is setup, you should ensure to run the process of : coherence will produce the necessary netcode (i.e. a bunch of C# scripts) to ensure that when the game is running and the Client connects, all of the properties and network messages you might have configured will correctly sync.
Now let's run this setup or using the .
Make sure is up-to-date before starting to test, and that the Replication Server is running with the latest generated
Messages (or RPCs) in coherence are called . We also have a video on .
To make all connected Clients move to a new scene, you can create a method that loads the scene and mark it as a . Then, from one of the Clients you would send that Network Command on all others (and to themselves) by selecting as destination MessageTarget.All.
Servers in coherence are called . You can also watch an .
To allow client-side prediction, start by on the properties you want to do prediction for. Implement your prediction code, and listen for incoming updates by . When the update arrives, you can reconcile the predicted state and the new, incoming sample in a way that fits your game best.
To create a functionality, you can leverage Network Commands to send strings (or byte arrays) to all connected Clients.
A pre-game chat can also be created by leveraging .
In your web browser, navigate to . Create an account or log into an existing one.
As a next step in the sub-pages of this section we'll see how to in the cloud, and how to .
We recommend heading to our Samples and Tutorials section, dive or watch some , to learn all about deeper topics.
If the status does not say "In Sync", or if you encounter any other issues with the server interface, refer to the section.
For quick and easy testing, we suggest trying out . Anyone with the link can then try the build in a browser.
Once you follow the instructions to install the coherence SDK package for Unity, you will be able to explore the package Samples with no additional download. You can either:
Go to: Coherence > Explore Samples
Open Unity's Package Manager (Window > Package Manager) and navigate to the package samples
Note that the Samples are meant to be self-explanatory, so they come with no documentation.
The scene shows up all magenta!
If, once you import the samples, the scenes show up magenta/pink, it's because the samples are made for the built-in pipeline and your project is using either URP or HDRP.
To fix this in URP, go to: Window > Rendering > Render Pipeline Converter
Click on the checkboxes to choose what to convert (Materials is necessary), then click the Initialize and Convert button. After a brief loading, you should see the example scenes displayed correctly.
For more information, refer to Unity's guides for URP or for HDRP.
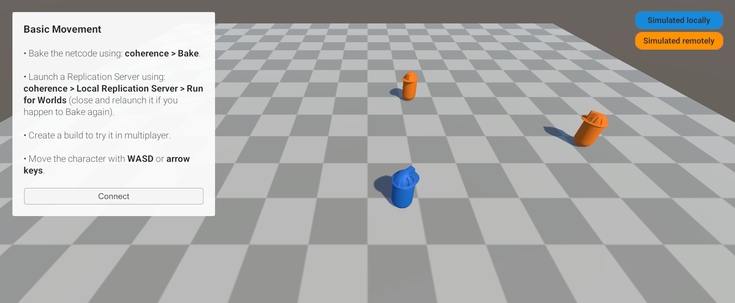
This scene demonstrates the simplest networking scenario possible with coherence. Characters sync their position and rotation, which immediately creates a feeling of presence. Someone else is connected!
CoherenceSync | Bindings | Component behaviors | Authority
WASD or Left stick: Move character
Hold Shift or Shoulder button left: Run
Spacebar or Joypad button down: Jump
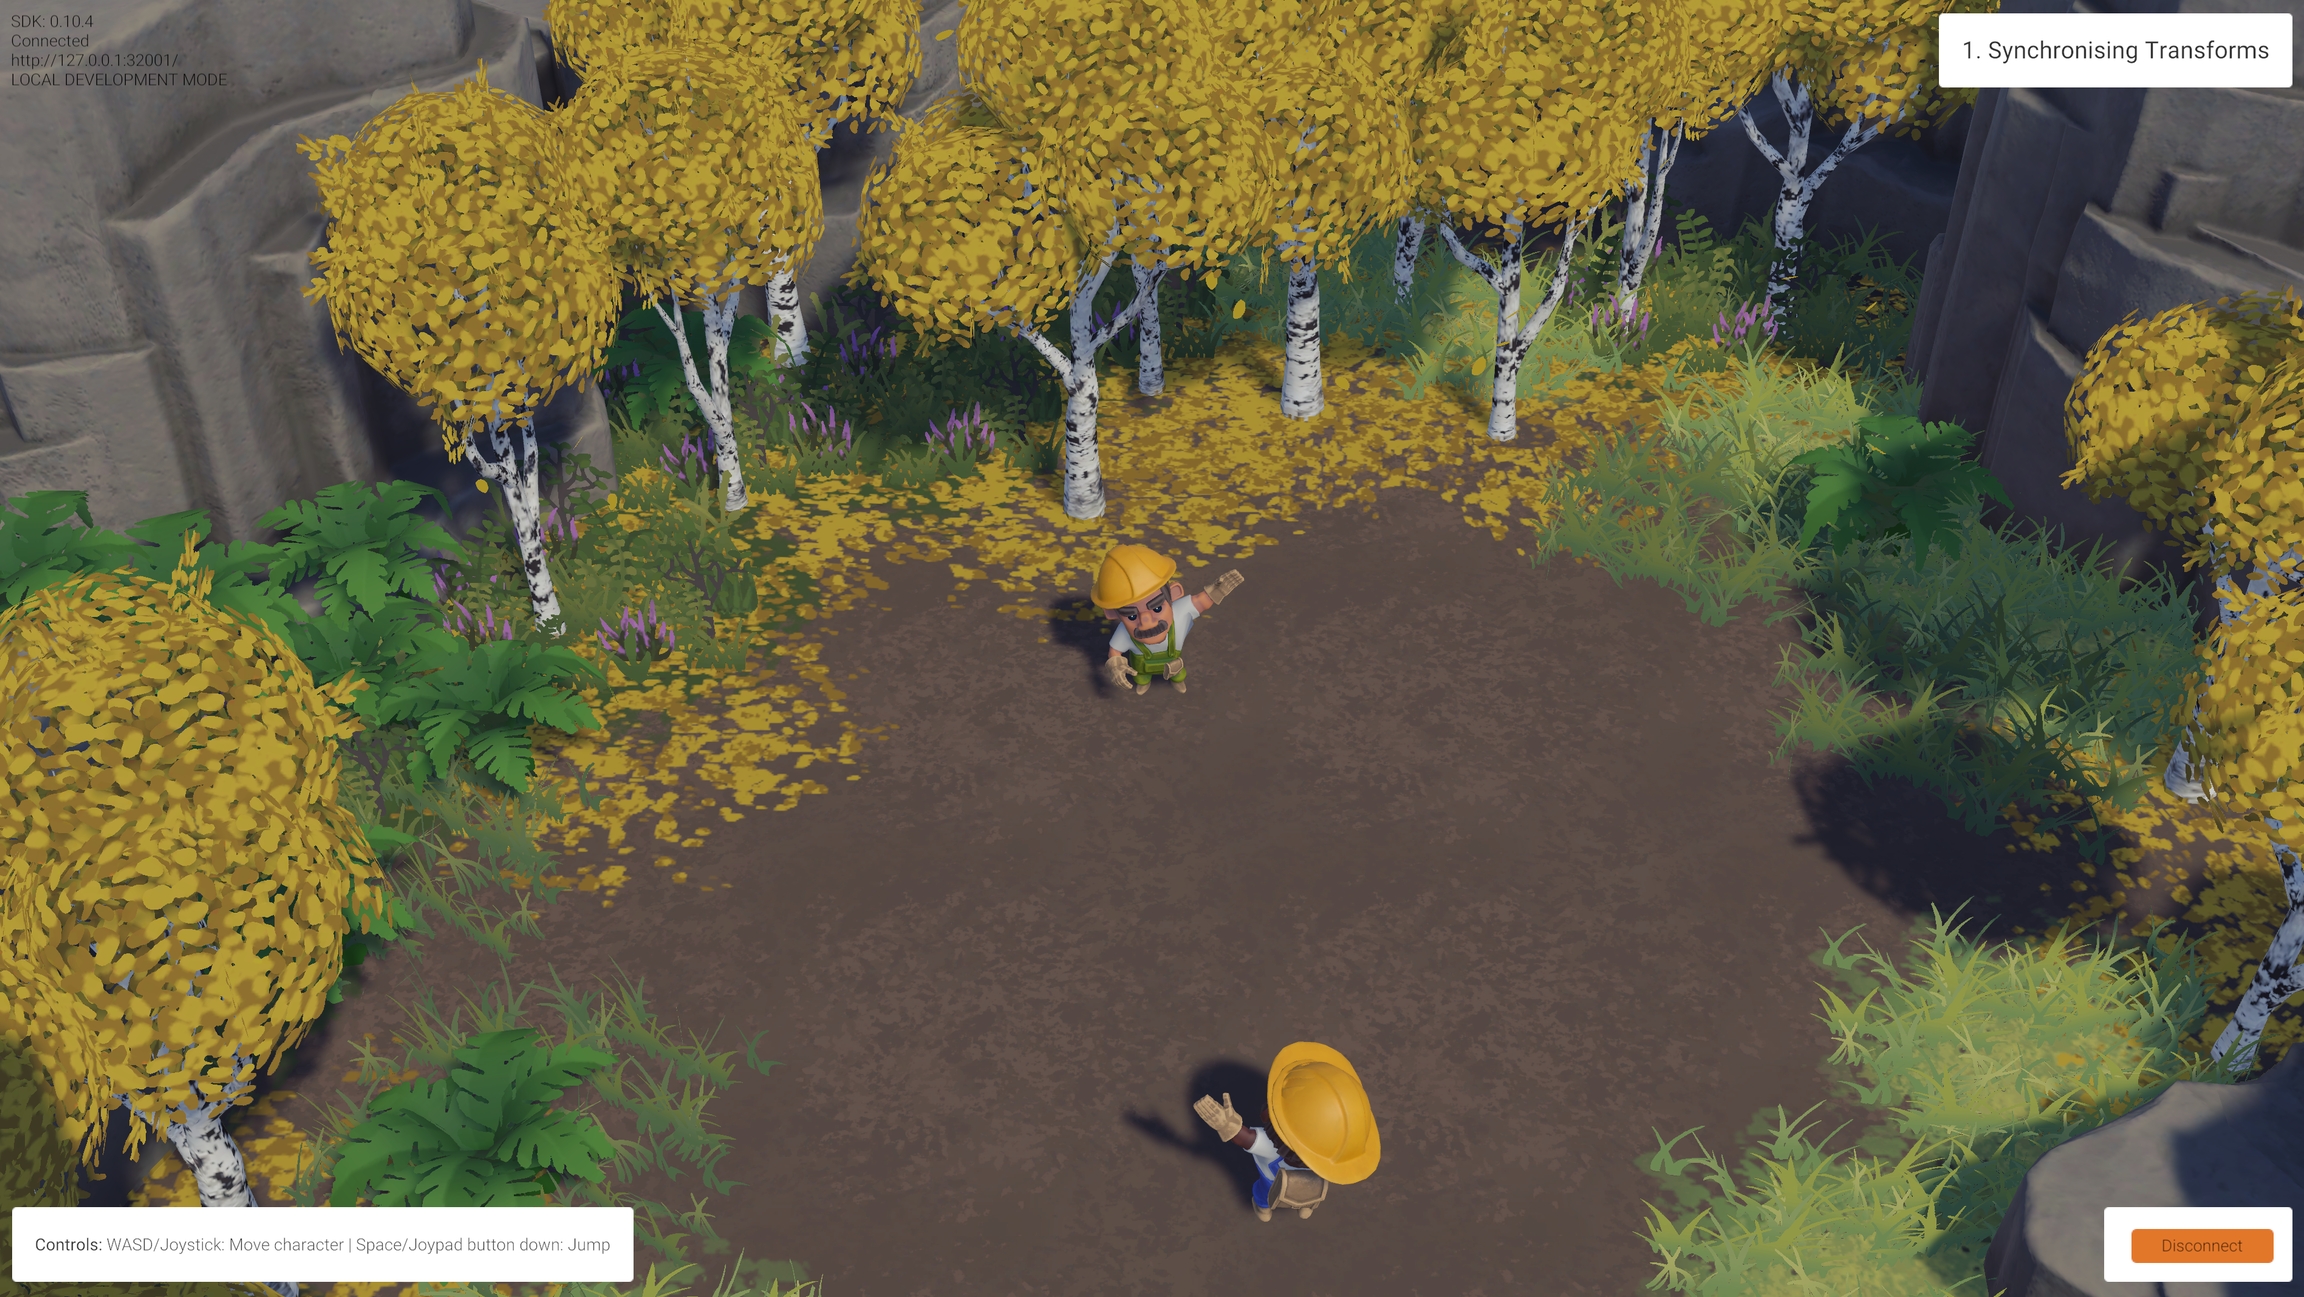
Upon connecting, a script instantiates a character for you. Now you can move and jump around, and you will see other characters move too.
To be able to connect, you need to also run a local Replication Server, that can be started via coherence > Local Replication Server > Run for Worlds.
coherence takes care of keeping network entities in sync on all Clients. When another Client connects, an instance of your character is instantiated in their scene, and an instance of their character is instantiated into yours. We refer to this as network instantiation.
When you click Connect in the sample UI, the CoherenceBridge opens a connection. The PlayerHandler GameObject on the root of the hierarchy controls character instantiation by responding to that connection event.
Its PlayerHandler script implements something like this:
On connection, a character is created. On disconnection, the same script destroys the character's instance. Note how instantiating and removing a network entity is done just with regular Unity Instantiate and Destroy.
Now let's take a look at the Prefab that is being instantiated. You can find it in the /Prefabs/Characters folder.
By opening coherence's Configuration window (either by clicking on the Configure button on the CoherenceSync component, or by going to coherence > GameObject Setup > Configure), you can see what is synced over the network.
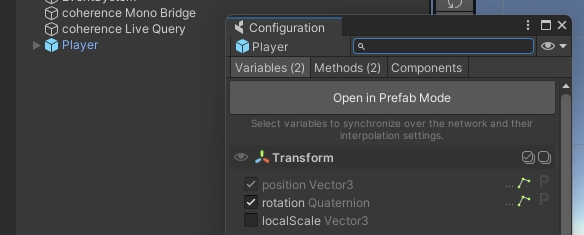
When this window opens on the Variables tab you will notice that, at the very top, Transform.position and Transform.rotation are checked:
This is the data being transferred over the network for this object. Each Client sends the position and rotation of the character that they have authority over to every other connected Client, every time there is a change to it that is significant enough. We call these bindings.
Each connected Client receives these values and applies them to the Transform component of their own instance of the remote player character.
In First Steps, all the variables are set to public by default. The network code that coherence automatically generates can only access public variables and methods, without them being public syncing would not work.
In your own projects, keep it in mind to always set synced variables to public!
To ensure that Clients don't modify the properties of entities they don't have authority over, we need to make sure that they are not running on the character instances that are non-authoritative.
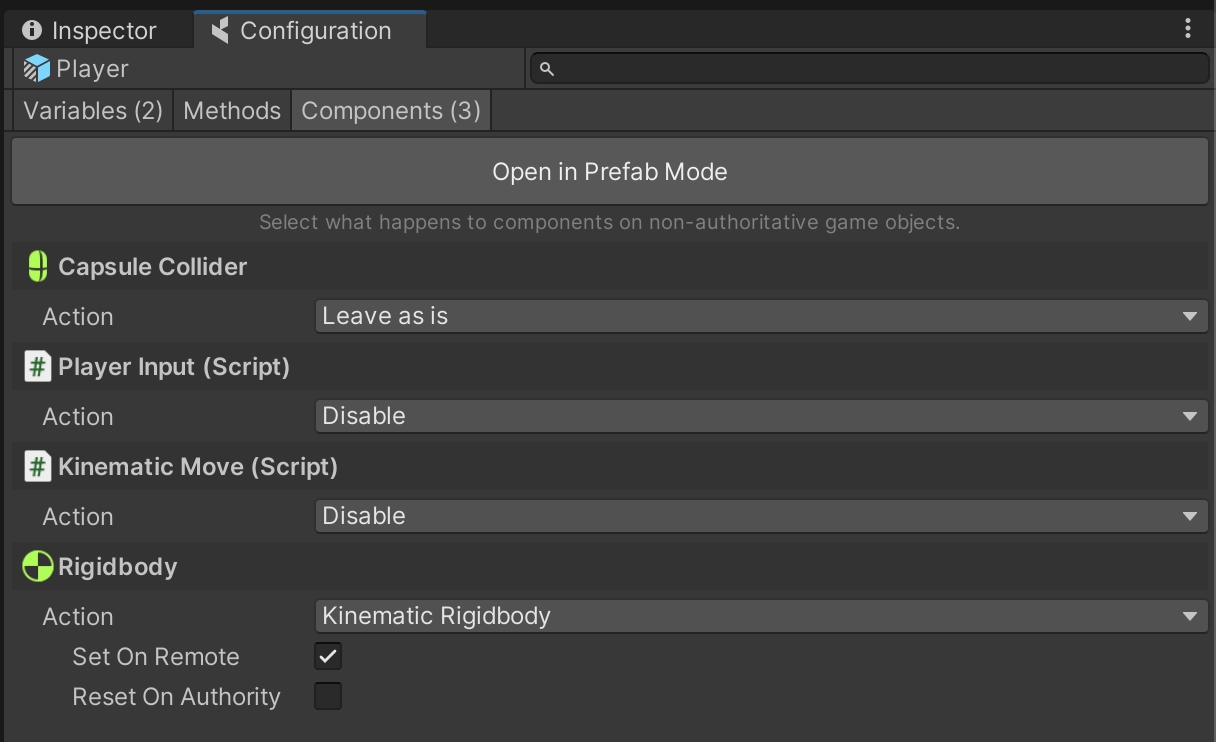
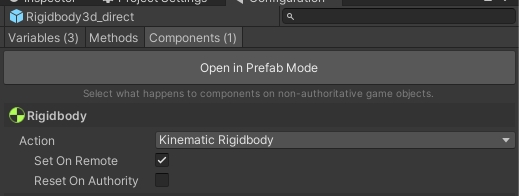
coherence offers a rapid way to make this happen. If you open the Components tab of the Configuration window, you will see that 3 components are configured to do something special:
In particular:
The PlayerInput and KinematicMove scripts get disabled.
The Rigidbody component is made kinematic.
While in Play Mode, try selecting a remote player character. You will notice that some of its script have been disabled by coherence:
You can learn more about Component Actions here.
One important concept to get familiar with is the fact that every networked entity exists as a GameObject on every Client currently connected. However, only one of them has what we call authority over the network entity, and can control its synced variables.
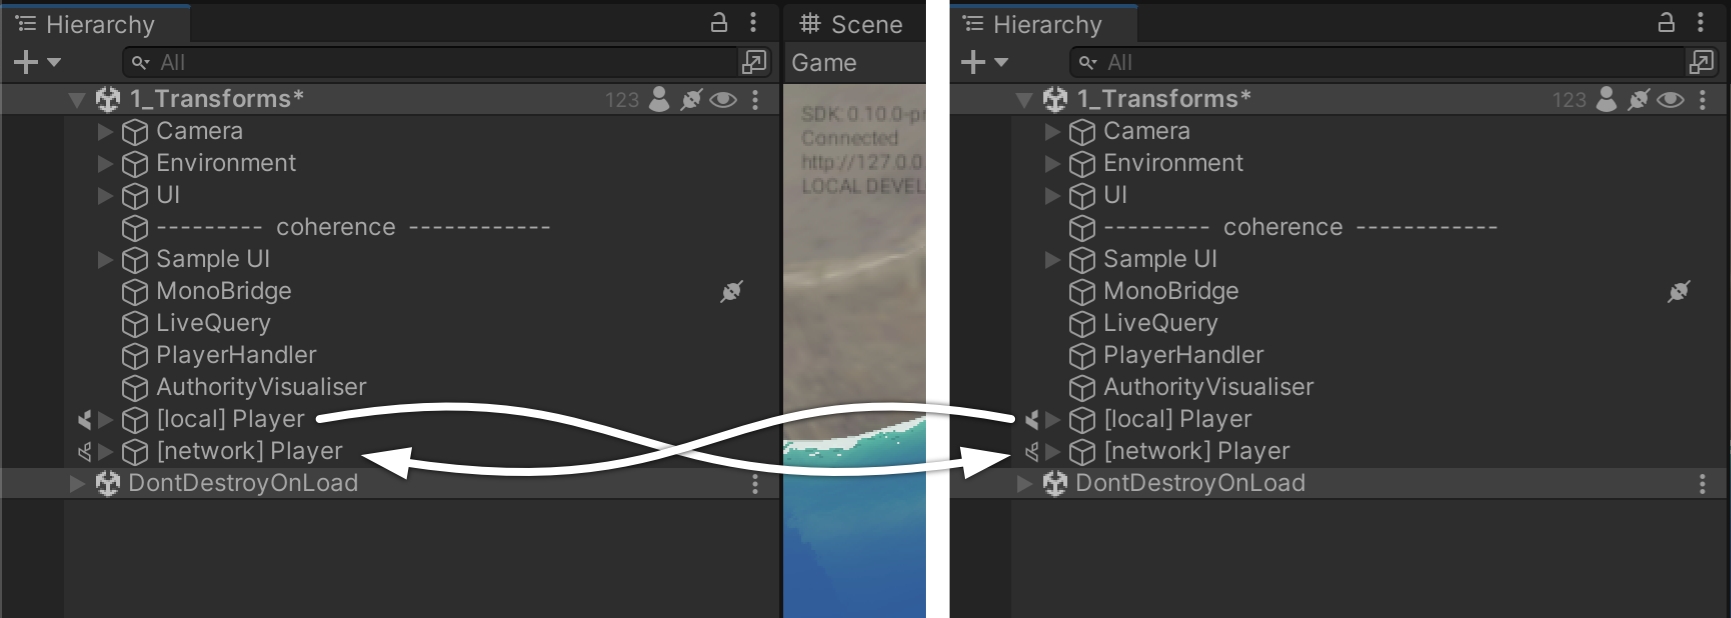
For instance, if we play this scene with two Clients connected, each one will have 2 player instances in their respective worlds:
This is something to keep in mind as you decide which components have to keep running or be disabled on remote instances, in order to not have the same code running unnecessarily on various Clients. This could create a conflict or put the two GameObjects in a very different state, generating unwanted results.
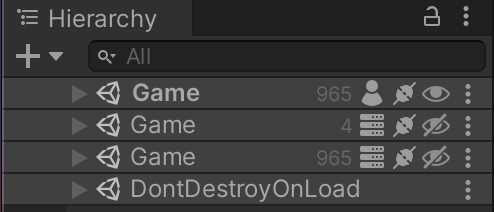
In the Unity Editor, when connected, the name of a GameObject and the icon next to it informs you about its current authority state (see image above).
There are two types of authority in coherence: State and Input. For the sake of simplicity, in this project we often refer just to a generic "authority", and what we mean is State authority. Go here for more info on authority.
If you want to see which entities are currently local and which ones are remote, we included a debug visualization in the project. Hit the Tab key (or click the Joystick) to switch to a view that shows authority. You can keep playing the game while in this view, and see how things change (try the Physics scene!).
Using the same scene as in the previous lesson, let's see how to easily sync animation over the network.
Animation | Bindings
WASD or Left stick: Move character
Hold Shift or Shoulder button left: Run
Spacebar or Joypad button down: Jump
We haven't mentioned it before, but the character Prefab does a lot more than just syncing its position and rotation.
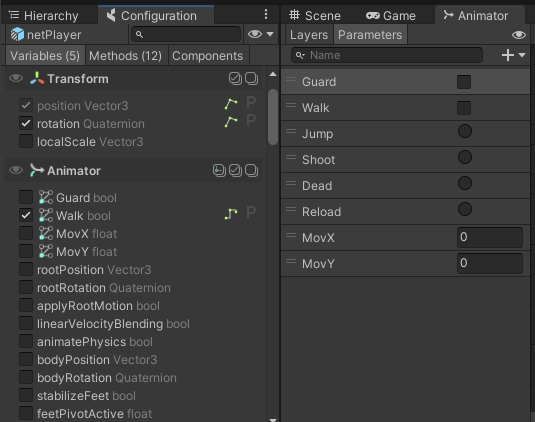
When you move around, you will notice that animation is also replicated across Clients. This is done via synced Animator parameters (and Network Commands, but we cover these in the next lesson).
Very much like in the example about position and rotation, just sending these across the network allows us to keep animation states in sync, making it look like network-instantiated Prefabs on other Clients are performing the same actions.
Open the player Prefab located in the /Prefabs/Characters folder. Browse its Hierarchy until you find the child GameObject called Workman. You will notice it has an Animator component.
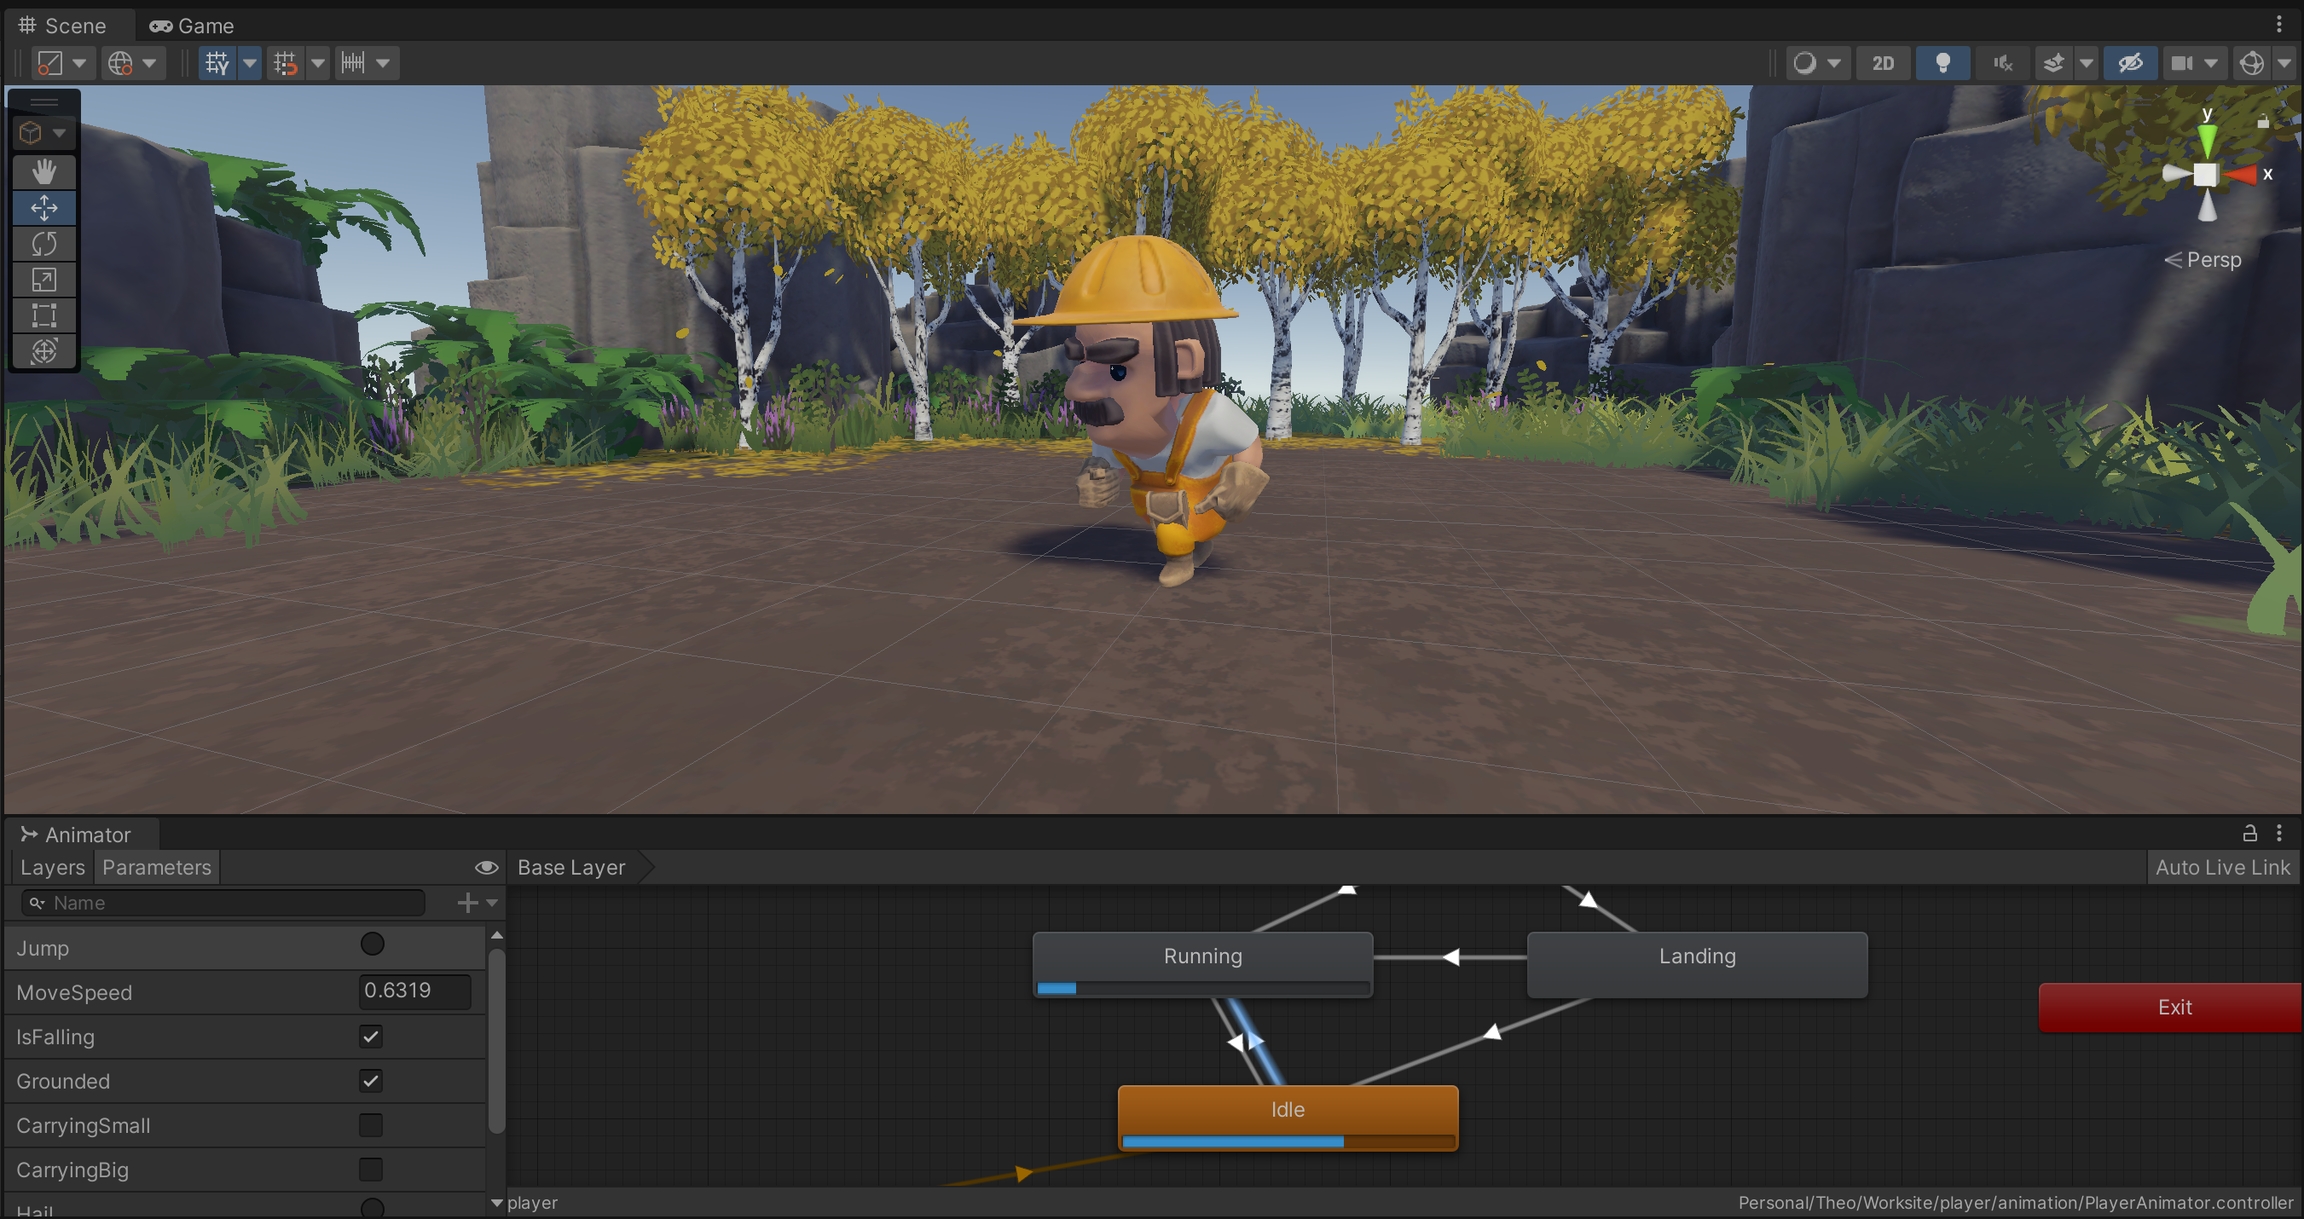
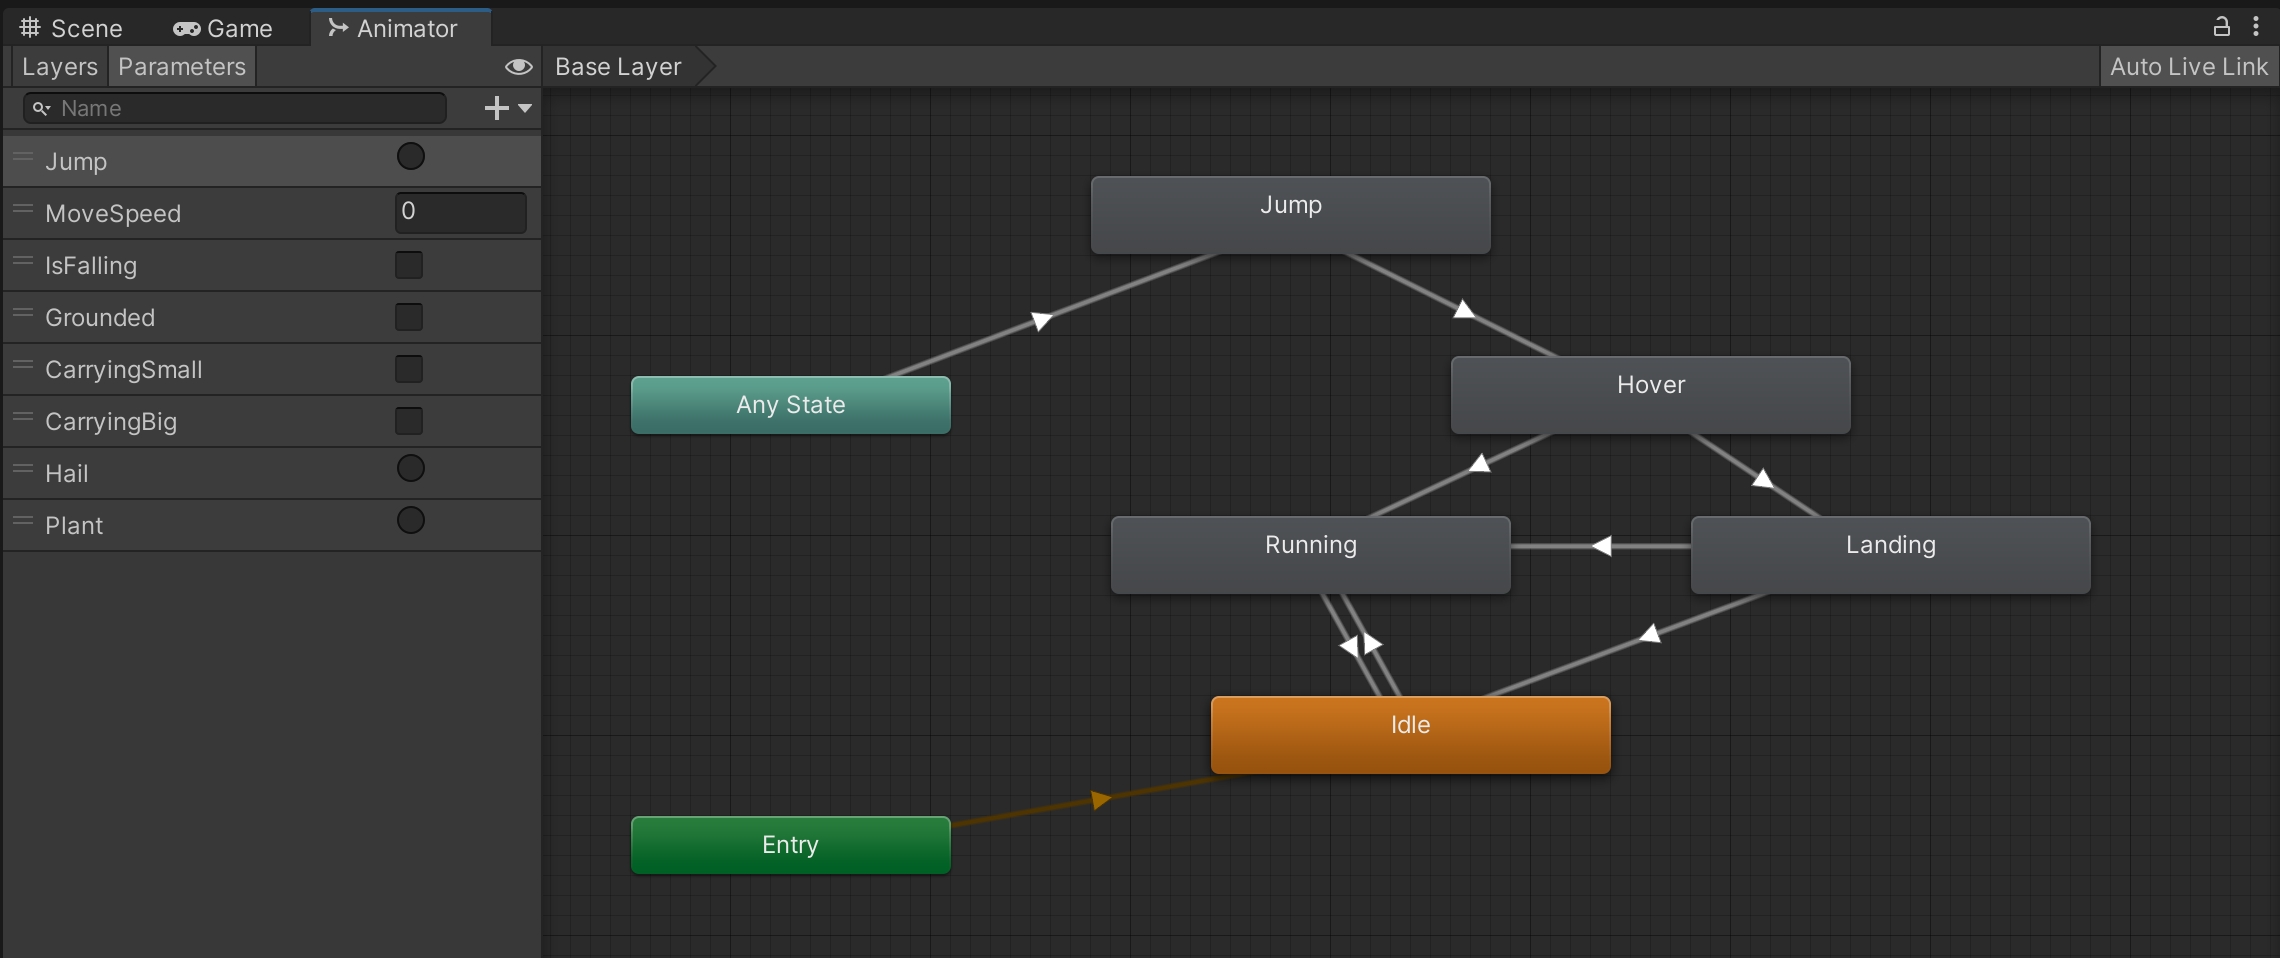
Select this GameObject and open the Animator window.
As is usually the case, animation is controlled by a few Animator parameters of different types (int, bool, float, etc.).
Make sure to keep the GameObject with the Animator component selected, and open the coherence Configure window:
You will see that a group of animation parameters are being synced. It's that simple: just checking them will start sending the values across, once the game starts, just like other regular public properties.
Did you notice that we are able to configure bindings even if this particular GameObject doesn't have a CoherenceSync component on it? This is done via the one attached to the root of the player Prefab.
These parameters on child GameObjects are what we call deep bindings.
Learn more in the Complex hierarchies lesson, or on this page.
There is only one piece missing: animation Triggers. We use one to trigger the transition to the Jump state.
Since Triggers are not a variable holding a value that changes over time, but rather an action that happens instantaneously, we can't just enable in the Config window like with other animator parameters. We will see how to sync them in the next lesson, using Network Commands.
If you prefer to be hands-on, we recommend you start by exploring the package Samples included right inside the Unity SDK. Or download one of our pre-made Unity projects First Steps or Campfire, which both come with great documentation explaining the thinking behind them.
Finally if you're new to networking and you want to read more about the fundamentals, you might enjoy our Beginner's Guide to Networking. This high-level intro is not coherence-specific, but rather is applicable to any networking technology.
The basics of coherence
The First Steps project contains a series of small sample scenes, each one demonstrating one or more features of coherence.
If you're a first time user, we suggest to go through the scenes in the established order. They will guide you through some key coherence and networking concepts:
Remember that playing the scenes on your own only shows part of the picture. To fully experience the networked aspects, you have to play in one or more built instances alongside the Unity Editor, and even better - with other people.
The Unity project can be downloaded from its Github repo. The Releases page contains pre-packaged .zip files.
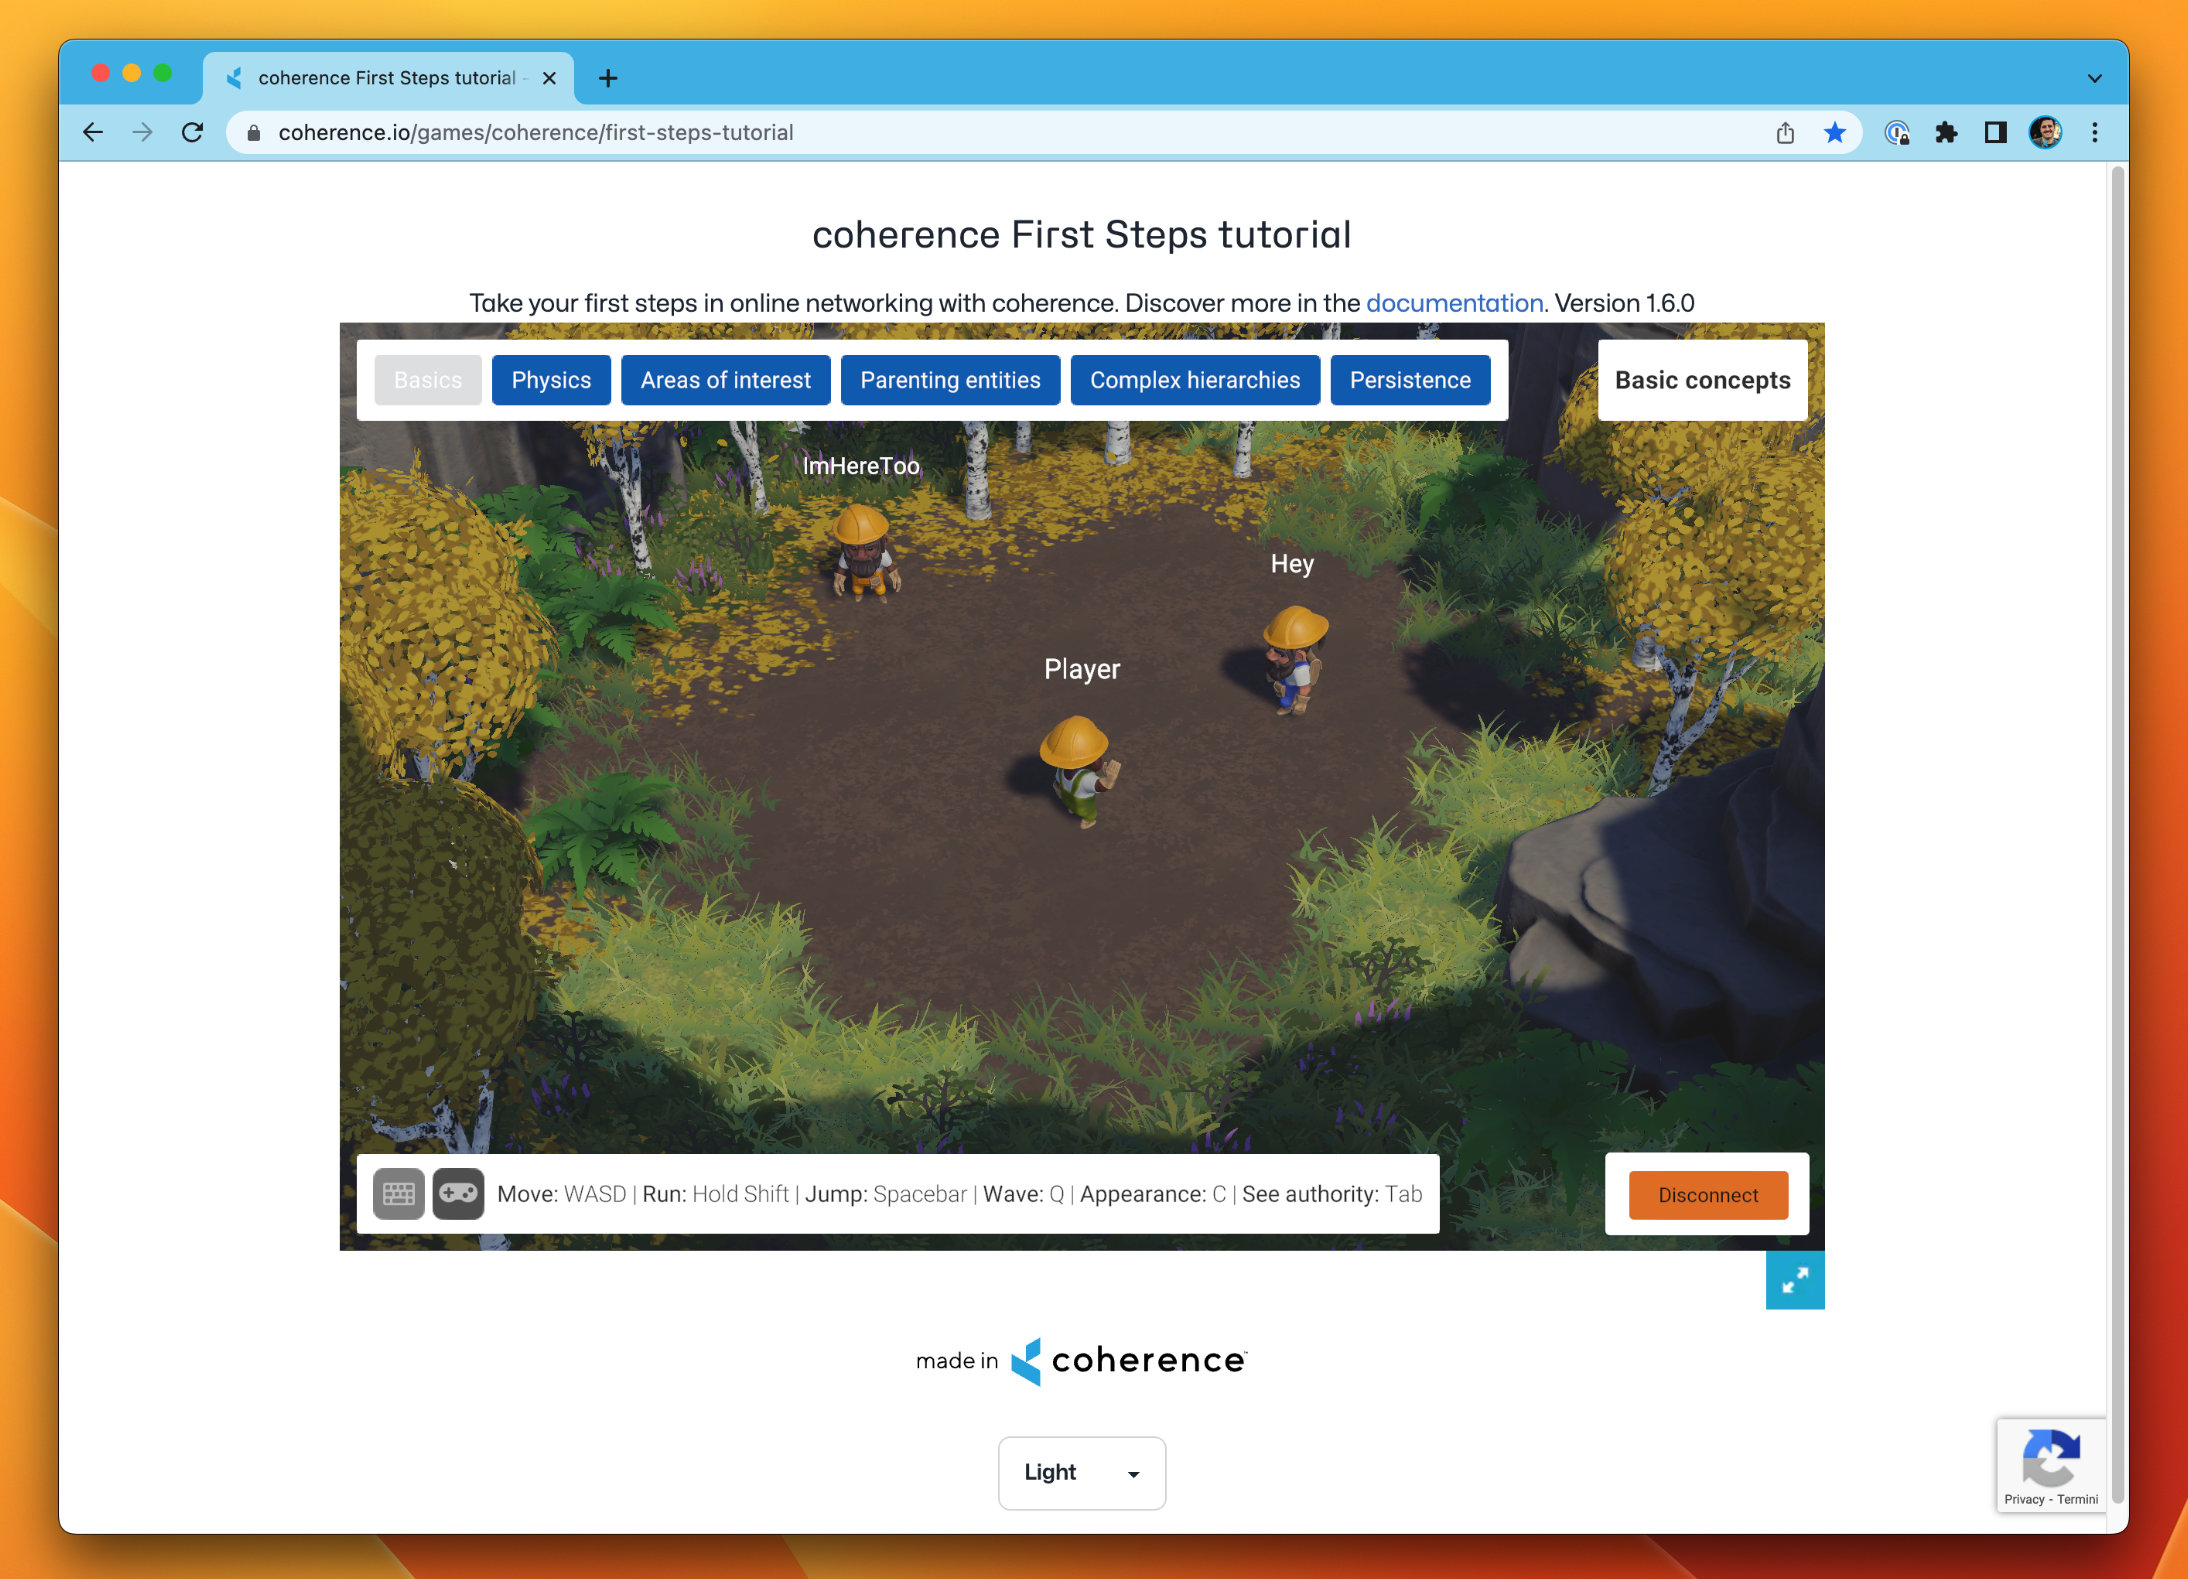
To quickly try a pre-built version of the game, head to this link and either play the WebGL build directly in the browser, or download one of the available desktop versions.
Share the link with friends and colleagues, and have them join you!
Once you open the project in the Unity Editor, you can build scenes via File > Build Settings, as per usual.
If you want to try all the scenes in one go, keep them all in the build and place SceneSelector as the first one in the list.
If you're working on an individual scene instead, bring that one to the top and deselect the others. The build will be faster.
To be able to connect, you need to also run a local Replication Server, that can be started via coherence > Local Replication Server > Run for Worlds.
You can try running multiple Clients rather than just two, and see how replication works for each of them. You can also have one Client just be the Unity Editor. This allows you to inspect GameObjects while the game runs.
Since you might be building frequently, we recommend making native builds (macOS or Windows) as they are created much faster than WebGL.
You can also upload a build to the cloud and share a link with friends. To do that, follow these steps or watch this quick video to learn how to host builds on the coherence Cloud.
The coherence package comes with several UI samples. The samples can get you connected to the Replication Server in no time, and are really useful for prototyping and learning.
In time, you can also edit the provided Prefabs and scripts however you want, to customise them to fit the style and functionality of your game.
The currently available samples are:
Lobbies Connection dialog
Matchmaking dialog
The difference between Rooms and Worlds is explained on this page: Rooms and Worlds, while Lobbies have somewhat of a different role, in that they are usually used in addition to Rooms in a game flow.
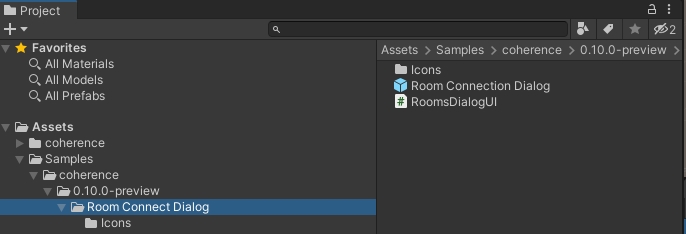
Each sample comes with a Prefab that can be added to your Scene. You can add them via coherence > Explore Samples.
Effectively these do two things for you:
Import the sample in the Samples directory of your project, if it isn't already.
Add the Prefab from the sample to your Scene.
Int the example above, that would be Room Connection Dialog.prefab.
You don't need to do anything else for the sample UIs to work (except of course, a Replication Server needs to be running to connect to it!).
My sample UI doesn't work!
If you notice that the samples are non-responsive to input, make sure you have a GameObject with an EventSystem component in the scene.
Also ensure that the mouse is not locked by a script. Is the cursor invisible? You might have a script that's modifying the cursor's lock state. In that case, modify the script or remove it.
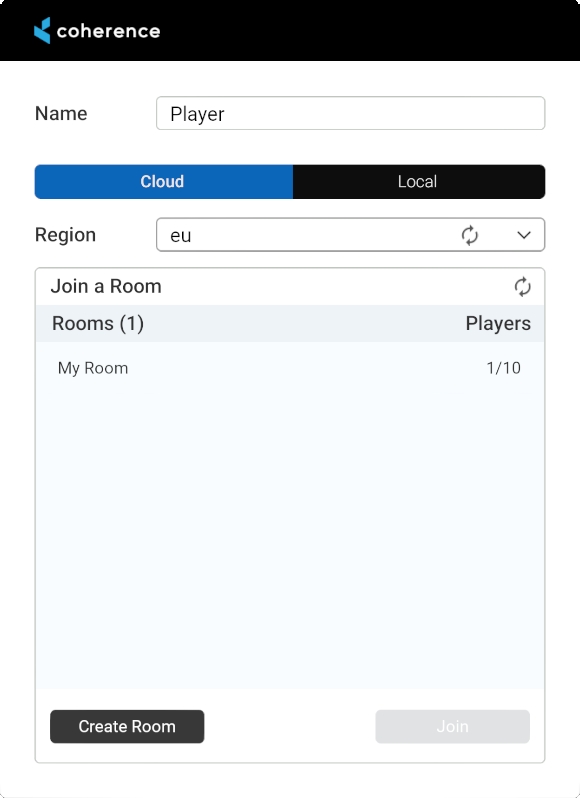
The Rooms Connect Dialog has a few helpful components that are explained below.
At the top of the dialog we have an input field for the player's name.
Next is a toggle between Cloud and Local. You can switch to Local if you want to connect to a Rooms Replication Server that is running on your computer.
Next is a dropdown for region selection. This dropdown is populated when regions are fetched from the coherence cloud. The default selection is the first available region. This is not enabled when you switch from Cloud to Local. This is also only relevant if you deploy your game to several different regions.
Next is a dropdown of available Rooms in the selected region (or in your local server if using the Local mode).
After selecting a Room from the list the Join button can be used to join that Room.
If you know someone has created a room but you don't see it, you can manually refresh the rooms list using the Refresh button.
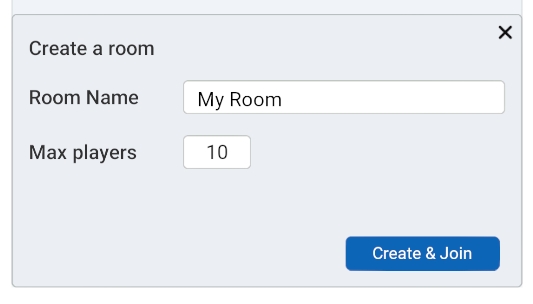
The Create a room section adds a Room to the selected region.
This section contains controls for setting a Room's name and maximum player capacity. Pressing the Create button will create a Room with the specified parameters and immediately add it to the Room Dropdown above. Create and Join will create the Room, and also join it immediately.
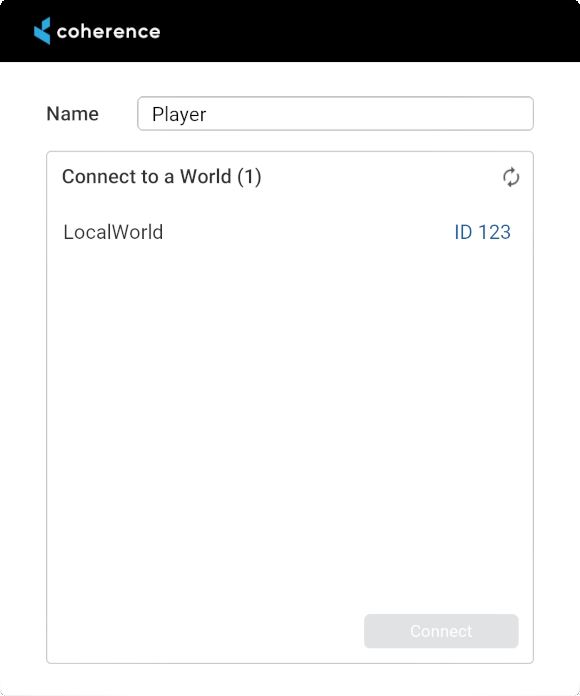
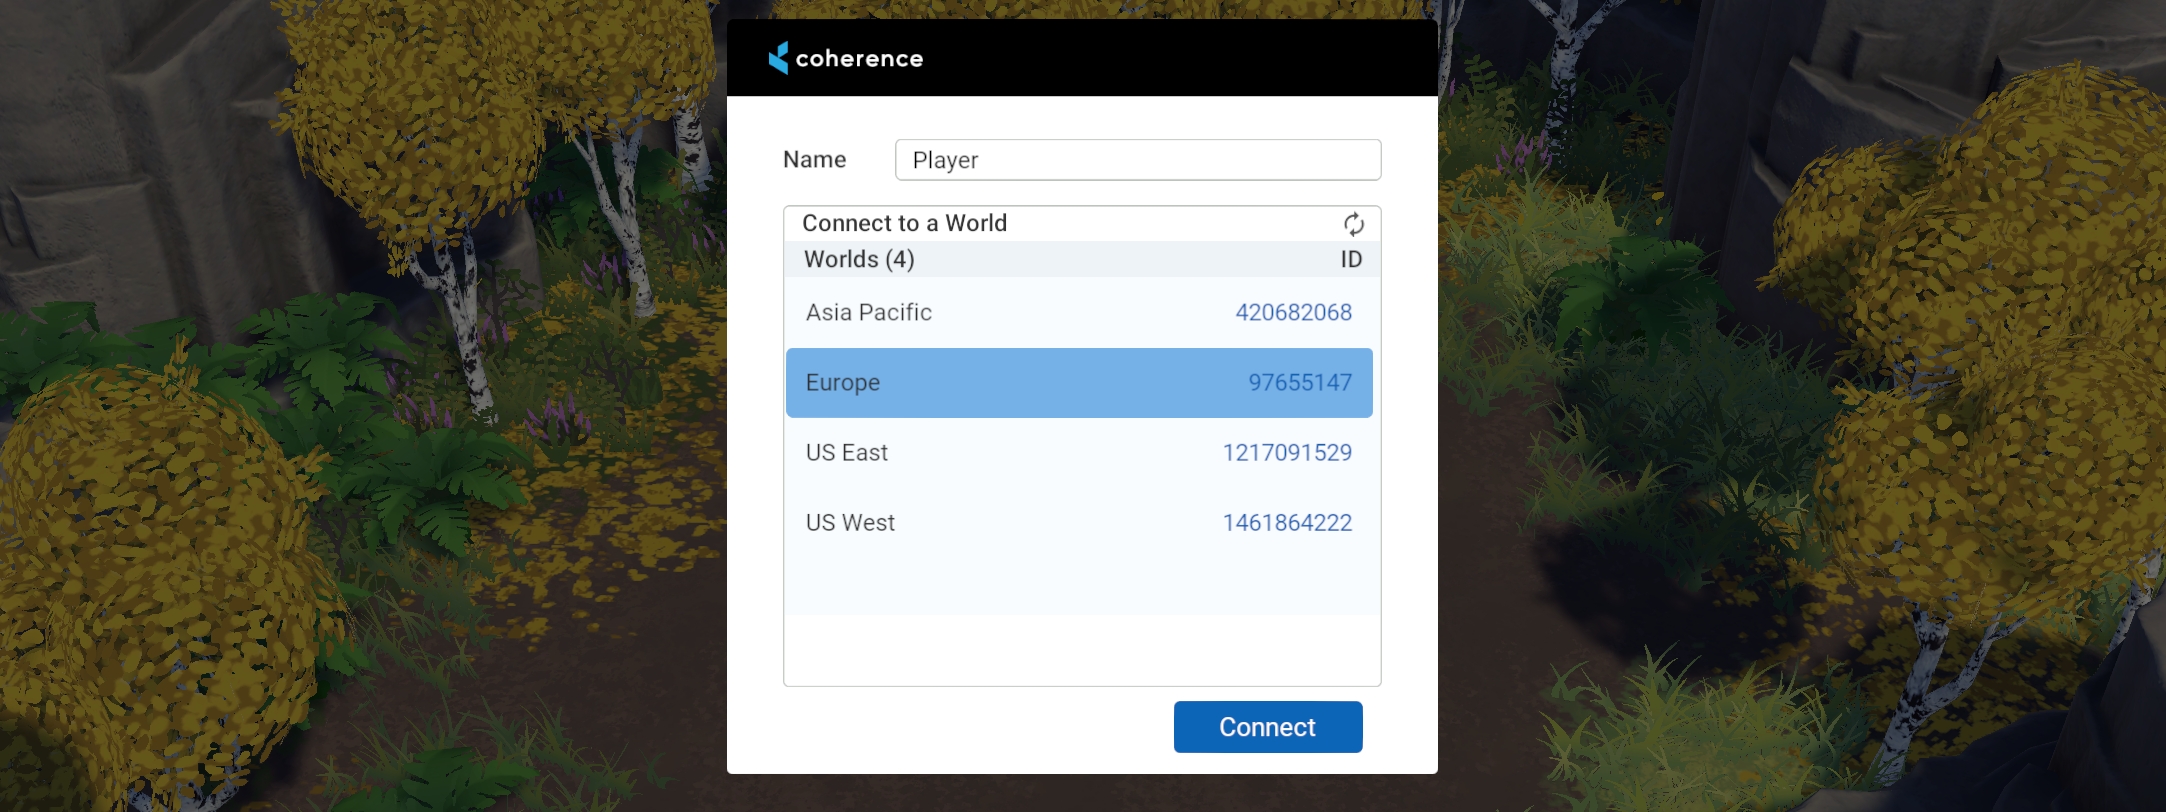
The Worlds Connect Dialog is a good option to start simple. It simply holds a dropdown for region selection, an input field for the players name, and a Connect button.
If you start a local World Replication Server, it will appear as LocalWorld. Similarly if there are Worlds running in the coherence Cloud, they will be listed here.
Future versions of coherence won't override your changes. If you upgrade to a newer version of coherence and import a new sample, they will be imported in a separate folder named after the coherence version.
If you want the new sample to overwrite the old one, first rename the folder in which the samples are, then import the new version.
We have seen a lot of examples where objects belonging to a Client would disappear with them when they disconnect. We call these objects session-based entities.
But coherence also has a built-in system to make objects survive the disconnection of a Client, and be ready to be adopted by another Client or a Simulator. We call these objects persistent. Persistent objects stay on the Replication Server even if no Client is connected, creating the feeling that the game world is alive beyond an individual player session.
| |
WASD or Left stick: Move character
Hold Shift or Shoulder button left: Run
P or Right shoulder button: Plant a flower (hold to preview placement)
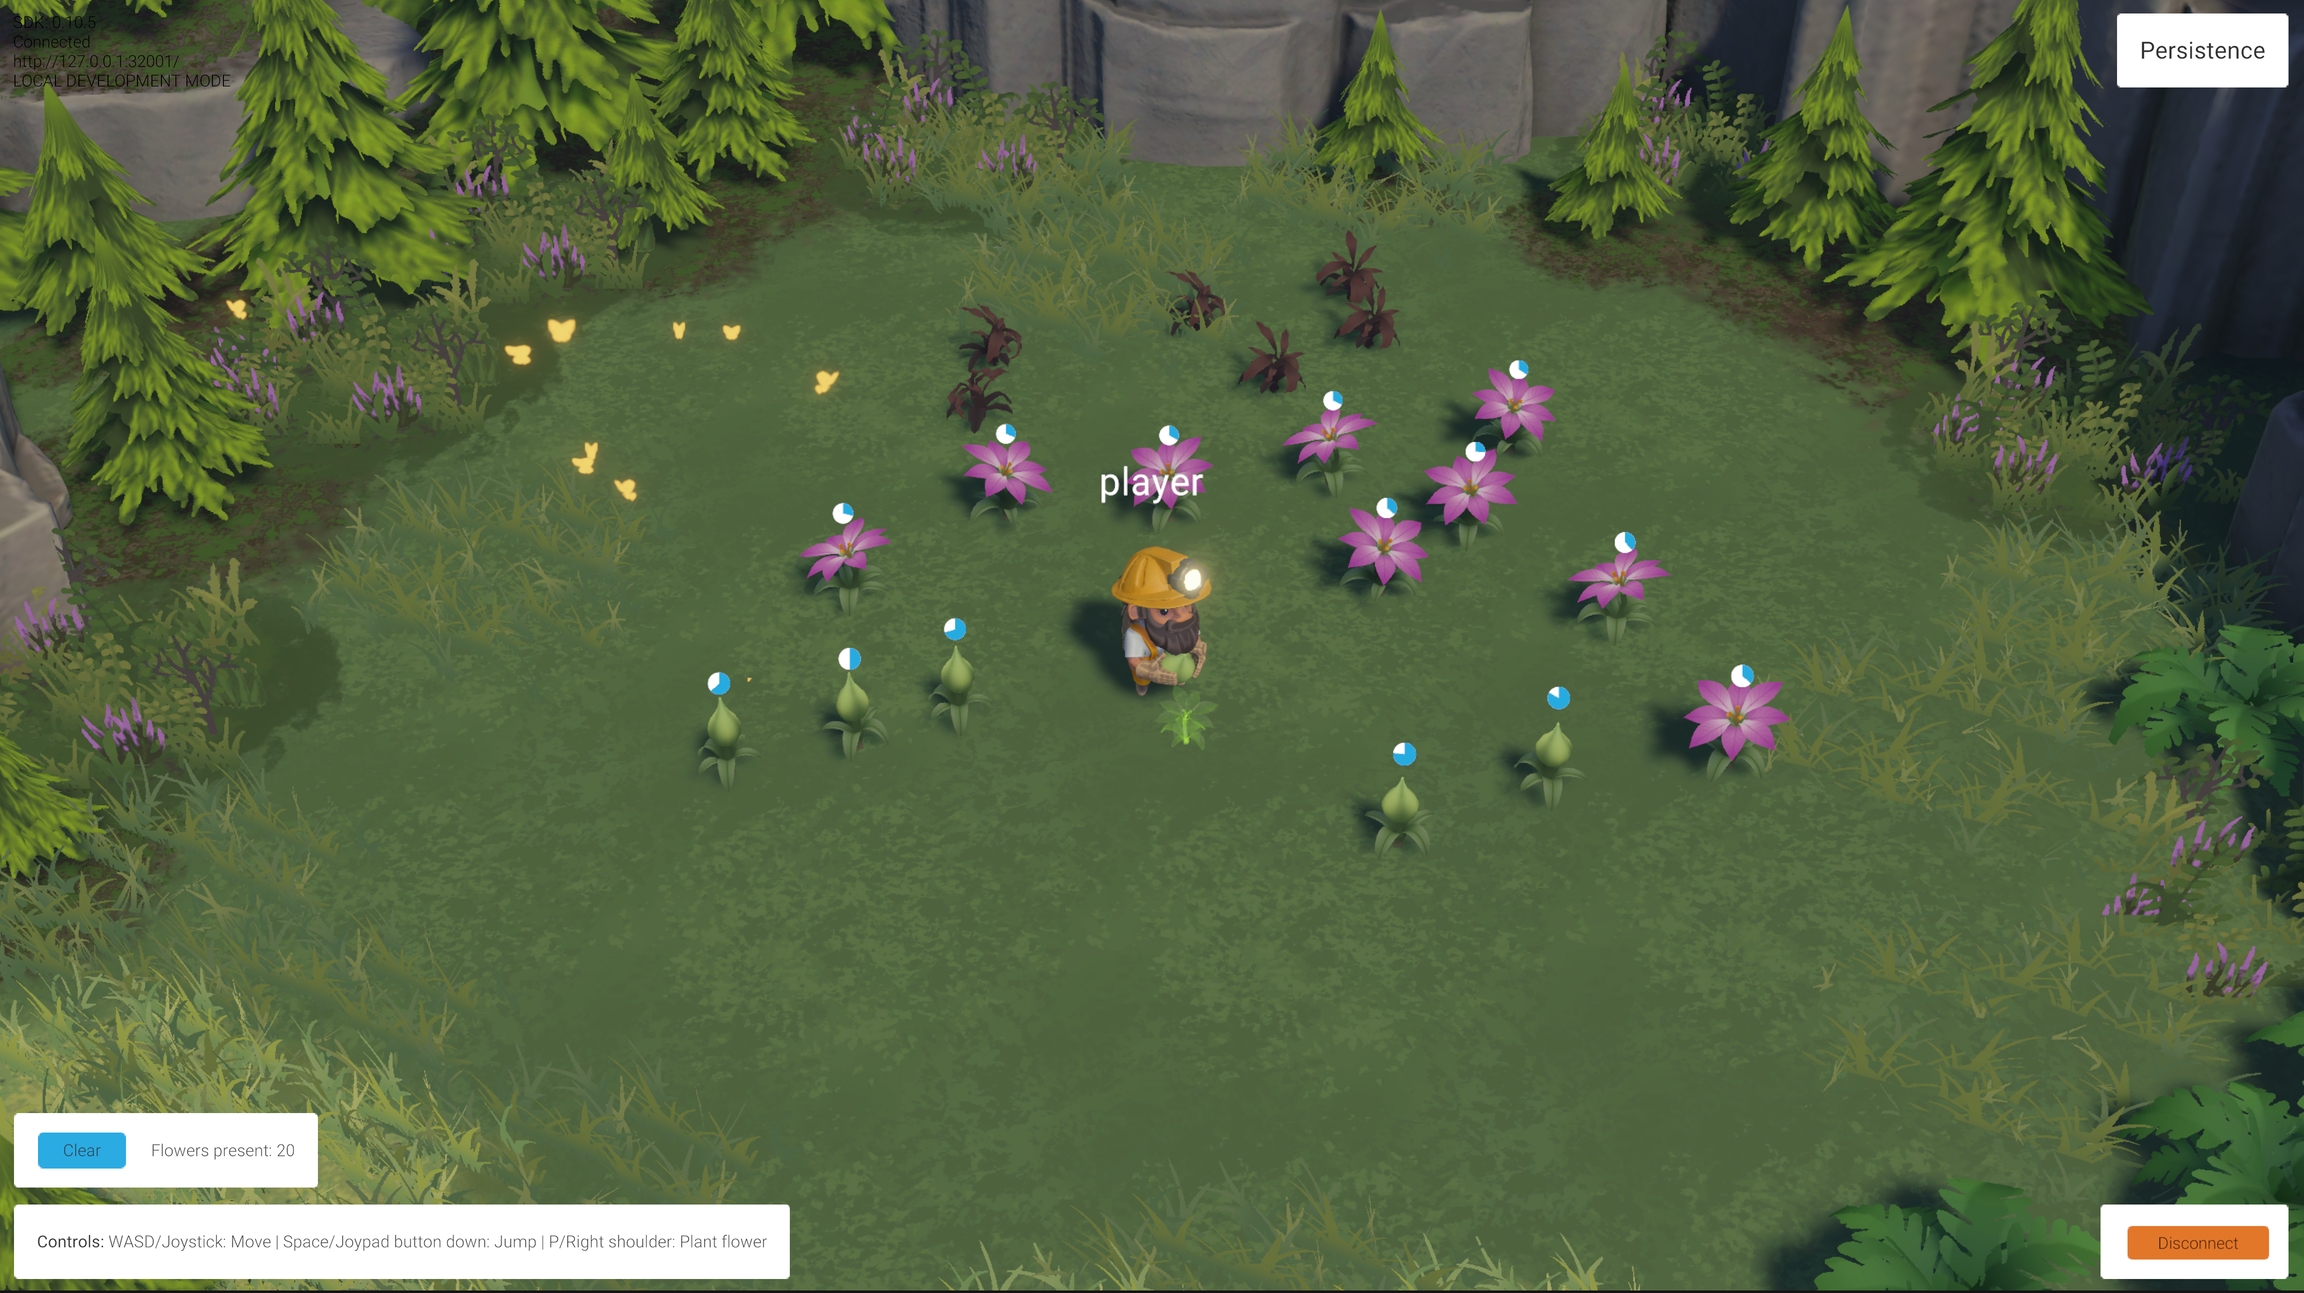
Players can plant flowers in this little valley. Each flower has 3 phases: starts as a bud, blooms into a full flower, and then withers after some time.
Creating a flower generates a new, persistent network entity. Even if the Client disconnects, the flower will persist on the server. When they reconnect, they will see the flower at their correct stage of growth (this is a little trick ).
Planting too many flowers starts erasing older flowers. A button in the UI allows clearing all flowers (belonging to any player) at any time.
When using the plant action, any connected player instantiates a copy of the Flower Prefab (located in the /Prefabs/Nature folder).
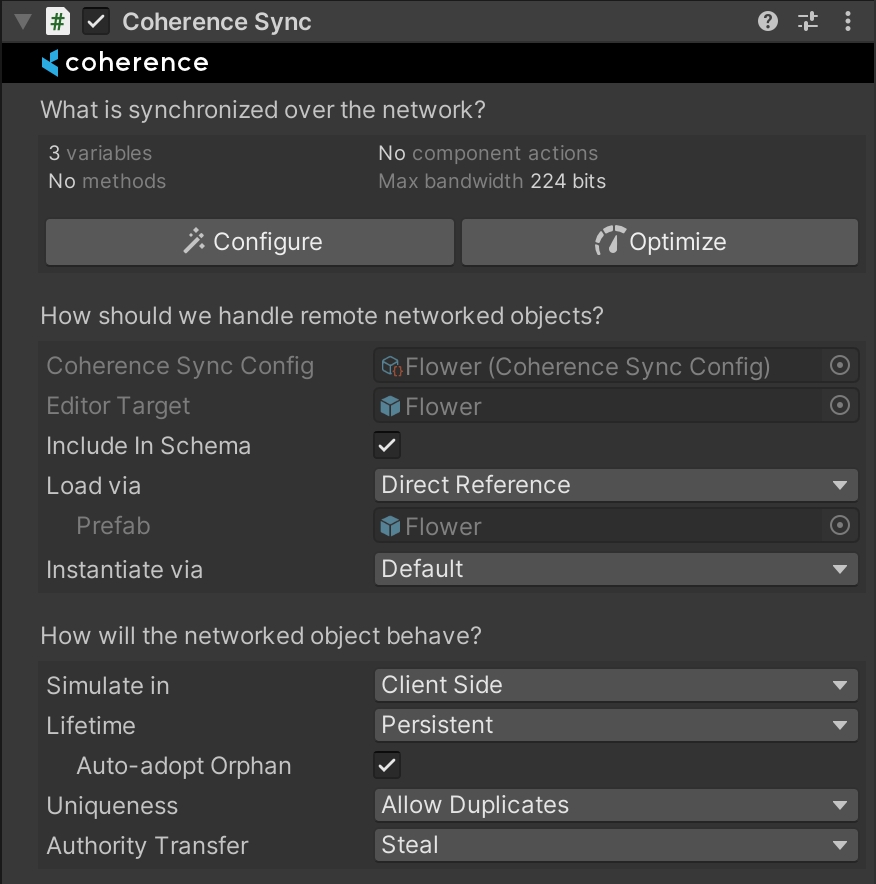
By selecting the Prefab asset, we can see its CoherenceSync component is set up like this:
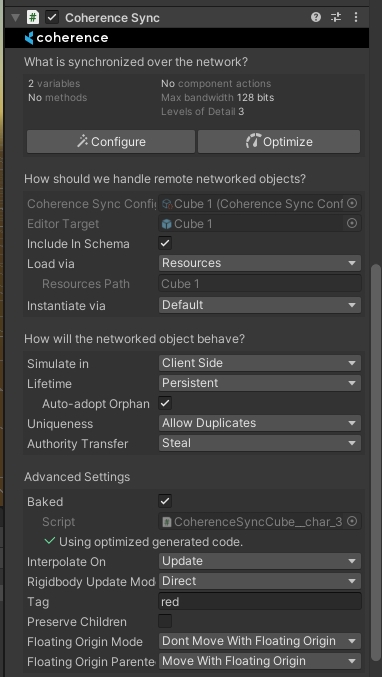
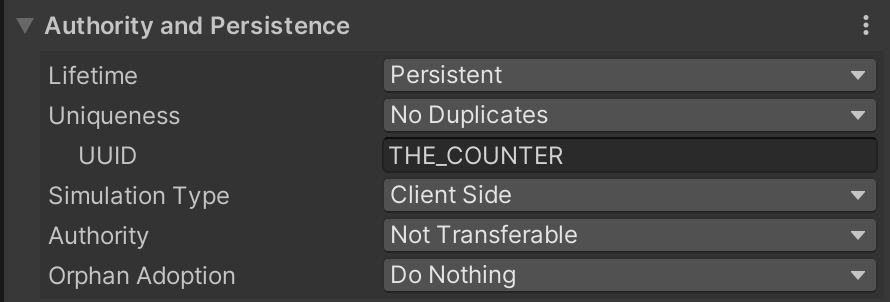
In particular, notice how the Lifetime property is set to Persistent. This means that when the Client who plants a flower disconnects, the network entity won't be automatically destroyed. Auto-adopt Orphan set to on makes it so the next player who sees the flower instantly adopts it, and keeps simulating its growth.
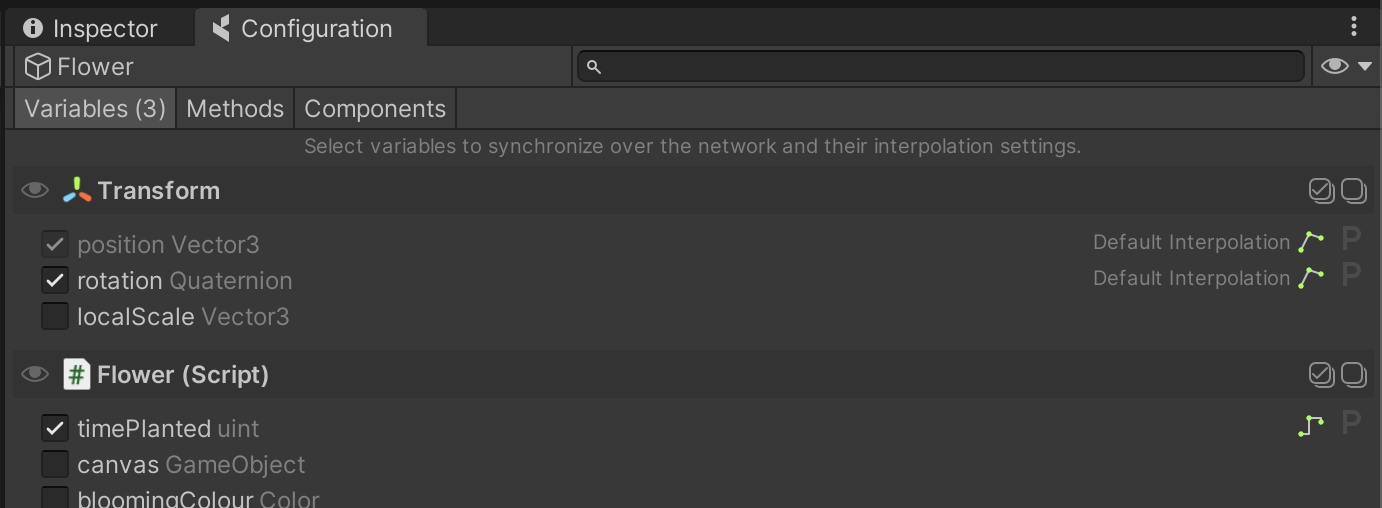
Opening coherence's Configuration window, you will see that we sync position, rotation, and a variable called timePlanted:
Once a flower has spawned, all of its logic runs locally (no coherence involved). An internal timer calculates what phase it should be in by looking at the timePlanted property and doing the math, and playing the appropriate animations and particles as a result.
To achieve this, the flowers of this scene store the Flower.timePlanted value on the Replication Server. A Replication Server with no connected Clients is dormant, and has a very low cost to run. So when nobody's connected the flowers are not actually simulating, they are just waiting.
When a new Client comes online and this value is synced to them, they immediately fast-forward the phase of the flower to the correct value, and then they start simulating locally as normal.
This gives the players the perception that things are still running even when they are not connected.
This setup is not bulletproof, and could be easily cheated if a player comes online with a modified Client, changing the algorithm calculating the flowers' phase.
But for a game in which this calculation is not critical, especially if it doesn't affect other player's experience of the game, this can be a nice setup to cut some costs.
Every Client can, at any time, remove all flowers from the scene by clicking a button in the UI.
It's important to remember that you shouldn't call Destroy() on a network entity on which the Client doesn't have authority on. To achieve this, we first request authority on remote flowers and listen for a reply. Once obtained it, we destroy them.
Check the code at the end of the Flower script:
Getting updates about every entity in the whole scene is unfeasible for big-world games, like MMOs. For this, coherence has a flexible system for creating areas of interest, and getting updates only about the entities that each Client cares about, using a tool called Live Query.
|
WASD or Left stick: Move character
Hold Shift or Shoulder button left: Run
Spacebar or Joypad button down: Jump
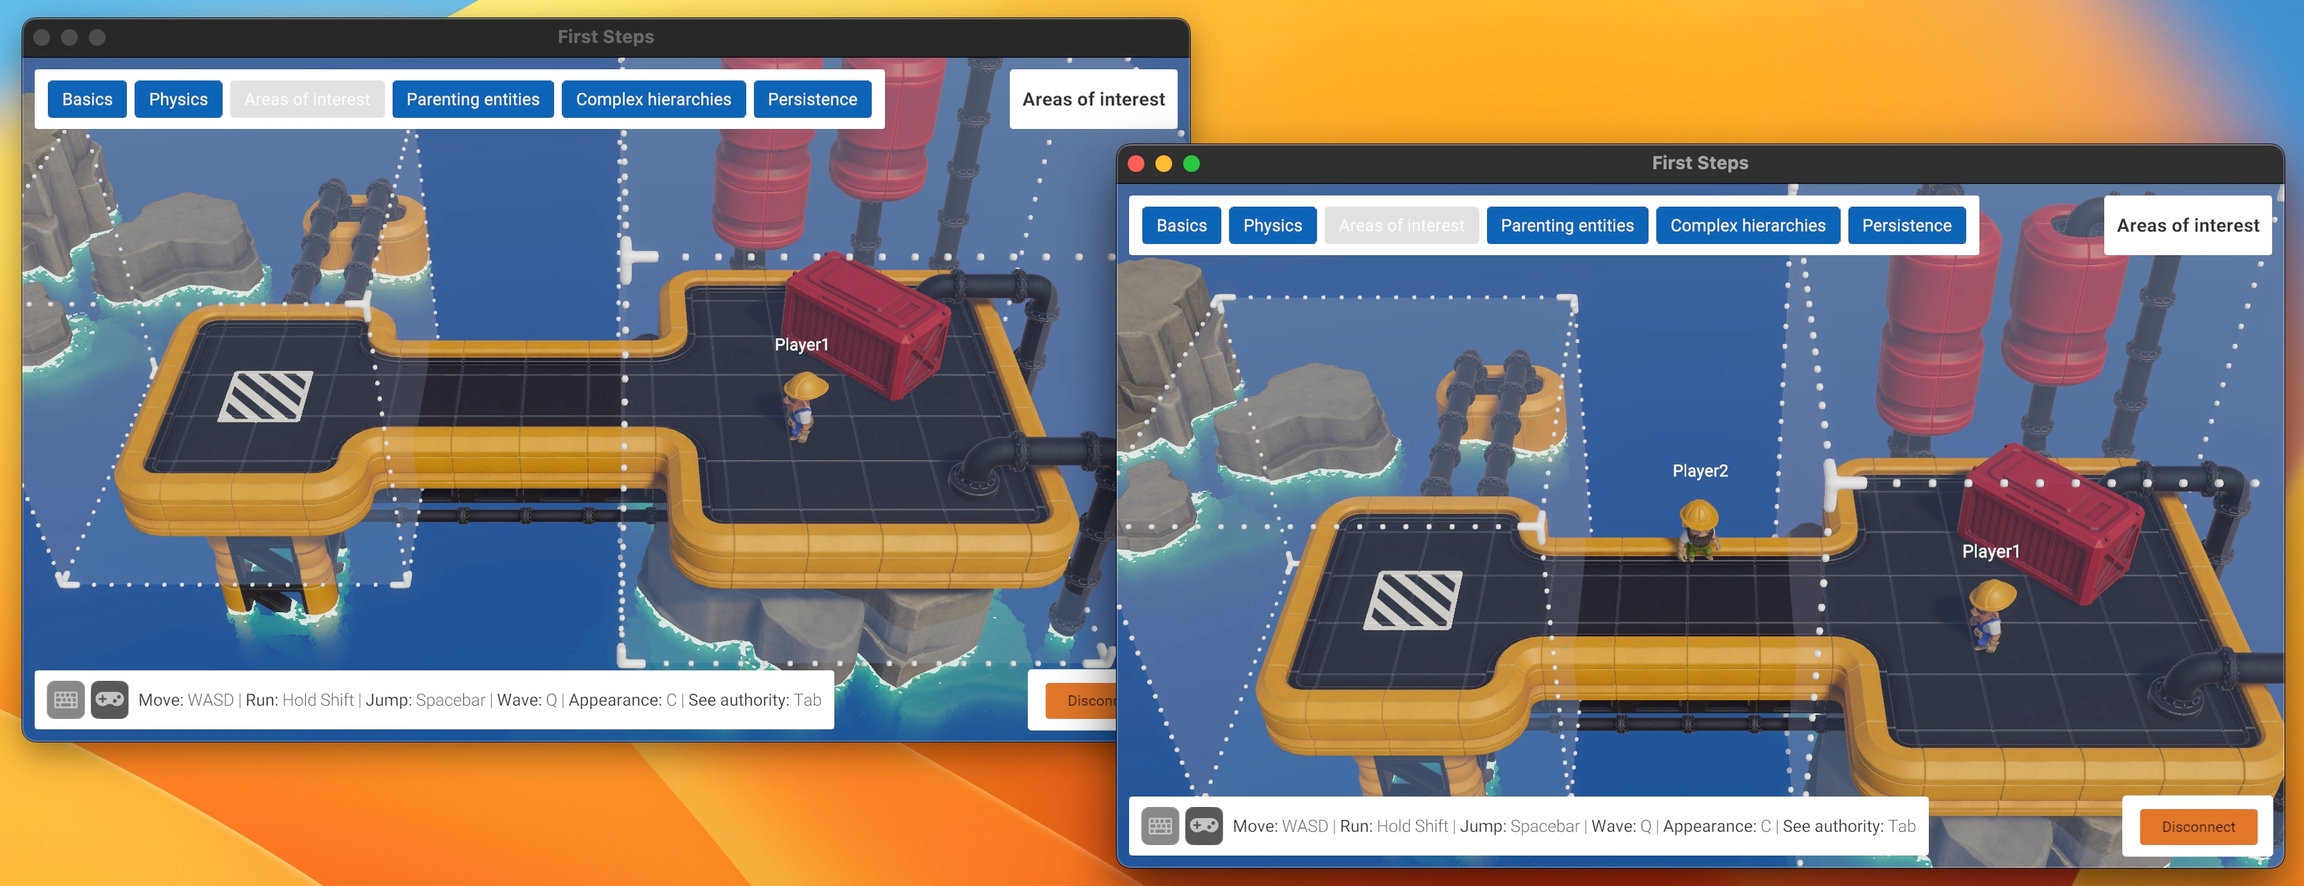
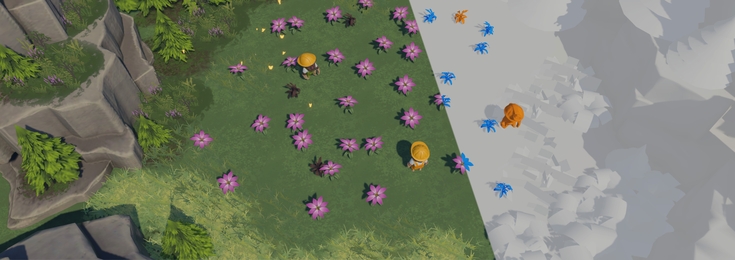
This scene contains two cubes that represent areas of interest. Every connected Client can only see other players if they are standing inside one of these cubes.
Select one of the two GameObjects named LiveQuery. You will see they have a CoherenceLiveQuery component:
This component defines an area of interest, in this case a 10x10x10 cube (5 is the Extent). This is telling the Replication Server that this Clients is only interested in network entities that are physically present within this volume.
If a Client has to know about the whole world, it's just enough to set the Live Query to Infinite
In addition, Live Queries can be moved in space. They can be parented to the camera, to the player, or to other moving elements that denote an area of interest - depending on the type of game.
It is also possible, like in this scene, to have more than one Live Query. They will act as additive, requesting updates from entities that are within at least one of the volumes.
Notice that at least one Live Query is needed: a Client with no Live Query in the scene will receive no updates at all.
If you explored previous scenes you might have noticed that GameObjects with a Live Query component were actually there, but in this scene we gave them a special visual representation, just for demo purposes.
Try moving in and out of volumes. You will notice that network-instantiation takes care of destroying the GameObject representing a remote entity that exits a Live Query, and reinstantiates it when it enters one again.
Also, notice that the player belonging to the local Client doesn't disappear. coherence will stop sending updates about this instance to other Clients, but the instance is not destroyed locally, as long as the Client retains authority on it.
If a GameObject can be in a state that needs to be computed somehow, it might not appear correctly in the instant it gets recreated.
Every now and then it makes sense to parent network entities to each other, for instance when creating vehicles or an elevator. In this sample scene we'll see what are the implications of that, and how coherence uses this to optimize network traffic.
Moving platforms | | |
WASD or Left stick: Move character
Hold Shift or Shoulder button left: Run
Spacebar or Joypad button down: Jump
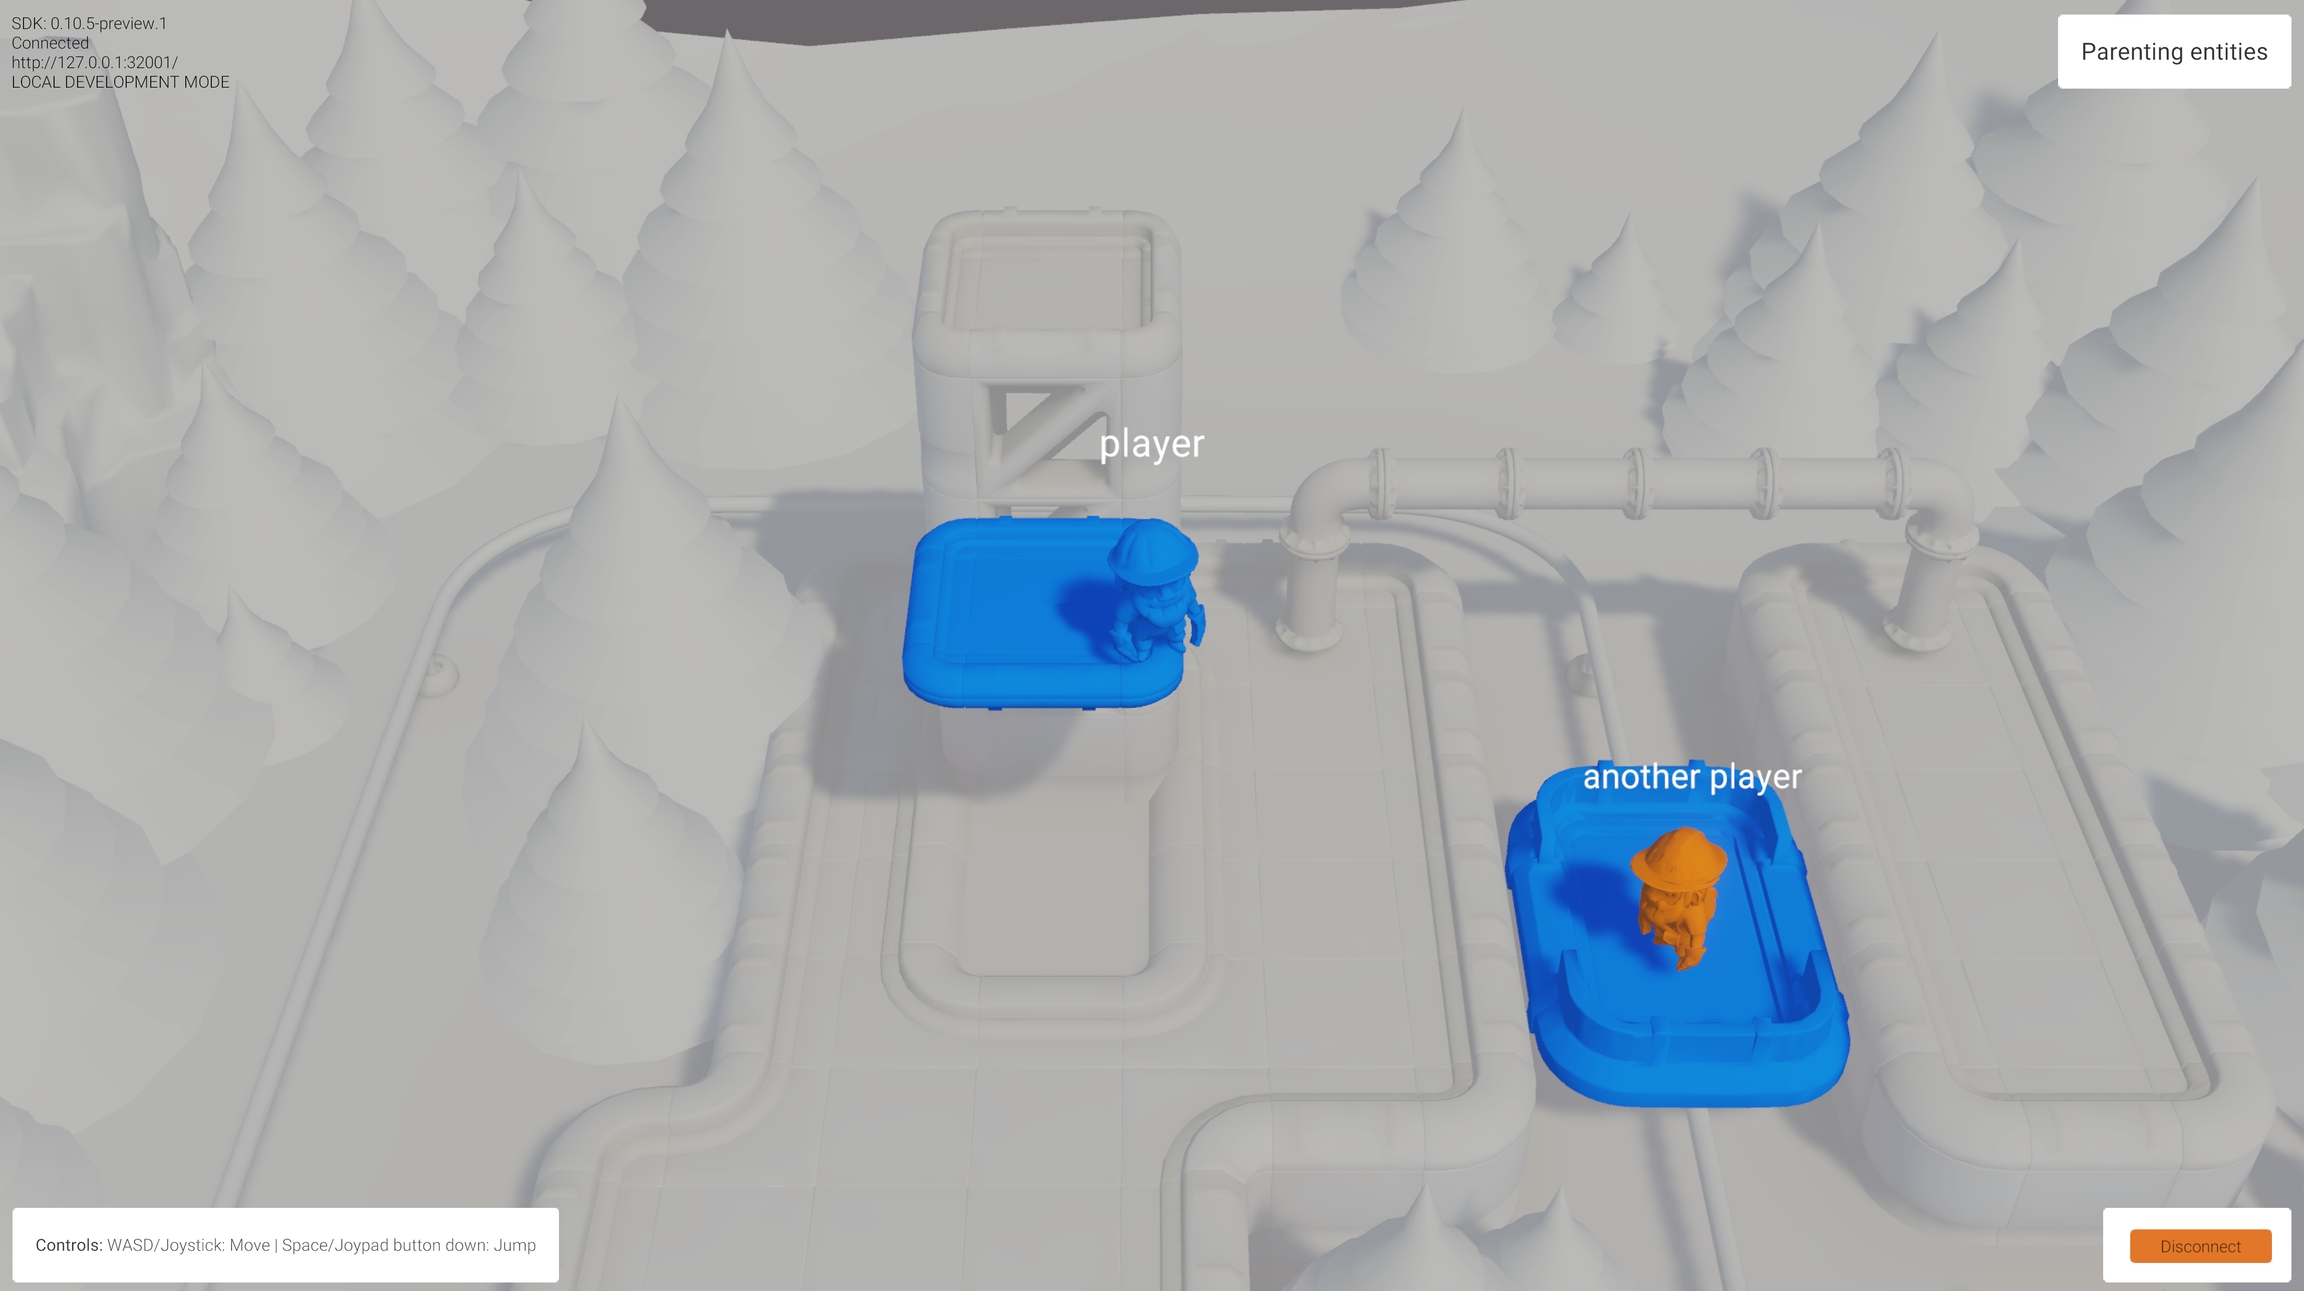
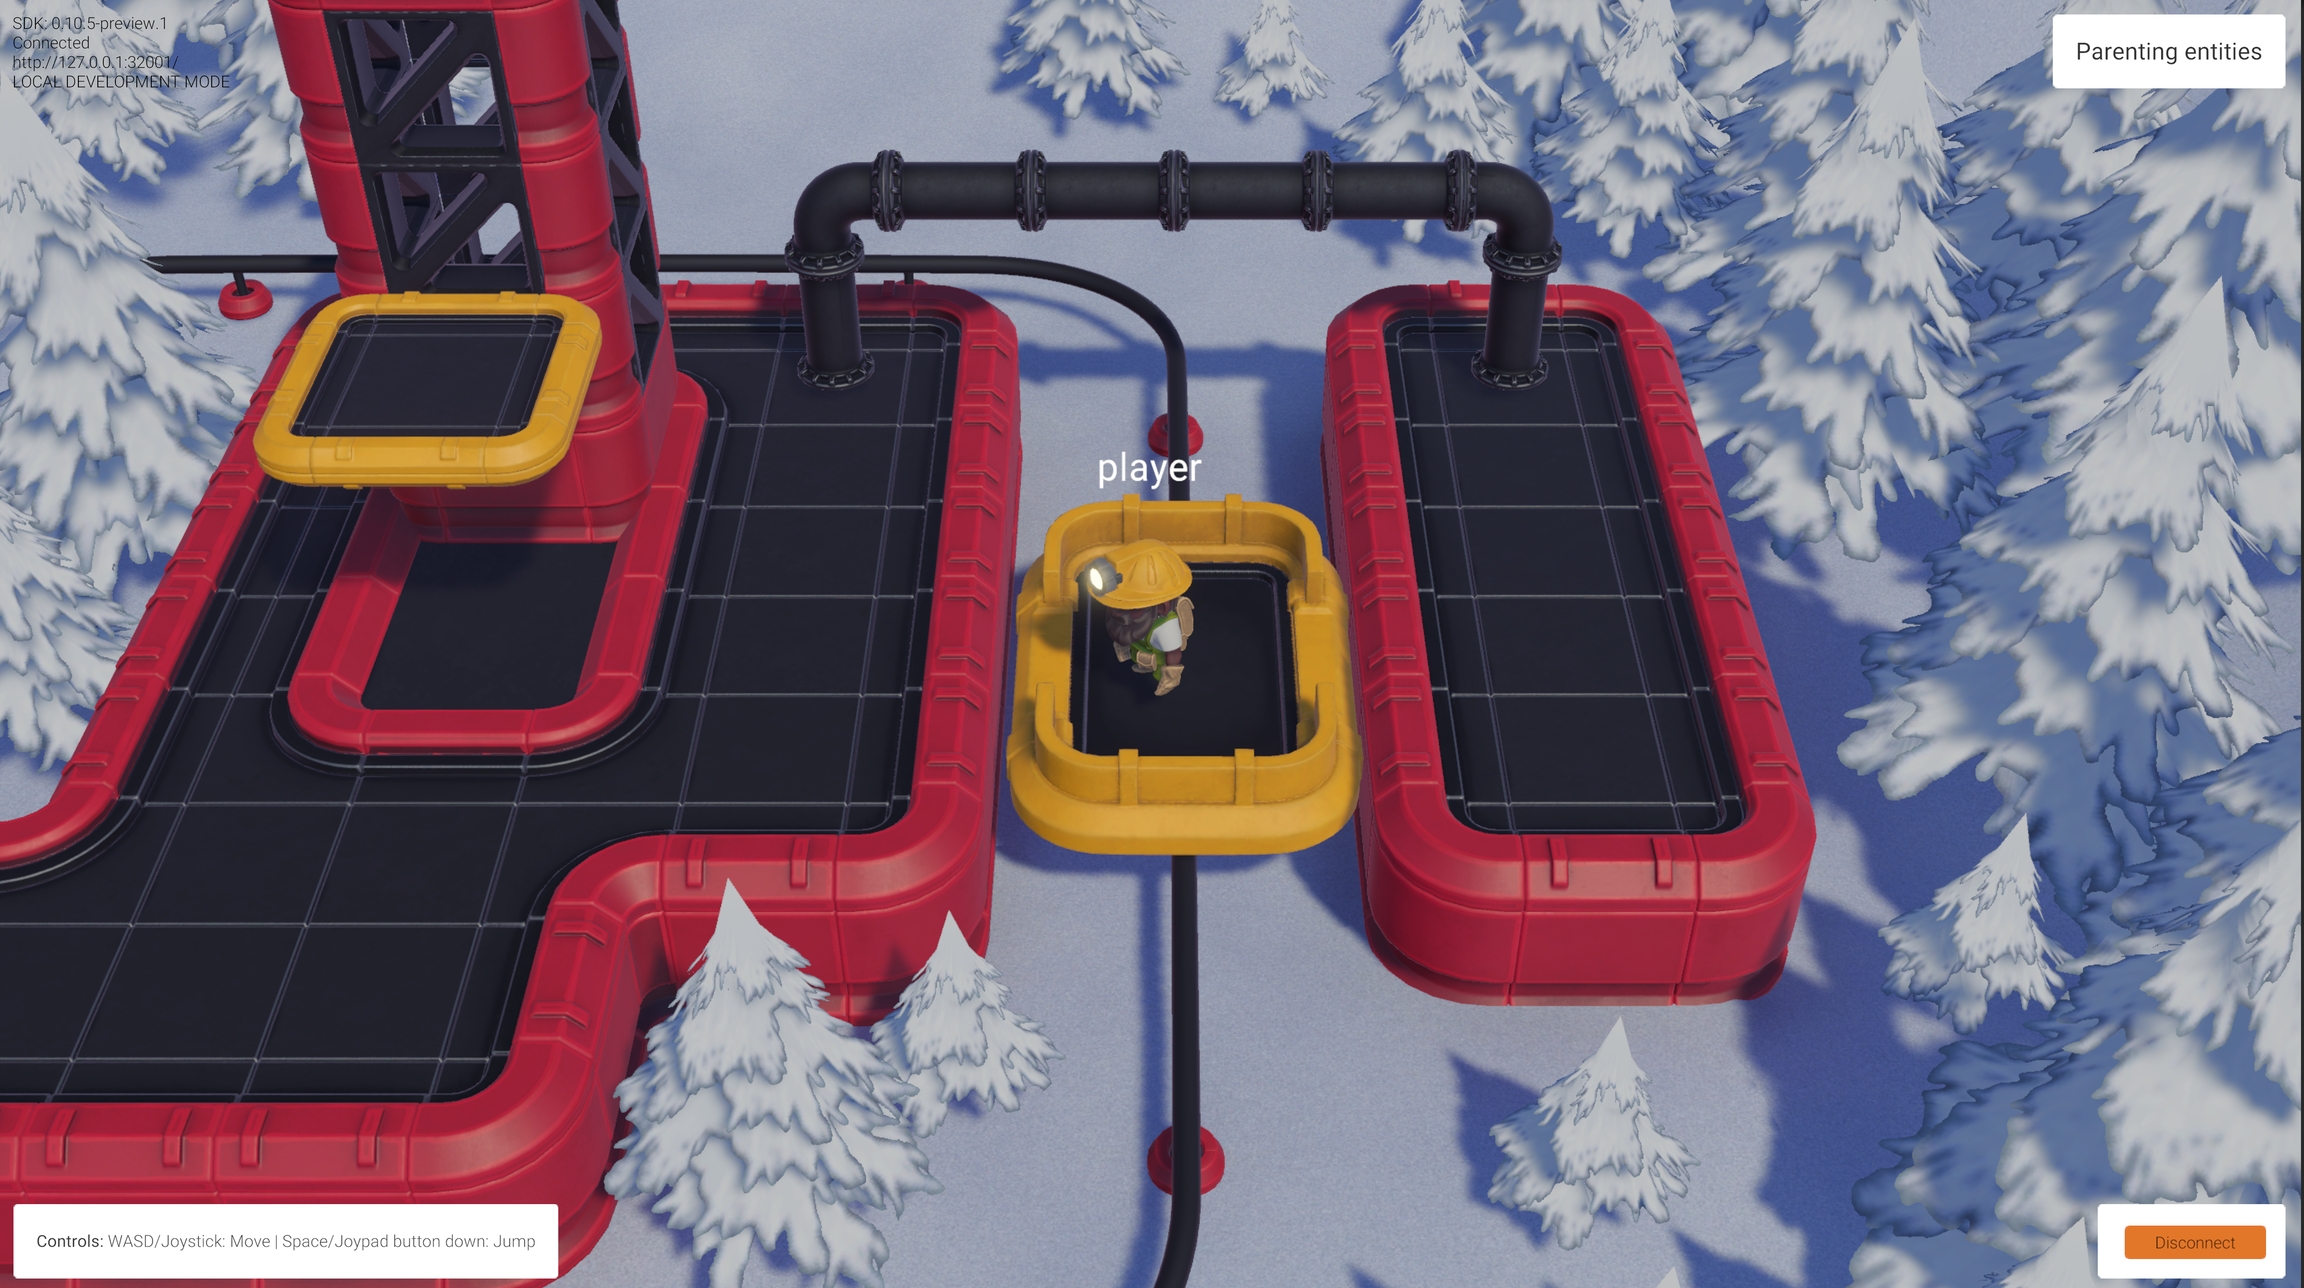
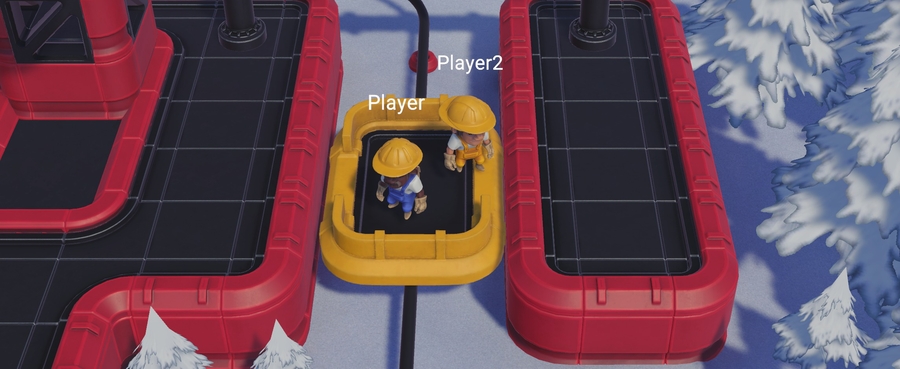
This wintery setting contains 2 moving platforms running along splines. Players can jump on them and they will receive the platform's movement and rotation, while still being able to move relative to the platform itself.
This scene doesn't require anything special in terms of network setup to work.
Direct parenting of network entities in coherence happens exactly like usual, with a simple transform.SetParent(). The player's Move script is set to recognize the moving platforms when it lands on them, and it just parents itself to it.
As for the platforms, they are just moving themselves as kinematic rigid bodies, following the path of their spline (see the FloatingPlatform script). Their position and rotation is synced on the network, and the first Client to connect assumes authority over them.
Once directly parented, coherence automatically switches to sync the child's position and rotation as local, rather than in world space. This means that when child entities don't move within their parent, no data about them is being sent across the network.
Imagine for instance a situation where 3 players are riding one of the platforms and not moving, only the coordinates of the platform are being synced every frame.
You might have noticed we always mentioned "direct" parenting. One limitation of this simple setup is that the parented network entity has to be a first-level child of the parent one. This doesn't exclude that the parent can have other child GameObjects (and other networked entities!), but networked entities have to be a direct child.
A hierarchy could look like this:
Platform
Player
Character graphics
Bones
...
Platform's graphics
...
(In bold is the root of each Prefab, which has a CoherenceSync component)
You can even parent multiple network entities to each other. For example, a networked character holding a networked crate, riding a networked elevator, on a networked spaceship. In that case:
Spaceship
Elevator1
Elevator graphics
Elevator2
Player
Crate
Character graphics
Elevator graphics
Spaceship graphics
...
When parenting entities, it is important that the child's position, rotation, and local scale are replicated so that all Clients see the relative state of the child when connected to a parent. If these properties are not replicated on the child, it is possible that different Clients will see different states of the child relative to the parent.
In this sample we look at how to network simple physics simulated directly on the Clients, and the implications of this setup.
If we were making a game that relied on precise physics at play between the players (like a sports match, for instance), we would probably go with a setup where the Clients connect to a that runs the physics and prevents cheating.
However, that makes running the game much more expensive for the developer, since a Simulator has to be always on.
Physics | | Uniqueness |
WASD or Left stick: Move character
Hold Shift or Shoulder button left: Run
Spacebar or Joypad button down: Jump
E or Joypad button left: Pick up / throw objects
This scene features a few crates that the players can pick up and throw around. Who runs the physics simulation here? You could say that everyone runs their part.
Let's take a closer look at the setup.
Select one of the crates in the scene. You can see that they have normal Box Collider and Rigidbody components. Up until a player is connected, they are being simulated locally. In fact if you press Play, they will fall down and settle.
The crates also have a CoherenceSync component. The first player to connect gets authority over them, and begins simulating the physics for them.
That Client now syncs 5 values over the network, including the most important ones that will drive the crate's motion: Transform.position and Transform.rotation.
On other Clients however (the ones that connect after the first one) these crates will become "remote". Their Rigidbody will become kinematic, so that now their movement is controlled by the authority (i.e. the first Client).
At this point, the first Client to connect is simulating all the crates. However, if we were to leave things like this, interacting with physical objects that are simulated by another Client would be quite unpleasant due to the lag.
To make it better, other Clients steal authority over crates, whenever they either:
Touch/collide with a crate directly
Pick a crate up
In code, this authority switch is a trivial operation, done in a single line. You can find the code in the Grabbable class. Essentially, it boils down to this:
As you can see, it's good practice to ask first if the requesting script already has authority over an object, to avoid wasted work.
If the request succeeds, the instance of the crate on the requesting Client becomes authoritative, and the Client starts simulating its physics. On the other Client (the previous owner) the object becomes remote (and its Rigidbody kinematic), and is now just receiving position and rotation over the network.
Careful! Since authority request is a network operation, you can't run follow-up code right away after having requested it. It's good practice to set a listener to the events that are available on the Coherence Sync component, like this:
This way, as soon as the reply comes back, we can perform the rest of the code.
Also note that while it's totally possible to configure an object so that Clients can just steal authority from each other, we configured the crates here to require an authority request.
When they want authority, Clients have to request it and most importantly, wait for an answer.
We implemented this request / answer mechanism to avoid problems of concurrency, where two players are requesting authority on a crate at the same time, and end up with a broken state because the game code assumes that they both got it.
So who is running the physics, after all? We can now say that it's everyone at the same time, as roles change all the time.
As mentioned before, pressing Tab (or clicking the Joystick) switches to an authority view. It's very interesting to see how crates switch sides when a player interacts with them.
For more on authority, take a look inside the Grabbable class. It has more code regarding authority events, all commented.
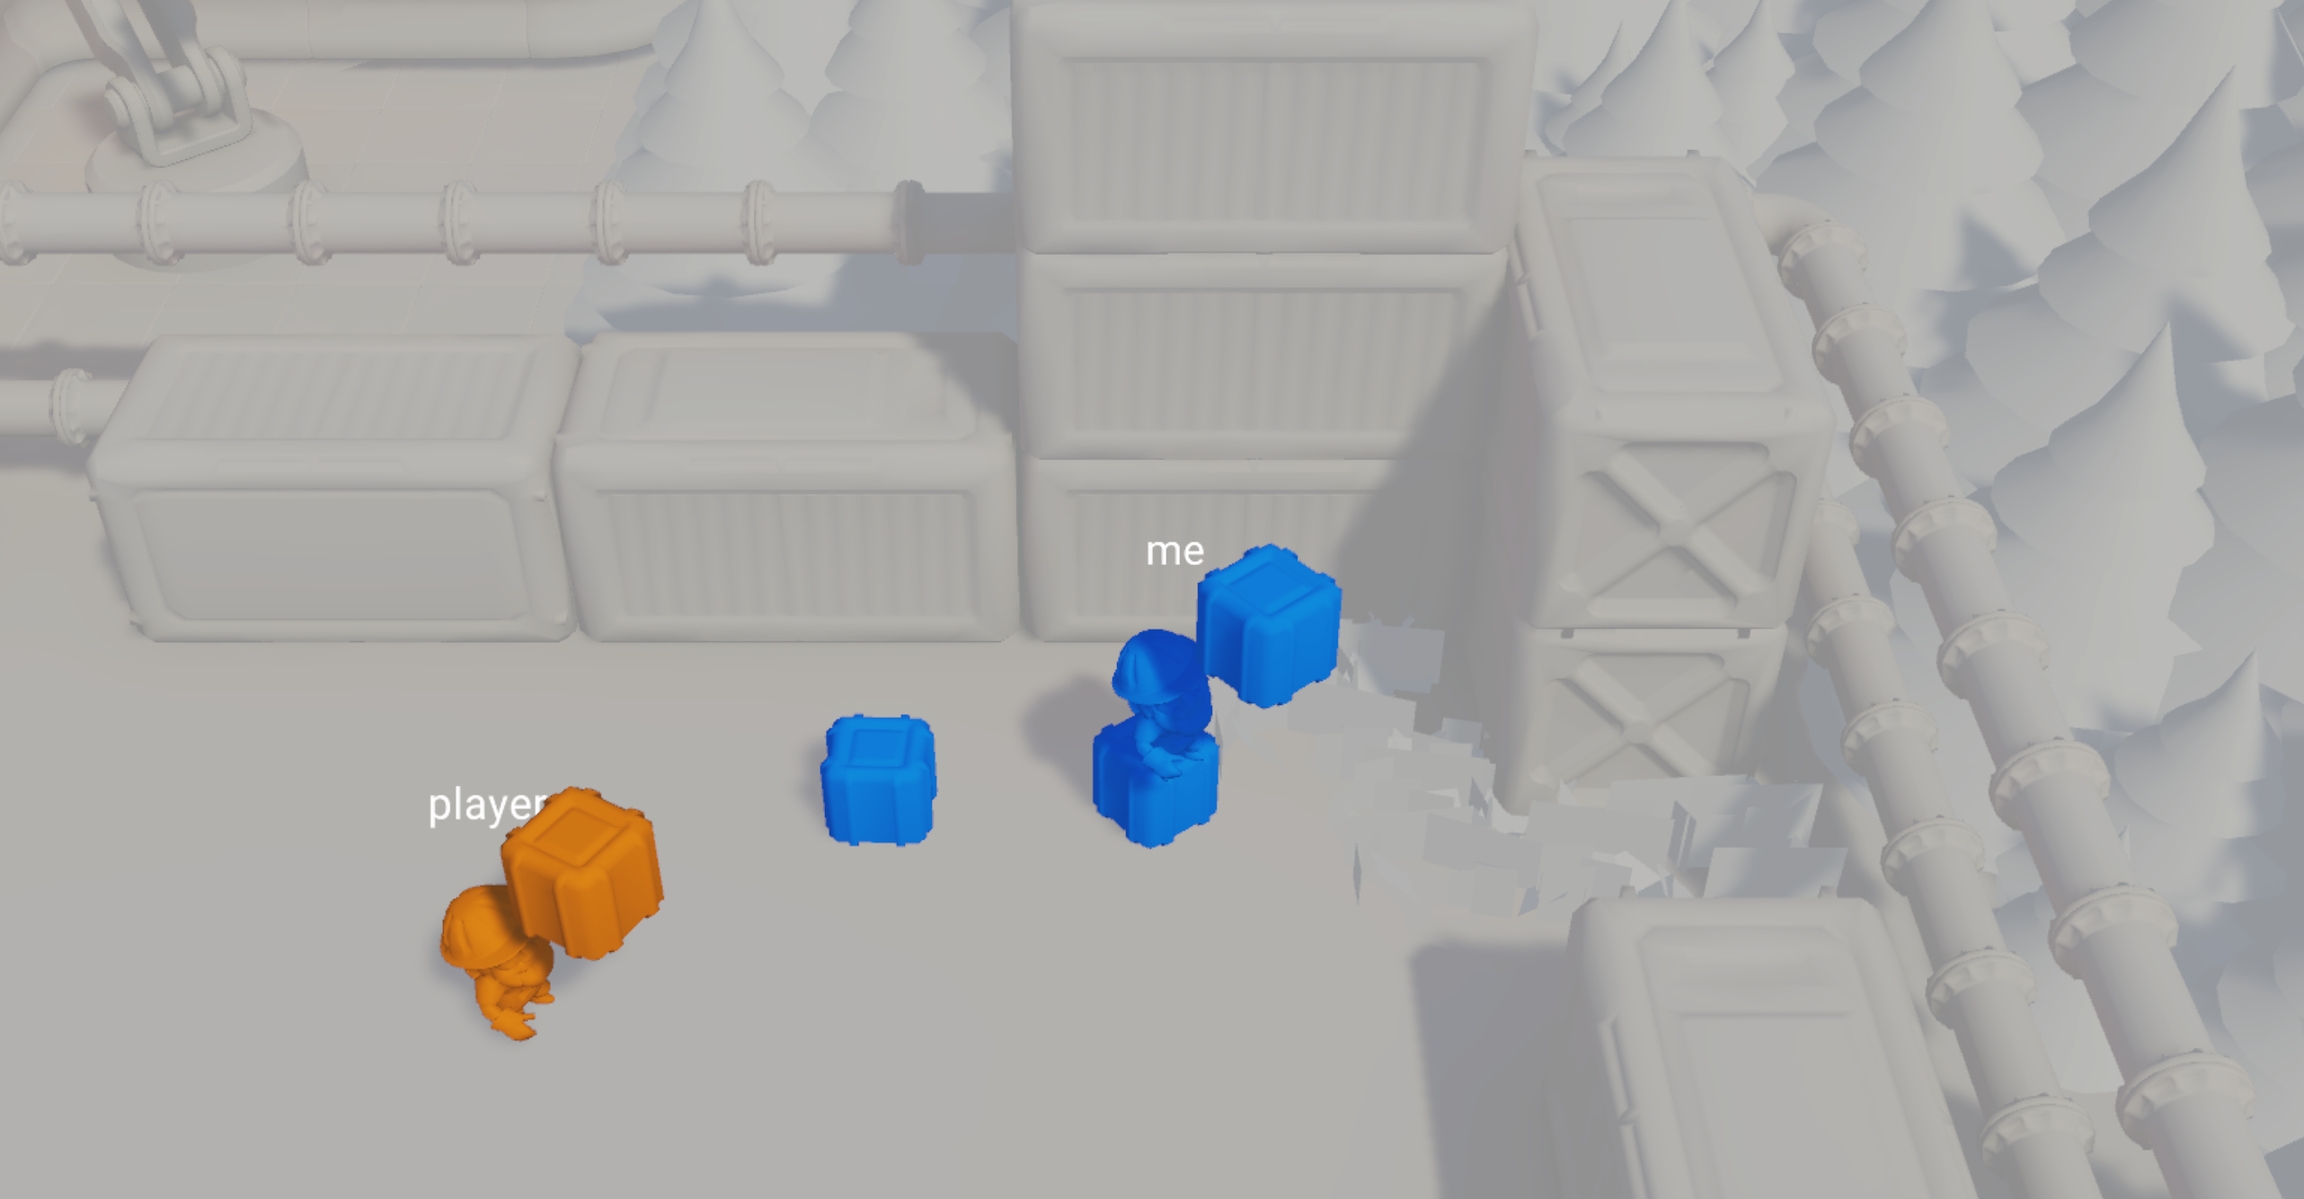
There is one important thing to note in this setup. Since the objects are already in the scene at the start, by default every time a Client connects it would try to sync those instances to the network. This is very similar to what we have seen with character instantiation so far: each Clients brings their own copy.
However, in this case this would effectively duplicate the crates, once online. One extra copy for each connected player! We don't want that.
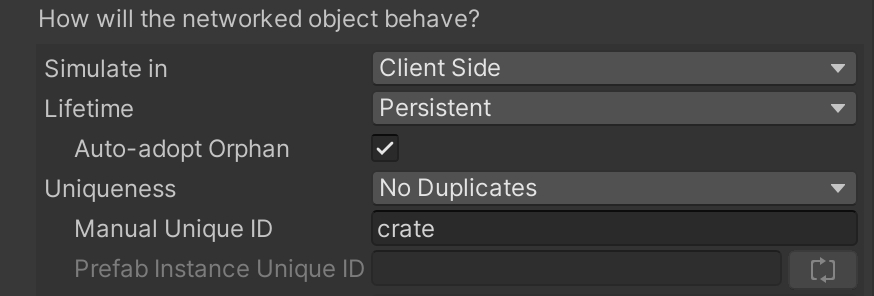
For this reason, the CoherenceSync is configured so that these crates have No Duplicates. This is generally the correct way of configuring networked Prefab instances that have been manually placed in the scene.
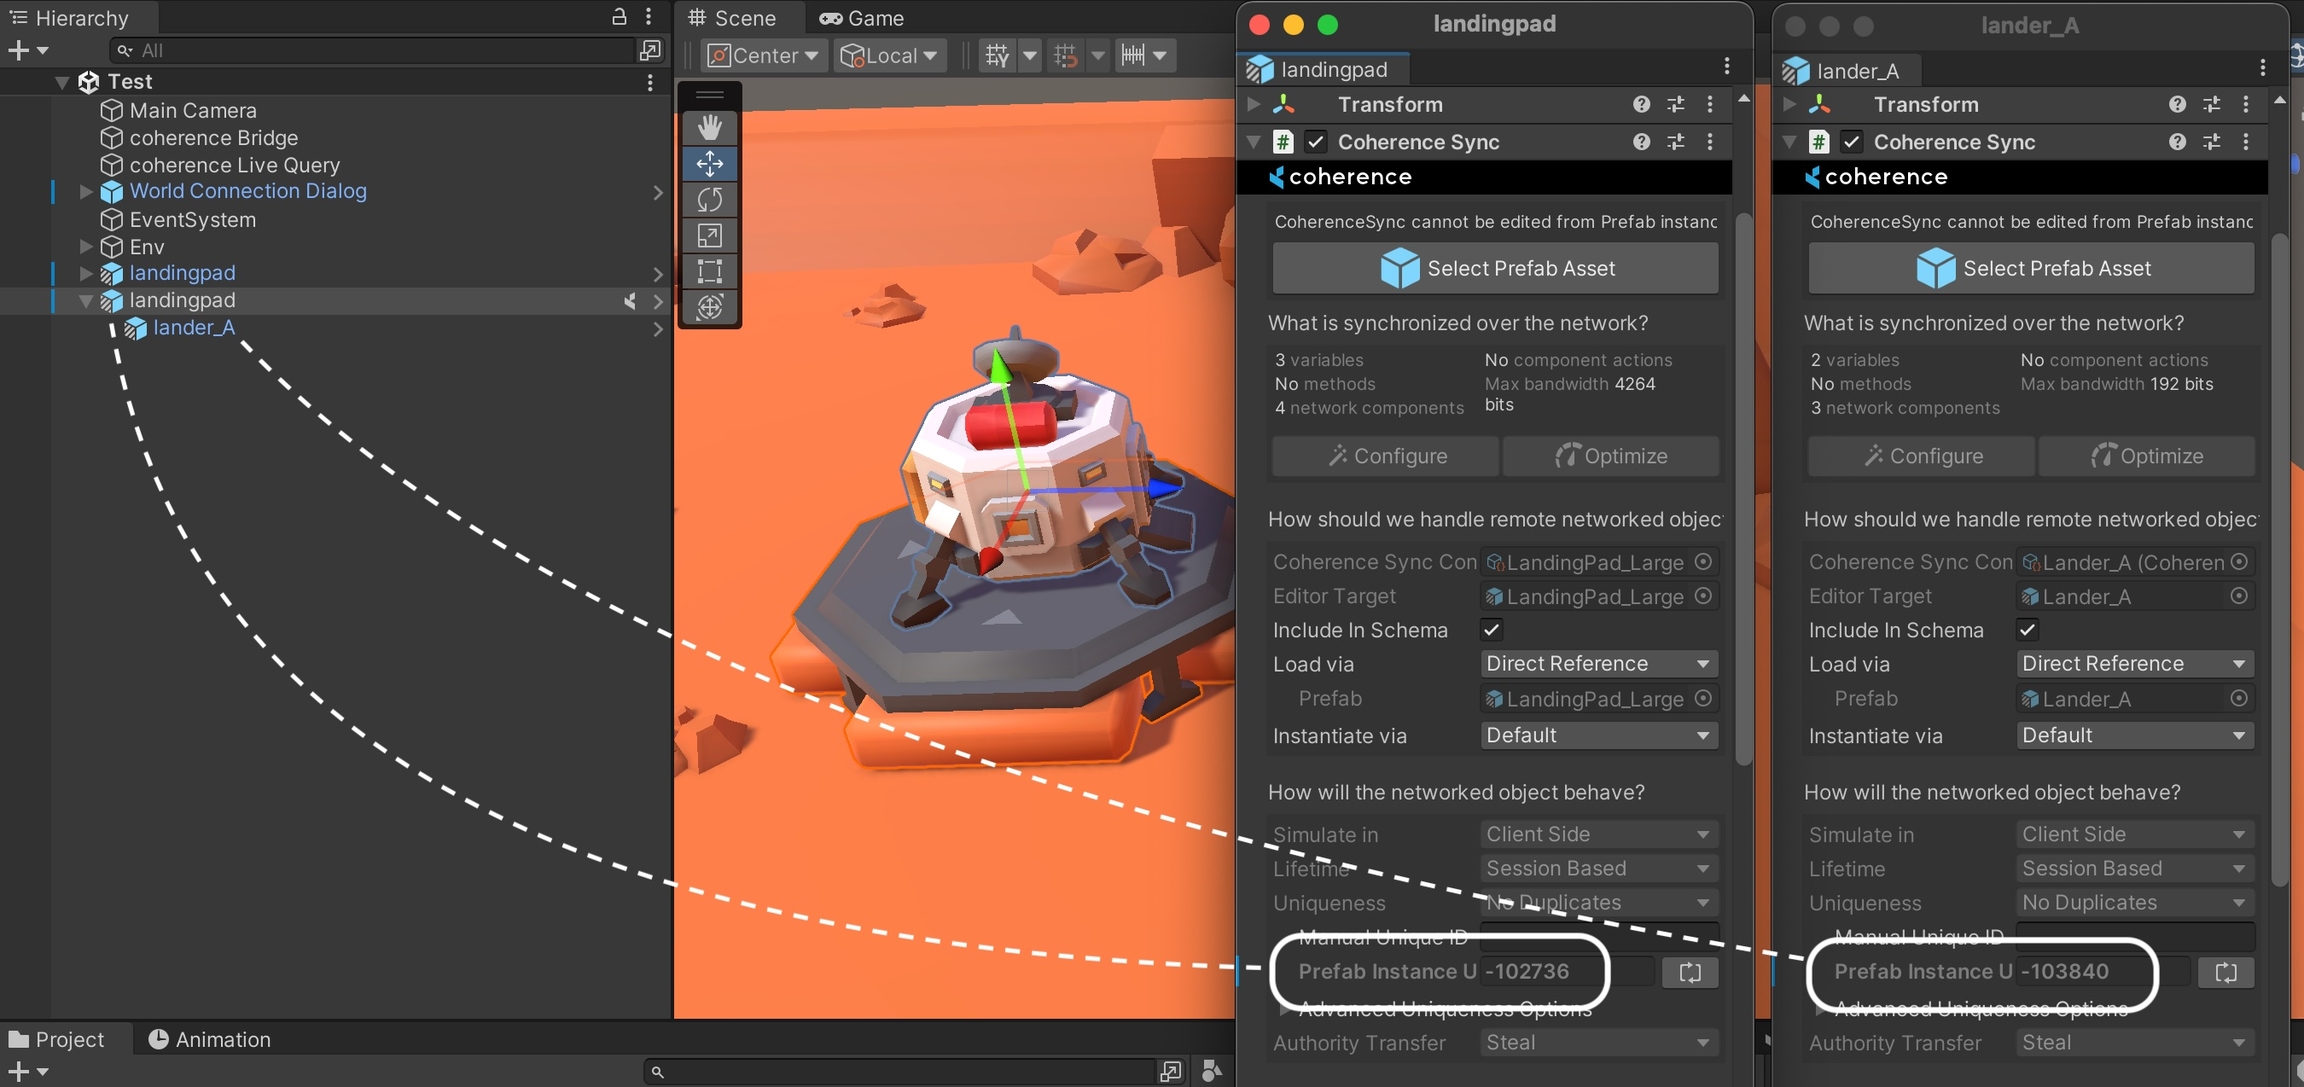
In addition to a unique identifier (the Manual Unique ID), coherence will auto-assign an additional identifier (the Prefab Instance Unique ID) whenever the crate is instantiated in the scene at edit time.
With these parameters in mind, the way the crates behave is as follows:
At the start, none of the entities exist on the Replication Server (yet).
Client A connects. They sync the crates onto the network. Being unique, the Replication Server takes note of their ID.
Client B connects. They try to bring the same crates onto the network, but because it is set to be No Duplicates and coherence finds there is already a network entity with the same ID, it doesn't create a new network entity but recognises that crate as the one on the server, and just makes it non-authoritative for Client B.
If Client A disconnects, the crates are not destroyed because their Lifetime is set to Persistent. They briefly become orphaned (no one has authority on them) but immediately the authority is passed to Client B due to the option Auto-adopt Orphan being on.
If everyone disconnects, the crates remain on the Replication Server as network entities that are orphaned. They keep whatever position/rotation they had, since nobody is simulating them anymore.
At this point, nobody is connected. The Replication Server is not doing any work.
When a new Client reconnects and tries to bring the crates online again, the same thing happens again: the crates in the scene are associated with the orphaned entities and are adopted by the new client, who assumes authority on them.
They will also most probably see the crates snap to the last seen position/translation that was stored on the Replication Server, which is synced just before they assume full control over the crates.
At this point, they start simulating their physics locally, like normal.
Game characters and other networked entities are often made of very deep hierarchies of nested GameObjects, needing to sync specific properties along these chains. In addition, a common use case is to parent a networked object to the tip of a chain of GameObjects.
Let's see how to handle these cases.
|
A/D or Left/right joypad triggers: Rotate crane base
W/S or Left joystick up/down: Raise/lower crane head
Q/E or Left joystick left/right: Move crane head forward/back
P/Space/Enter or Joypad button left: Pick up and release crate
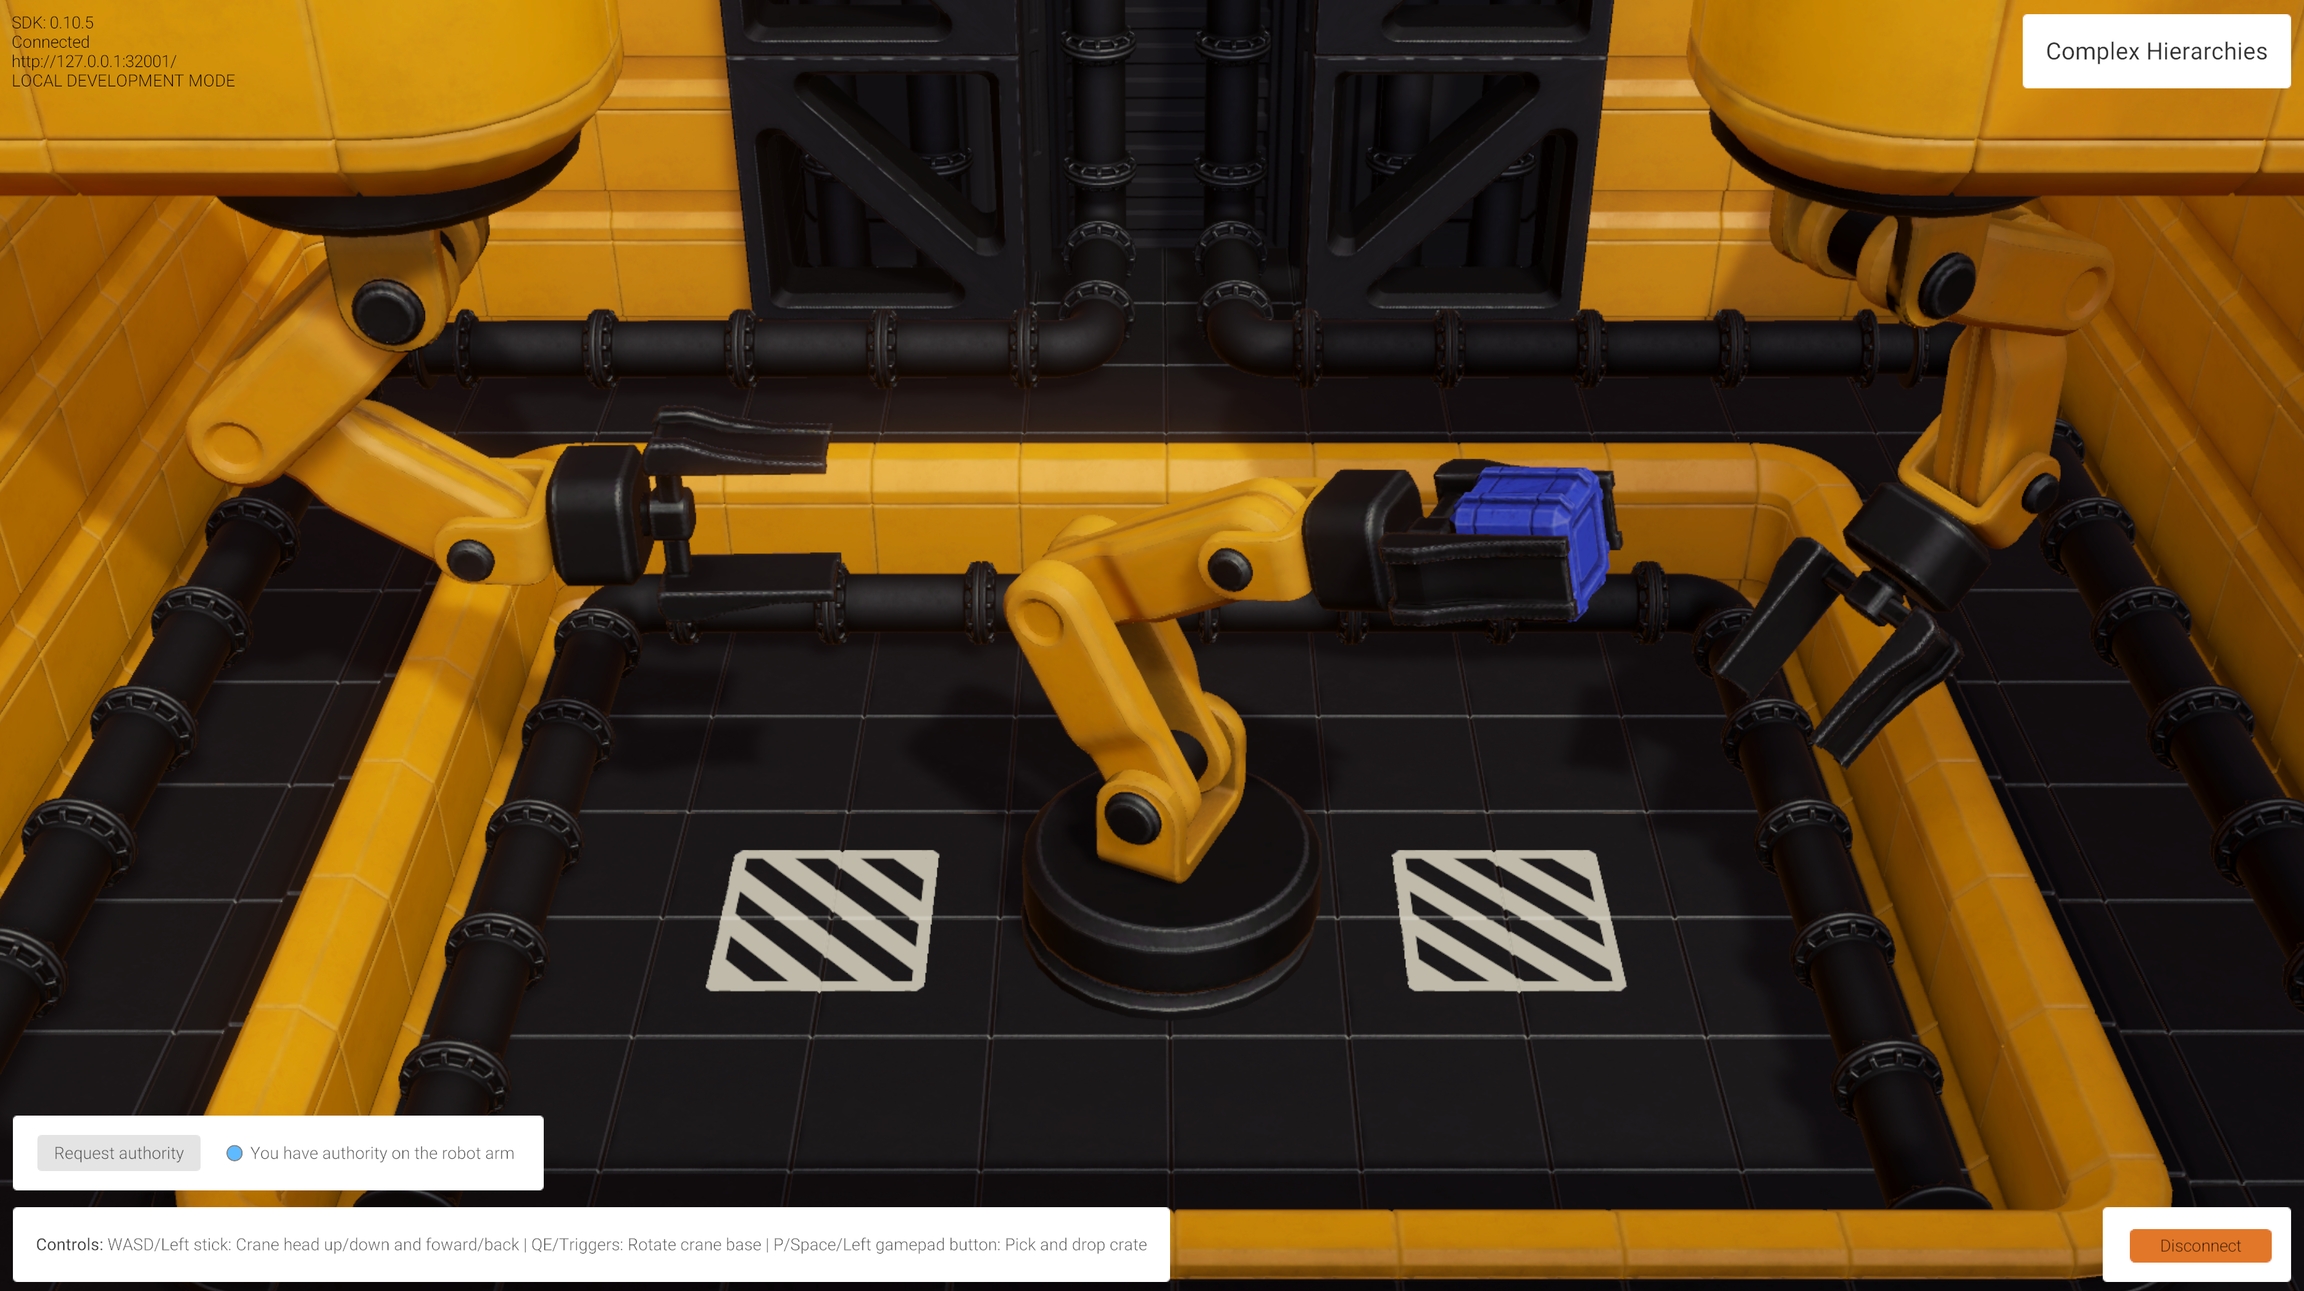
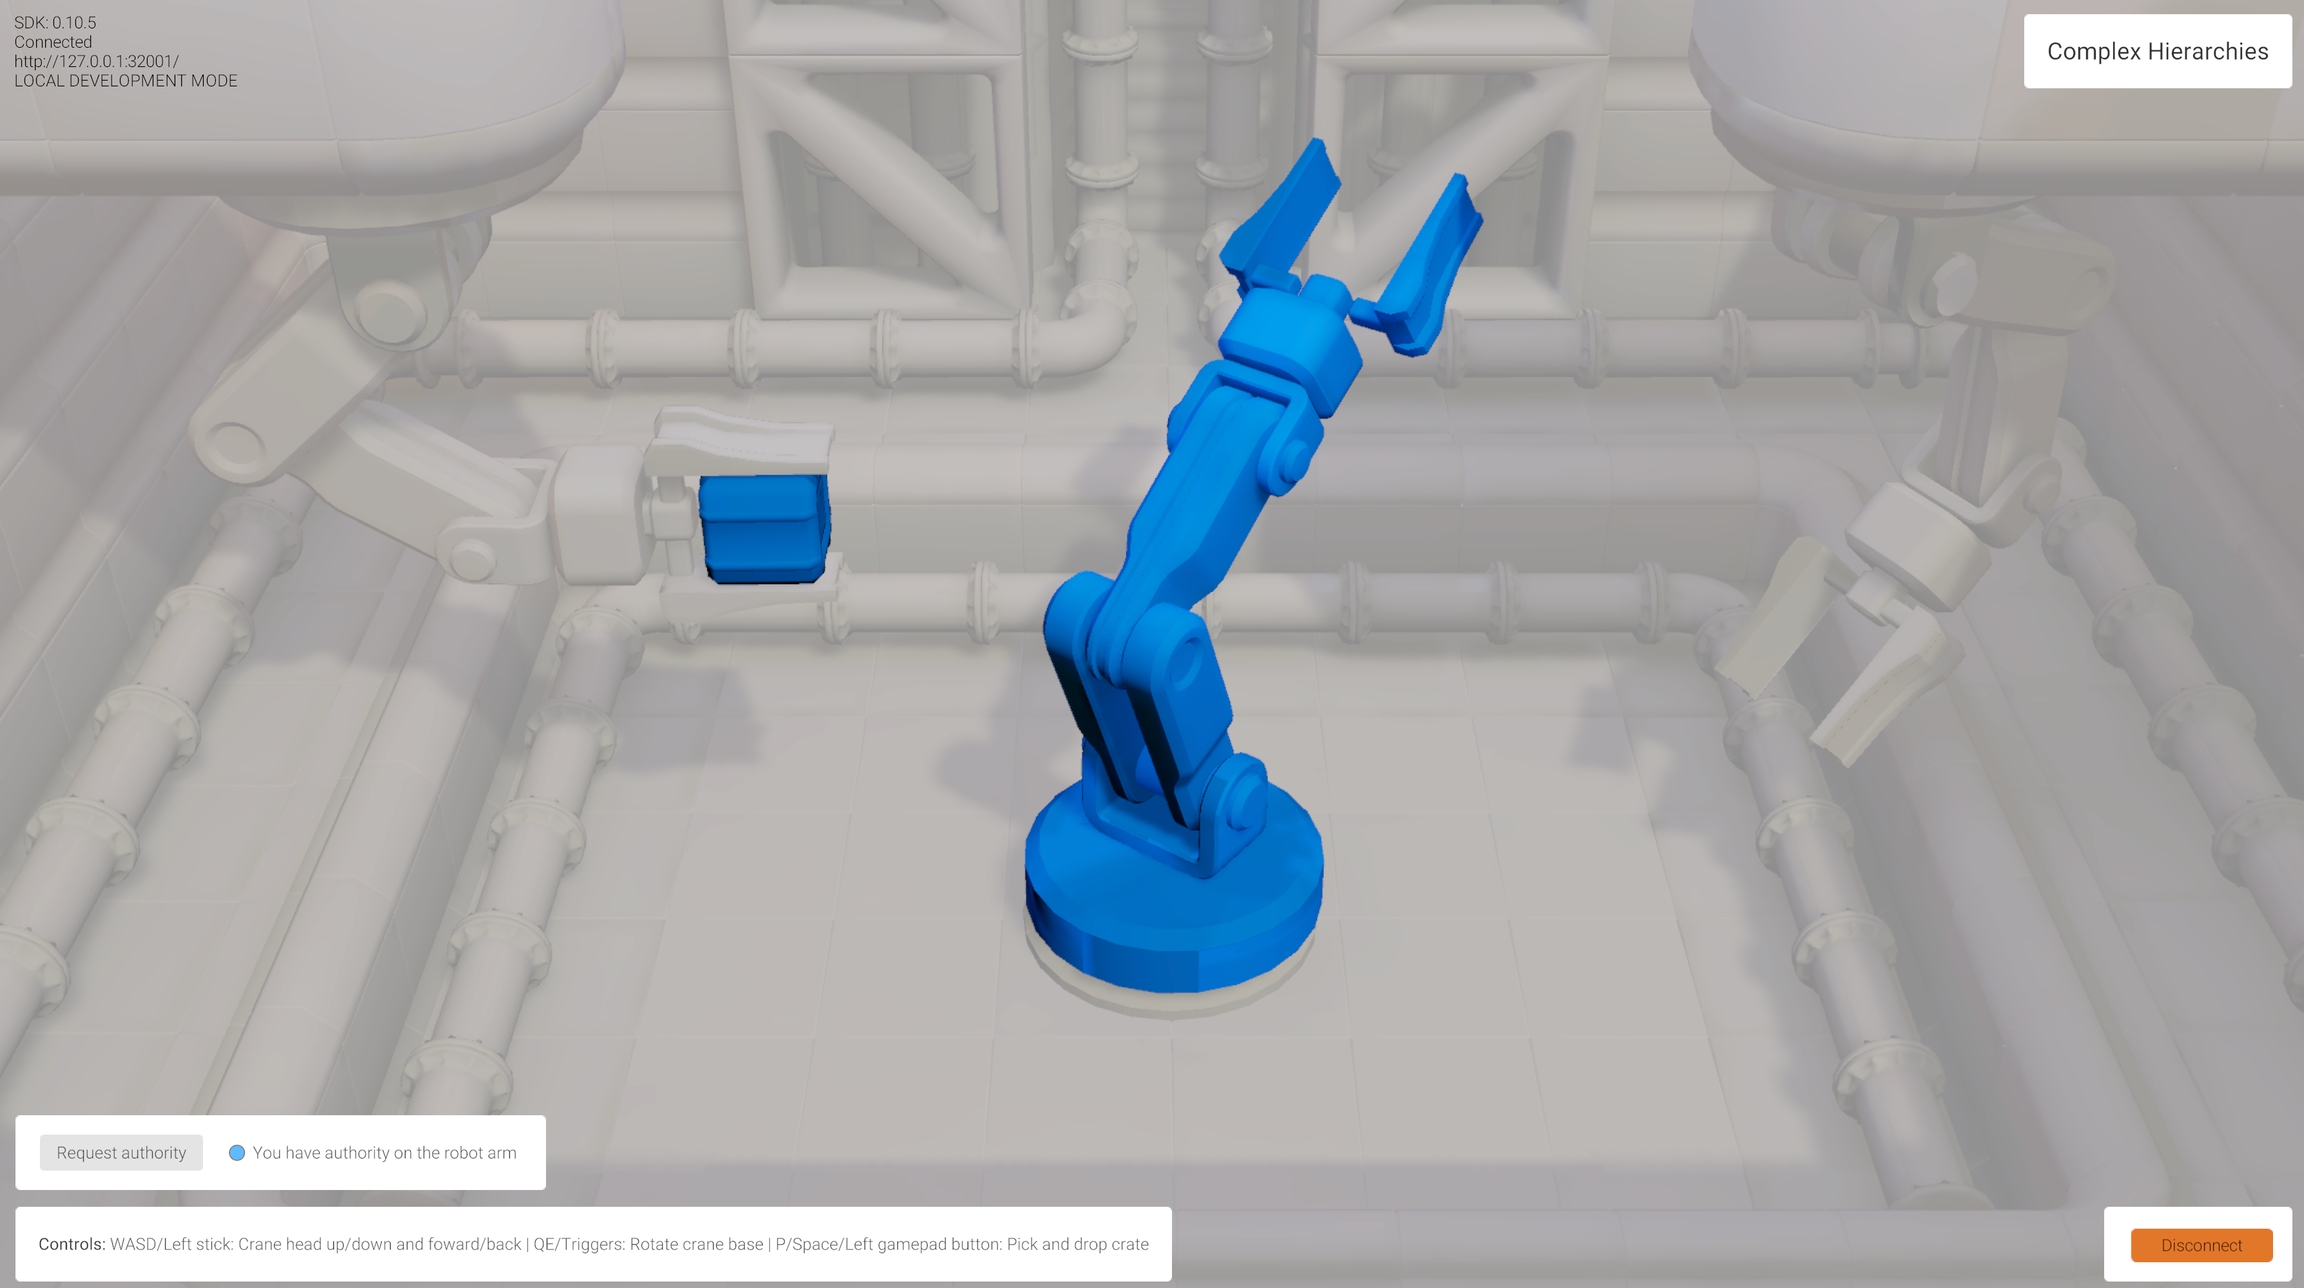
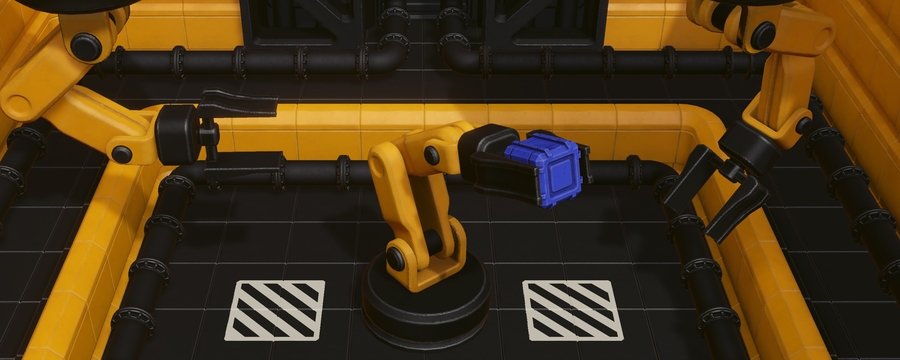
This scene features a robotic arm that can be controlled by one player at a time. In the scene, a small crate can be picked up and released.
The first player to connect takes control of the arm, and other players can request it via a UI button.
To demonstrate complex hierarchies we choose to sync the movement of a robot arm, made of several GameObjects. In addition to syncing several positions and rotations, we also sync animation variables and other script parameters, present on child objects.
To sync the whole arm we use a coherence feature called deep bindings, that is bindings that are located not on the root object, but deeper in the transform hierarchy.
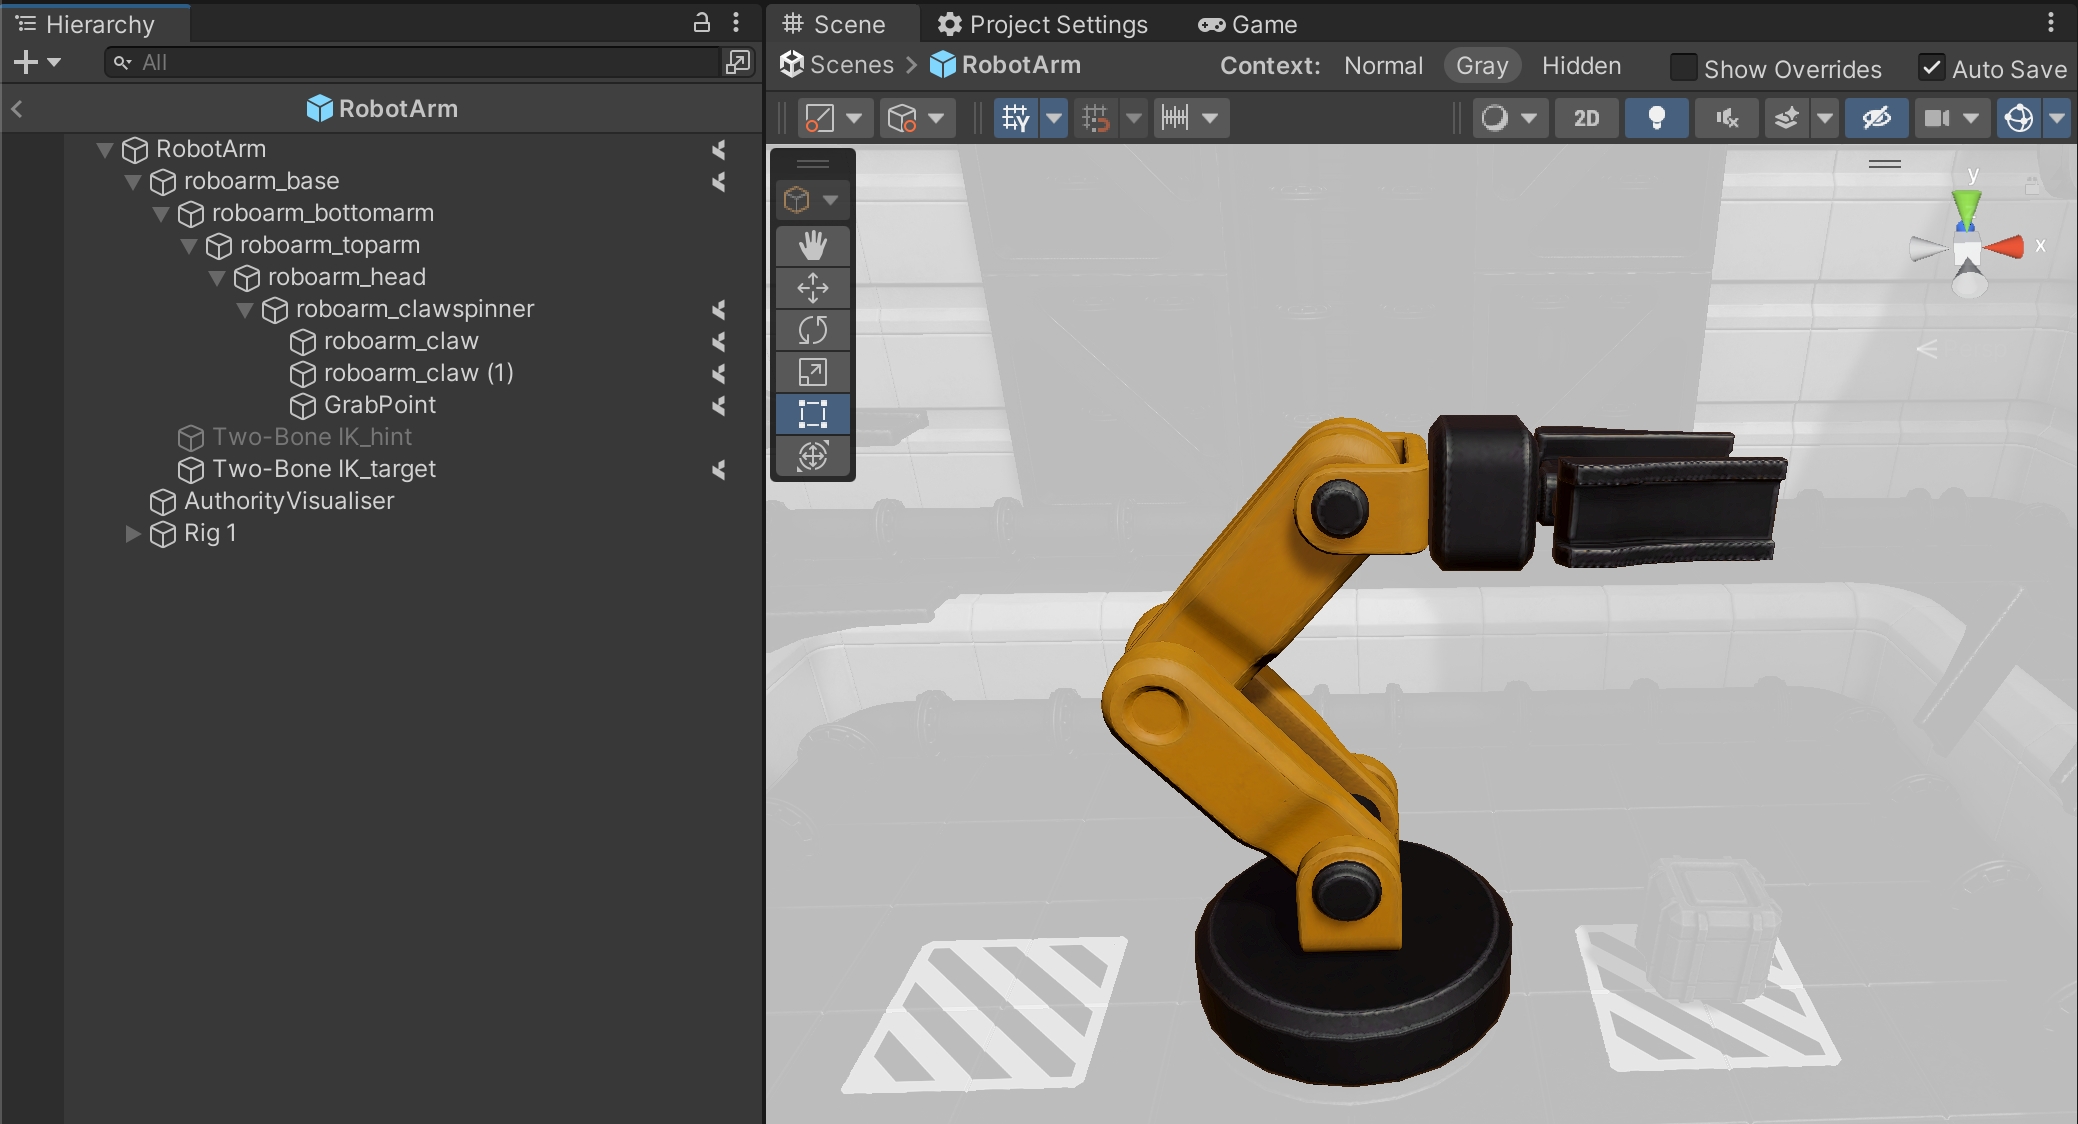
Select the RobotArm Prefab asset located in /Prefabs/Characters, and open it for editing. You will immediately notice a host of little coherence icons to the right of several GameObjects in the Hierarchy window:
These icons are telling us that these GameObjects have one or more binding currently configured (a variable, a method, or a component action).
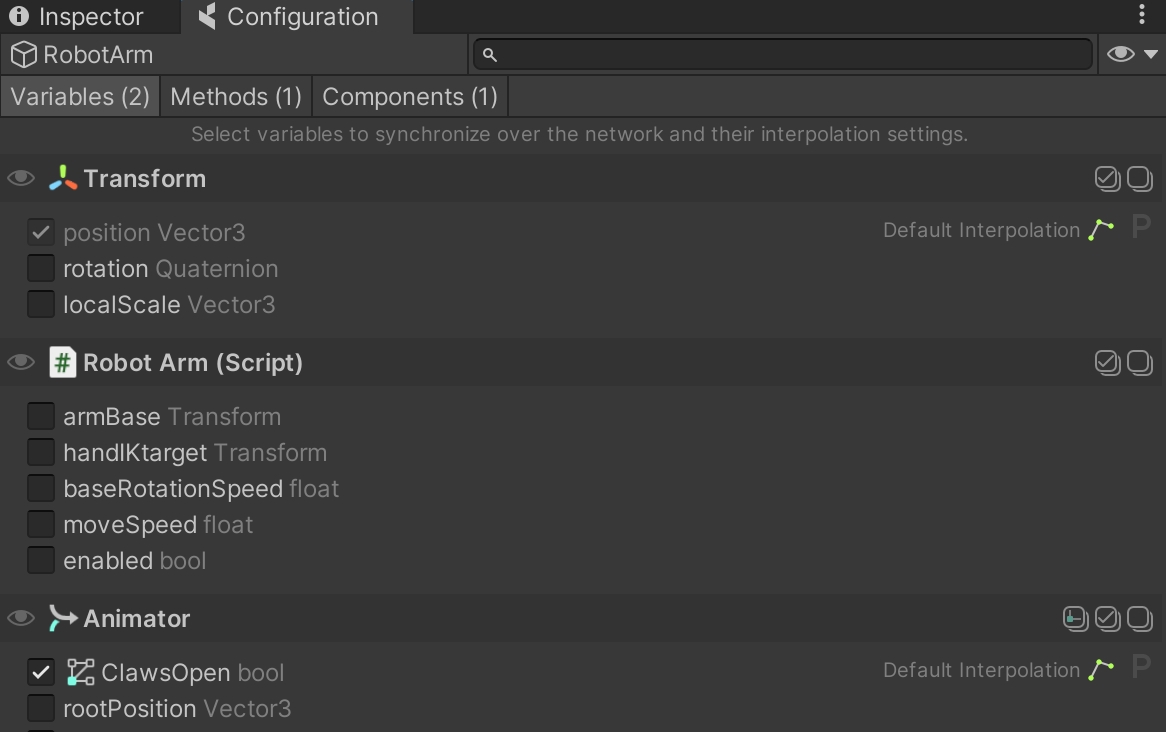
Now open the coherence Configuration window, and click through those objects to discover what's being synced:
In addition to position and rotation, we also choose to sync the animation parameter ClawsOpen, and enable Animator.SetTrigger() as a Network Command. Finally we disable the Robot Arm script when losing authority (to disallow input).
This is the base of the robot arm, for which we only sync rotation:
We don't sync the rotation of every object in the chain, since the arm is equipped with an IK solver, which allows us to just sync the target (Two-Bone IK_target) and work out the rotation of the limb (robotarm_bottomarm and robotarm_toparm) on each Client:
By syncing all of these properties, we can have the robotic arm move in sync on all Clients, simply by translating the tip of the IK, and rotating the base of the crane. All of the bindings in this hierarchy are synced through the Coherence Sync component present on the Prefab's root object RobotArm.
As you can see, using deep bindings doesn't require any special setup: they are enabled in exactly the same way as a binding, a Network Command, or a Component action is enabled on the root GameObject.
The Path property displays the location in the hierarchy where this object will be inserted. It gets automatically updated by coherence every time the object is parented. Each number represents a child in the root object (and it's 0-based).
Once we have this component set up, parenting the object only requires calling Transform.SetParent() like any usual parenting operation, and setting its Rigidbody component to be kinematic.
When we do this, coherence takes care of propagating the parenting to other Clients, so that the crate becomes a child GameObject on every connected Client.
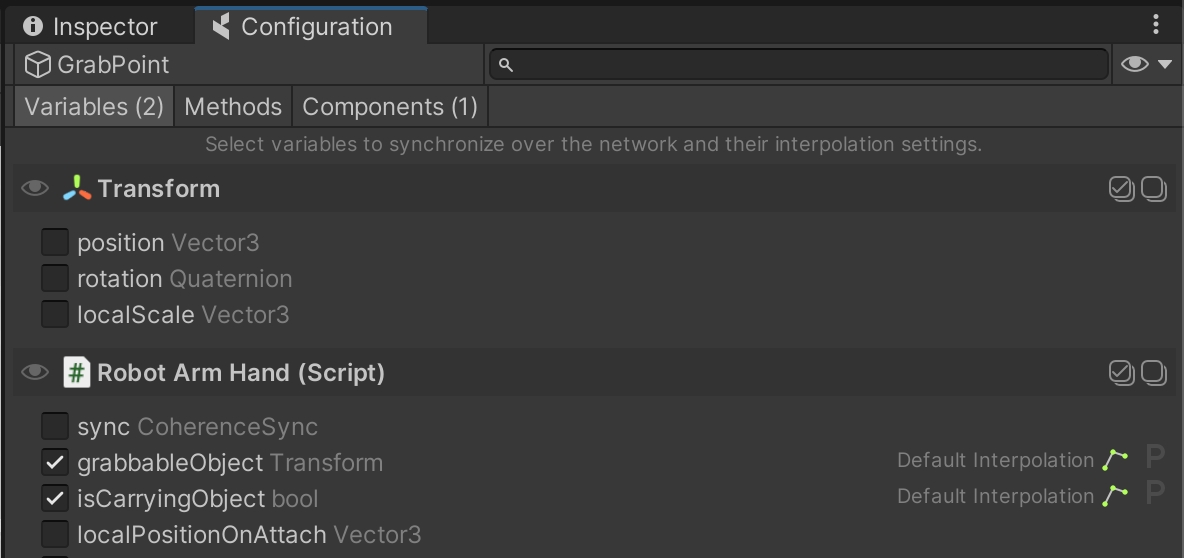
This code is in the RobotArmHand class, a component attached to the tip of our hierarchy chain: GrabPoint. In OnTriggerEnter we detect when the crate is in range, storing a reference to it in a variable of type Transform named grabbableObject.
This reference is set to sync:
When the player presses the key P (or the Left Gamepad face button), the referenced crate is parented to the GrabPoint GameObject.
Note that coherence natively supports syncing references to CoherenceSync and Transform components, and to GameObjects.
Even if the Robot Arm Hand script is disabled on non-authoritative Clients, it references the correct grabbed crate in the grabbableObject variable due to it being synced over the network. So when its authority disconnects, other Clients will already have the correct reference to the crate network entity.
This allows us to gracefully handle a case where, for instance, a Client picks up the crate and disconnects. Because both the crate and the robot arm have Auto-adopt Orphan set to "on", authority is passed onto another Client and they immediately have all the data needed to keep handling the crate.
To move authority between Clients, we can use the UI in the bottom left corner. The button is connected to the Robot Arm Authority script on the ArmAuthoritySwapper GameObject, and it transfers authority on both the robot arm and the crate. This script takes care also of what happens as a result of the transfer, including setting the crate to be kinematic or not.
Is Kinematic is set as follows:
The code is in the RobotArmAuthority class. To detect whether it's currently being held, it's as simple as checking whether its Transform.parent is null:
Remember you can use Tab/click the Gamepad stick to use the authority visualization mode. Try requesting authority from another Client while in this mode.
Using the same scene as in the , we now take a look at another way to make Clients communicate: Network Commands. Network Commands are commonly referred to as "RPCs" (Remote Procedure Calls) in other networking frameworks. You can think of them as sending messages to objects, instead of syncing the value of a variable.
|
WASD or Left stick: Move character
Hold Shift or Shoulder button left: Run
Spacebar or Joypad button down: Jump
Q or D-pad up: Wave
Building on top of previous examples, let's now focus on two key player actions. Press Space to jump, or Q to greet other players. For both of these actions to play their animation, we need to send a command over the network to invoke Animator.SetTrigger() on the other Client.
Like before, select the player Prefab located in the /Prefabs/Characters folder, and browse its Hierarchy until you find the child GameObject called Workman.
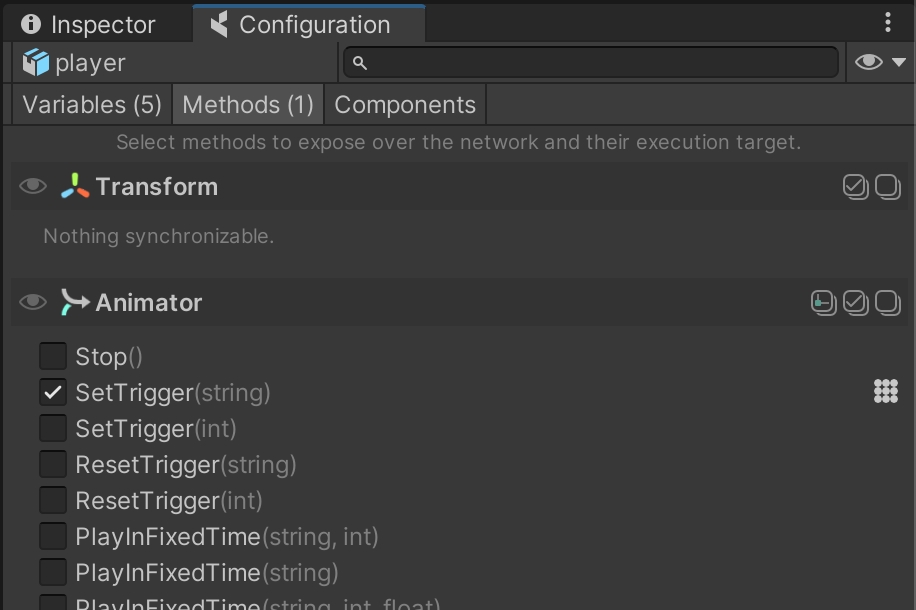
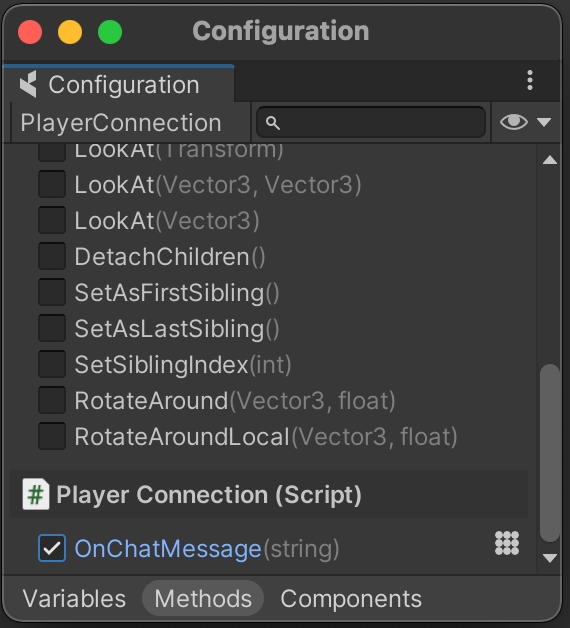
Open the coherence Configure window on the third tab, Methods:
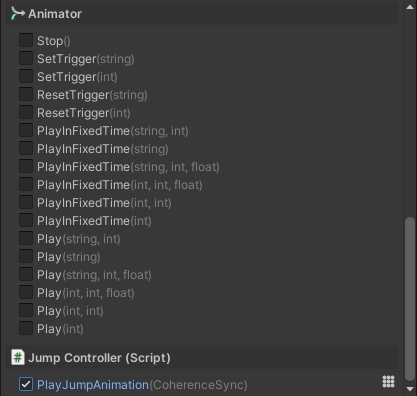
You can see how the method Animator.SetTrigger(string) has been marked as a Network Command. With this done, it is now possible to invoke it over the network using code.
You can find the code doing so in the Wave class (located in /Scripts/Player/Wave.cs):
Analysing this line of code, we can recognize 5 key parts:
First, notice how the command is invoked on a specific CoherenceSync (that sync property).
We want to invoke this command on a component that is an Animator.
We invoke a method called "Animator.SetTrigger".
With MessageTarget.Other, we are asking to send this message only to network entities other than the one that has the CoherenceSync we chose to use.
We pass the string "Wave" as the first parameter of the method to invoke.
Because we don't invoke this on the one with authority, you will notice that just before invoking the Network Command, we also call SetTrigger locally in the usual way:
An alternative to this would have been to call CoherenceSync.SendCommand() with MessageTarget.All.
Samples are copied to your assets folder, in Samples/coherence/version_number/. This means you can change and customise the scripts and Prefabs however you like.
The folder to rename is the one that is named after the version number (normally its path would be something like Samples/coherence/1.1.0/ for coherence 1.1.0).
When it gets instantiated, the flower writes the current into the timePlanted variable. This variable never changes after this, and is used to reconstruct the phase in which the flower is in (see ). Similarly, as the flower is not moving, position and rotation are only synced at the time of planting.
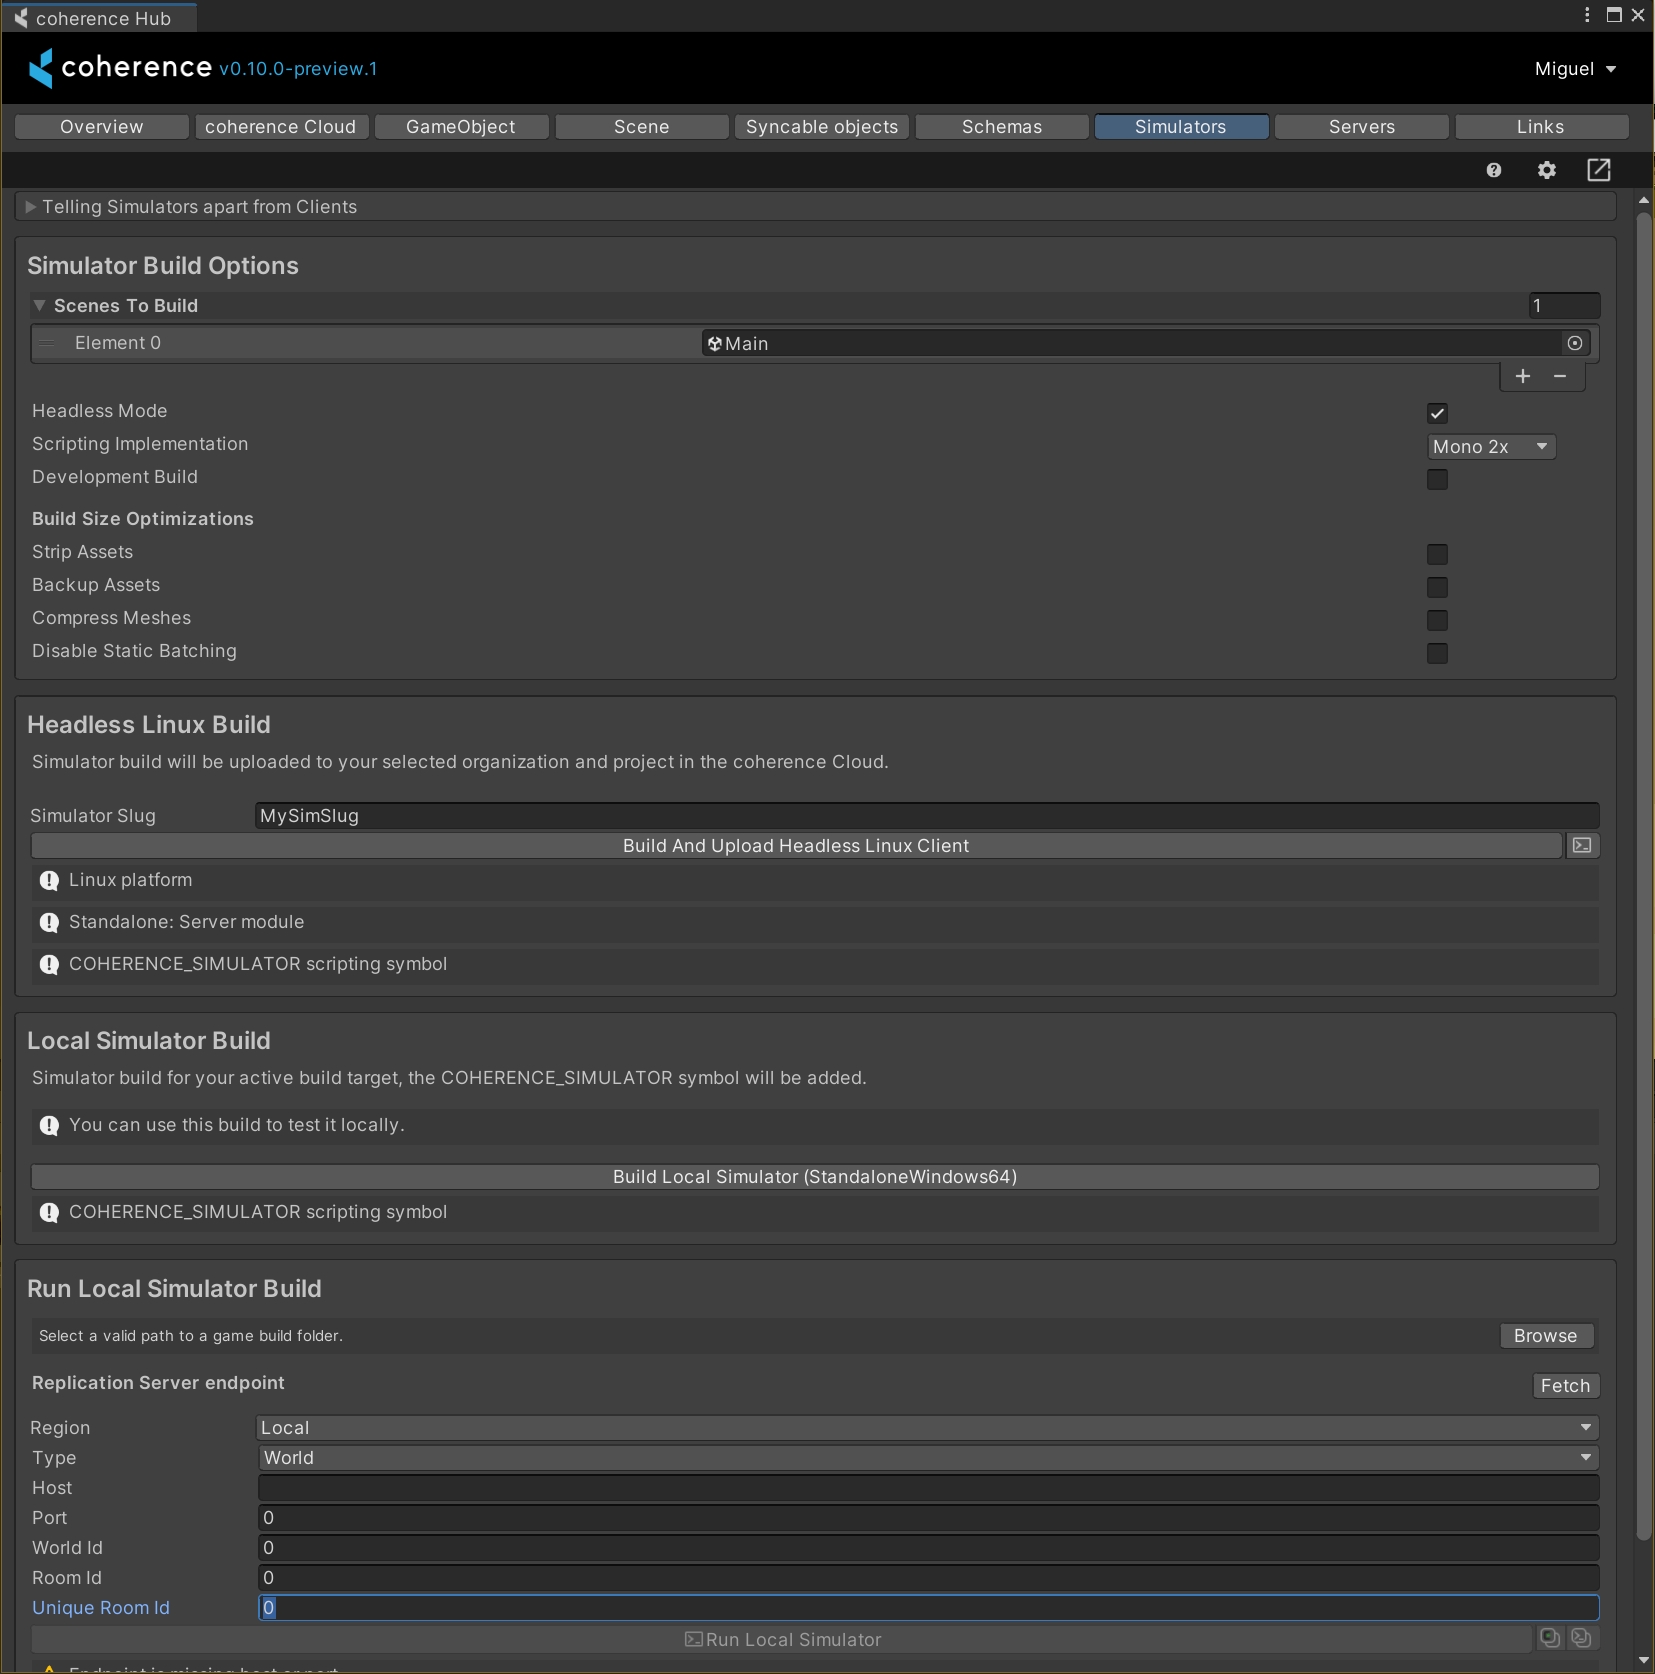
coherence supports the ability to have an instance of the game active in the cloud, running some logic all the time (we call this a ). However, this might be an expensive setup, and it's good advice to think things through differently to keep the cost of running your game lower.
As we discussed in the , switching authority is a network operation that is asynchronous, so we need to wait for the reply from the player who currently has authority.
Now it's clear why Transform.position cannot be excluded from synchronization, as we saw in . coherence needs to know where network entities are in space at all times, to detect if they fall within a Live Query or not.
For instance, an animation state machine might not be in the correct animation state if it had previously reached that state via a trigger parameter. You would have to ensure that the trigger is called again when the instance gets network-instantiated (via a ) or switch your state machine to use other type of animation parameters, which would be automatically synced as soon as the entity gets reinstantiated.
One important note: this sample describes parenting at runtime. For more information on edit-time parenting, see the page about .
For cases like these, coherence takes care of them automatically. More complex hierarchies require a different handling, and we cover them in .
As we mentioned in the intro - in a simple game where precise physics are non-crucial this might be enough, and it will definitely keep the costs of running the game down, since no has to run in order to make the game playable.
For more information on persistence, there's about it.
One important note: this sample describes deep parenting at runtime. For more information on edit-time deep parenting, see the page about .
As mentioned in the lesson about , parenting a network entity to a GameObject that belongs to a chain requires some setup. To be able to pick up the crate with the crane, we equip it with a CoherenceNode component:
Similarly to the crates in the , we don't just want the crate to automatically become non-kinematic when we have authority on it. We want the crate to stay kinematic when authority changes while it's being held by the arm.
In this example we used Network Commands to trigger a transition in an animation state machine, but they can be used to call any instantaneous behavior that has to be replicated over the network. As an example of this, it is also used in the lesson to change a number in a UI element across all Clients.
Is being held
true
true
Has been released
false
true
Is a Replication Server running?
Tip: Try running one locally, before trying the coherence Cloud.
Does the running Replication Server have the right ?
Ensure you have baked the netcode.
For local RS, shut down the the Replication Server and launch it again.
For cloud RS, ensure you have uploaded the schema to the cloud, then retry.
Ensure you only have one Replication Server running.
Are you connected to the Replication Server? Check the icon and messages on the CoherenceBridge component.
Do you have at least one LiveQuery in the scene, and is it framing the gameplay?
Tip: You can set it to radius 0 so it encompasses the whole game space.
Authority | Authority transfer | Network Commands
In a networked game, an object's logic is always run by one node on the network, whether it's a Client or a Server (which we call a Simulator in coherence). We say that the node "has authority" on the network entity.
There are cases where it makes sense to transfer authority, like it happens in this project with objects that can be picked up. When the player grabs an object, the Client performing it requests authority over the network entity. Once it gets authority it starts running its scripts and has full control over it. This is a very good way to go when only one player can interact with a certain object at a given time.
For more info, check the lesson about transferring authority in the First Steps project.
However, there are cases when we don't want to change who has authority on an entity. In the case of an object that many players can interact with at the same time, it wouldn't make sense to continuously move authority between nodes.
The interaction with such remote entities then needs to happen entirely through Network Commands.
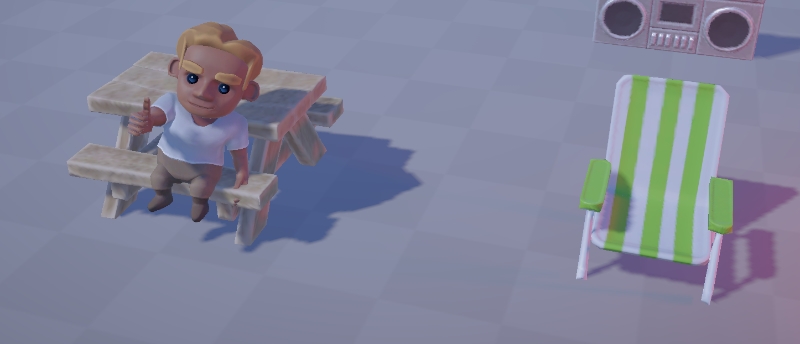
In this project, it is the case of the chairs placed in the scene. The first Client or Simulator to connect will take authority over them, and it will keep it until they disconnect.
When a player wants to sit down on a chair, they inform the Authority that they are doing so. The client holding authority will then set the chair as busy, which prevents other players from sitting on it next time they try.
However, for the sake of simplicity and to illustrate the point, we intentionally left this interaction a bit flaky. Can you guess why? What could go wrong with this setup?
The action originates in SitAction.cs:
SitAction checks if the isBusy property of the chair is set to true (by the authority, of course). If so, it means someone else is already sat on the chair. If false, we can sit. So it invokes Chair.Occupy().
And further down, the essence of the interaction:
So both when occupying a chair (Occupy()) or standing up (Free()), the player executing the action invokes the ChangeState method, either directly or as a Network Command - depending if they are the one with authority.
So one way or the other, ChangeState gets executed on the authority, who sets the isBusy property to its new value. On the next coherence update, the property will be sent to the other Clients.
The answer: Clients are using the isBusy property as a check for whether they can sit or not. It is possible that two players will approach a chair at the same time, check if isBusy is false (and yes, it will be false), at which point they will inform the authority that want to sit down on it.
The authority performs no additional checks, so you will see both players successfully sitting on the chair, overlapping on each other.
Thankfully we also coded the rest of the interaction so that this doesn't break the game. So while this incidence and the consequences for this interaction are low-risk, if you're looking to create a more robust system it could make sense to implement a check on the authority, and have the Client wait for an answer before they sit down.
We do this in other parts of the demo, like when chopping a tree or when picking up an object. Check the following section on chopping trees to explore this similar but more complex use case.
Authority | Authority transfer | Network Commands
We saw in the previous section about sitting on chairs how sometimes it makes sense not to move authority around between Clients. At this point, Network Commands are the way to interact with a remote object.
Now let's take a look at another case of remote object, where the interactions with it need to be validated by the one holding authority, to avoid nasty cases of concurrency.
In this project, it is the case of the trees that are placed in the scene. The first Client or Simulator to connect will take authority over them, and it will keep it until they disconnect.
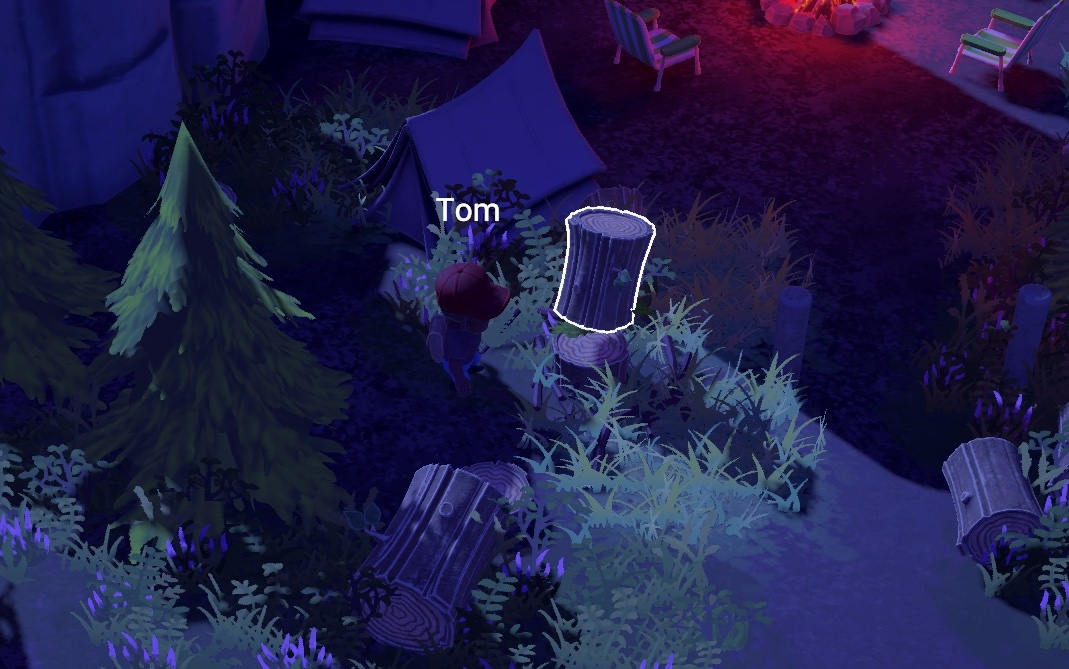
When a player wants to chop a tree, they request the Authority to subtract 1 unit of energy. When the energy runs out, it's the Authority that spawns a new Log instance.
This centralization, as opposed to passing authority around, allows multiple players to chop the same tree at the same time and prevents many race conditions, because the important action (destroying the tree and spawning the log) is all resolved on the Client with Authority.
Conceptually, we can imagine the event flow to go like this:
(1) Chop action happens on a Client -> (2) Authority is notified, elaborates new state -> (3) Authority sends result to all others -> (4) All other Clients play out animation and effects
You can find this flow in practice in the ChoppableTree.cs script. In this script, only one variable is synchronized, the energy of the tree:
The flow goes like this:
(1) A player presses the button to chop down the tree.
It locally invokes the method TryChop(), which checks if the tree hasn't been already chopped down, subtracts energy locally, and also invokes the Chop() method, locally or remotely depending if authority on this tree is here or not.
(2) On the Authority, the Chop() method is called, and checks if the tree needs to be effectively cut down based on its energy:
(3) If so, CutDown() is invoked locally, spawning the log and informing all other clients to play the animation of the tree disappearing:
(4) Finally, other Clients play animation, particles and sound locally in ChangeState(). They will also see the log spawn thanks to the automatic network-instantiation.
Why do we subtract energy from a synced variable in TryChop() when we are not the Authority?
Ultimately, the final word on whether the tree has been chopped down completely is always on the Authority's side, of course. But by subtracting energy locally and immediately, we can deal with cases where the player manages to produce two or more chop inputs before the Network Command has travelled to the Authority (and back) with a result.
Imagine: the tree has 1 energy. If we didn't subtract energy locally, the player would be able to chop several times because until the Authority tells them that the tree is down, they still think it has 1 energy.
In fact, it would send several Chop() Network Commands for no reason, which the Authority would have do discard on arrival.
Instead, if we immediately change the value on the variable and we use it as an indication of whether we can chop or not this will stop the chopping after one hit, as it should be.
Soon, the Authority will have elaborated on its side that the tree has gone down, and will inform our Client (with ChangeState()). Because energy is a synced variable, it will be overwritten again with the value computed on the Authority - which of course will be 0 at this point, so it will match.
So nothing is lost and no state is compromised, but with this little trick we get immediate feedback and we avoid some unneeded network traffic.
Before we dive into the networking-specific topics, in this introductory page we'll quickly go over how the whole gameplay is structured and set up. We'll cover it both from a point of view of Prefabs and of code so you know where to look for what.
WASD: Move | Shift: Sprint | Spacebar: Jump | E: Pick up/throw, Chop trees, Sit/stand | C: Random appearance | 1: Wave emote | 2: Dance | 3: Yes emote | 4: No emote | Enter: Show chat/send message | Esc: Cancel chat
Left stick: Move | Left trigger: Sprint | Button south: Jump | Button west: Pick up/throw, Chop trees, Sit/stand | Button east: Random appearance | D-pad up: Wave emote | D-pad down: Dance | D-pad left: Yes emote | D-pad right: No emote | Select button: Show/hide chat | Start button: Send chat
You'll find the Player Prefab in Prefabs/Characters.
When connecting, an instance of the Player is instantiated in the scene by the PlayerHandler script, which listens to the corresponding event fired by CoherenceBridge.
The player character is a Rigidbody-driven kinematic capsule that is hovering above the ground slightly, and detecting the ground via a raycast. Movement values are provided by the Move script on its root, which is in turn informed by the PlayerInput component. When instantiated over the network both these components are disabled, and the Rigidbody is set to be kinematic.
Besides movement, other actions are controlled by scripts on three child GameObjects: Interactions, Emotes, and Chat.
When pressing the interaction key, the right action will be carried on by one of the scripts ChopAction, SitAction, and GrabAction, depending on the type of the object highlighted (a ChoppableTree, a Chair, or a Grabbable).
The chat system is described here. Other actions are described below.
The Player Prefab builds on the structure and functionality of the one used in the First Steps tutorial project, adding more actions. If you find it complex to dive into, try exploring that version first.
The trees have an Interactable script that indicates which mesh gets highlighted.
They have an amount of energy that determines the number of times they need to be chopped to be cut down. When they run out, they transition to a chopped state and spawn a tree log. A coroutine makes them spring out again after a certain amount of time.
Read more about how characters interact with remote trees in this page about dealing with a non-authority object.
The campfire is at the center of this demo. Players can burn anything they can pick up by simply throwing the object into it. The campfire exists only in one instance and is pre-placed in the scene, and marked as unique on the network by setting the Uniqueness property of its CoherenceSync to No Duplicates.
Most of the logic of the campfire is in the Campfire component. This handles a lot of the networking flow, and can be run by a Client but, if a Simulator connects, they will take over.
In addition to calculating which fire effect to display, it's also in charge of replicating the sound of burning an object on all Clients (read more about effects here).
Learn more about the campfire's logic on this page.
They are all Prefab Variants of a base Prefab called Base_BurnableObject, which you can inspect to get a sense of the common functionality.
The objects have several scripts: Grabbable provides the ability for them to be picked up, carried and thrown, while Burnable grants the ability to be burnt on the campfire.
They have a collider at the root which determines collisions, but a child GameObject named Interaction (and its Interactable script) has the trigger collider that makes it interactive, and allows to pick the object up. The Interactable script also holds a reference to the objects to highlight when the player's interaction trigger intersects the object.
The logs that are spawned when chopping down trees are not unique, and they are set to Allow Duplicates. Check this page for more info on the logs and how they are recycled using an object pool.
Instead, the other burnable objects are pre-placed in the scene, and set to be unique (No Duplicates): the banjo, the cooler, the bins, the mushrooms, and more. More details on the lifetime of these pre-placed objects in the section below.
The Keeper Robot is an NPC designed to be run by a Simulator (aka, the "server"), to restore the campsite to its initial state even when no-one is connected.
Its script will cycle through all unique campfire objects every X seconds. If an object has been destroyed, it will recreate it and put it in its place. If it has been moved, it will just chase it down and put it back into its place.
The way the robot knows about destroyed objects is because the objects, when created the first time, spawn an invisible marker (that we call an "object anchor") which the robot can inspect to know which object has disappeared, and where it was originally placed. The page about custom instantiation has more info on these objects and their anchors.
Read more about this server-side NPC works on its dedicated page.
Sitting is one of the three actions that can be performed by interacting with objects. It doesn't have networking effects, so it's not covered in this tutorial pages.
Object pooling | CoherenceSyncConfigRegistry | CoherenceSyncConfig
Network entities need to be created and removed all the time. This can be due to entities getting in and out of a LiveQuery, or simply because gameplay requires so. If that is the case, we can leverage coherence's object pooling system in order to avoid costly calls to Instantiate and Destroy, which are famously expensive operations in Unity.
In this project we use pooling for one very clear use case: the tree logs that get spawned when chopping down a tree.
This was a natural choice as players will be chopping trees all the time, but we can also assume that they will burn the logs on the fire almost as often. So by pre-allocating a pool of around 10 logs, we should be covered in most cases.
To set up the log to behave like this, all we did was to set that option on the log's own CoherenceSync inspector.
A pool configured like this means that coherence will pre-spawn 10 instances of the Prefab at the beginning of the game.
However if we were to need more, we could request more instances and they would be created and added to the pool. The game can even go above 20. If that were to happen, any instance released beyond 20 wouldn't just be returned to the pool, but would be destroyed.
In other words, 10 and 20 represent the lower and upper limit for the amount of memory we are reserving for the logs alone in our game. We are considering anything above 20 as a temporary exception.
When we press Play, coherence instantiates these 10 logs, deactivate them, and put the pool in the DontDestroyOnLoad scene:
Because they are inactive, their CoherenceSync components are not syncing any value.
To spawn a new log we only need to call one line of code. However, we don't provide a reference to a regular Prefab like we would with Instantiate. We instead leverage the CoherenceSyncConfig object that represents the log.
This CoherenceSyncConfig contains all the info that coherence needs to handle this particular Prefab over the network. If we inspect it, we will notice that it contains in fact how the object is loaded (Load via) and how it's instantiated (Instantiate via).
You can notice how this is the same info we saw while configuring the CoherenceSync before.
Now that we have a reference to it, we can spawn the log with one line of code. In the ChoppableTree script, we do something like:
This line looks remarkably similar to Unity's own Instantiate in its syntax. The difference is that it gives us back a reference to the CoherenceSync attached to the log instance that will be enabled. From this, we can do all sorts of setup operations by just fetching other components with GetComponent, to prepare the instance.
When we are done with it (in this case, when it's thrown into the campfire), we can dispose of it:
(this line is in the Burnable.cs class, inside the GetBurned() method)
The instance is then automatically returned into the pool, and disabled.
When taking an instance out of the pool or when returning it, coherence doesn't automatically do any particular clean up to its state.
As such, when we reuse a pool instance, it is good practice to think of what values should be reset that might have been messed up by previous usage. We should think about what happens during gameplay, and use OnEnable / OnDisable as needed to ensure that disabled instances are put in a state that makes them ready to be used again.
For this project, since an object can be burned while being carried, we do some cleaning in the OnDisable of the Grabbable.cs class to prepare the wood logs for another round, like so:
Advanced networking concepts
Once you have learned the basics using the First Steps tutorial project, Campfire is the natural follow-up to get acquainted with more advanced and practical topics.
As with First Steps, you can download the whole Campfire Unity project and explore it at your own pace. Instead of being a series of independent scenes, Campfire is one big scene that presents multiple concepts working together at the same time. We recommend using the pages on this section as guidance on the individual topics, starting with getting acquainted with the game structure.
The Unity project can be downloaded from its Github repo. The Readme will tell you the minimum Unity version to use.
To quickly try out the game, we shared a WebGL build on the coherence Cloud. You can play it directly in the browser, or download one of the available desktop versions. Share the link with friends and colleagues, and try it together!
To play as a regular Client, make sure that the GameObject called Simulator is disabled in the scene Main:
Without it, the game will behave as a pure Client and spawn a player character on connection.
If you want to make a game build, simply having that object off will produce a Client build. You can run many Client builds to experience multiplayer gameplay.
In this project, there is an NPC that is supposed to be controlled by the Simulator (the Keeper Robot). Though this is intended to be a server-side behavior, you can actually make it run locally and play as a player at the same time without modifications to the code.
First, enable the Simulator GameObject in the scene.
Now press Play and connect.
The robot will start acting, exactly like it would do if it were running on a Simulator (minus, of course, the network delay). This allows you to see what would be happening on the server, with the full debugging power of the Unity Editor.
You can even use this Editor instance running alongside one or more Client builds.
To create a Simulator build, you have two ways to go about it, as usual:
building a Simulator to launch locally on your machine
building one to upload on the coherence Cloud
In both cases, make sure that the Simulator GameObject is enabled in the scene.
Don't change the Keeper Robot's Simulate In property like described in the previous section, since to run this behavior on the Simulator we want it to stay Server Side.
For more information, refer to the Simulators: Build and Deploy page.
Network Commands | Seamless authority transfer | Optional server-side logic
It's often the case that in addition to objects being fully owned by players, like their characters, there is often the need to have objects that exist only in one copy in the world and that need to store a complex state that needs to be reflected in the same way on each Client. And the state might not be a simple int or bool that can be just automatically synced over the network whenever it changes, but something more complex that requires to be elaborated.
This is often the case for more invisible objects like a leaderboard, a spawn point, a score counter or a match timer; but can also be the case for objects that have graphics.
An example of such an object, that also happens to be very central to this demo, is the campfire. As the players pick up objects and throw them on the fire, the campfire needs to perform a calculation based on a timer and the type of the object burned to decide which fire effect to play.
Timing is key here! If two players throw in two objects, one right after the other, they activate a special effect that makes the campfire burn bigger and brighter. But the two objects need to get on the fire within 2.5 seconds from each other (it's the teamEffortLength variable in the Campfire.cs script).
Because this calculation depends on the timer value that is managed by the Authority, we can't just independently calculate a result on each Client, as they would almost certainly end up with different results. We need to inform the Authority that the action is taking place, let it figure out the final state, and only then propagate the resulting state and actions to all Clients.
This is in a way similar to what happens with the trees. The event flow is very similar:
(1) Action happens on a Client -> (2) Authority campfire is notified, processes result -> (3) Authority campfire sends result to all others -> (4) Non-authority campfire objects execute local effects
We do have an extra challenge here though. Ultimately we want the Authority to inform everyone to play specific visual and sound effects depending on the object burned. But we can't send Network Commands with a reference to audio assets or particle systems. So we need to change this information to something we can send, and then on the receiving end, "unpack it" and transform it into the info we actually need (i.e., which sound).
Right now, we are looking at things in the context of a setup where Authority on the campfire is on one of the Clients. It is totally possible to give the Authority to a Server (and in fact we do in this project, see the end of this page), but the actual logical process doesn't change at all.
If you look into the Campfire.cs script, you will find this sequence of actions as exemplified by the flow below:
(1) The player throws an object on the fire. BurnObjectLocal() is invoked by the Burnable that collided with the Campfire. The script checks if Authority is already on this Client:
The method invoked in both cases is BurnObject(), but it's invoked differently depending on whether it is local (direct invocation) or remote (using SendCommand via the CoherenceSync).
We use the ID of the CoherenceSyncConfig of the object that burned as a parameter. The ID is a string, so it's something we can send over the network.
For more info on CoherenceSyncConfig check out this page.
(2) The logic for which fire effect to play is then calculated in BurnObject().
The campfire uses the CoherenceSyncConfig ID as a key to look into the CoherenceSyncConfigRegistry, and find the right object archetype to play the right effect.
For more info on CoherenceSyncConfigRegistry check out this page.
(3) ChangeFireState() is invoked locally on the Authority. Here the Authority updates its own property activeFireEffect which, being a synced property, gets sent to the other Clients.
But updating that int wouldn't be enough to tell which sound to play, so we send a command to invoke the FireStateChanged() method, passing the CoherenceSyncConfig ID which the non-authoritative campfire instances can use to trace down the object that burned in the CoherenceSyncConfigRegistry.
(4) The non-authoritative clients execute FireStateChanged(), which turn on/off the appropriate fire particles, and play a specific sound.
If the Client (or a Simulator) detaining the authority on the campfire disconnects, we need to make sure that whoever gets assigned authority next can pick up the job exactly where it was left off, and continue simulating the campfire logic without interruption.
That's why in the Campfire.cs class we make sure to sync three values:
activeFireEffect is an index (expressed as an integer) of which fire effect should be playing right now.
fireTimer and bigFireTimer are two countdowns that indicate how much time the fire will still burn normally or, when in "big fire mode", brighter.
However, there's an opportunity to be smart here. fireTimer and bigFireTimer are variables that are updated every Update on the Authority, but they are only useful in case the Authority gets transferred. So what we can do using the Optimization panel is to reduce the frequency they are sent to other Clients to a much more manageable value of once every second.
This might not be very precise and would have been unacceptable in the case of a visible timer, but here it doesn't matter. To the players this is going to be invisible, but we avoid a lot of network traffic.
As mentioned before, this mini state-machine behavior can run perfectly on one of the connected Clients. There is one catch though: this way, if no one is connected, the fire will stop updating because no one is simulating it, and thus it will never burn out.
Try this: connect, throw an object on the fire, disconnect, and reconnect after some time. The value of fireTimer will still be the same and so the fire will still be burning no matter how much time has passed.
Using an Authority transfer, it is trivial to let this behaviour run on a Simulator if there is one connected. Look into the Campfire class, within OnLiveQuerySynced:
With this simple code, whenever a Simulator connects and sees the persistent campfire network entity, it will take Authority over it. If it were ever to go offline and a client is connected, that Client would take back Authority. If the Simulator comes back online, it would steal it again. And so on.
While this is not a cheat-proof solution, it can be useful for various scenarios.
Having a behavior set up this way allows the Prefab and its logic to be used in an offline mode without modification (because the offline player would act as the owner Client). This can be useful to create a free demo version; a tutorial mode; or even to showcase the game in conditions of limited connectivity.
You could launch the game with no Simulators to run a game preview while keeping costs down, like during an Early Access or a Steam festival. Later on when it goes live, the game could be switched to use a Simulator, and no change to the code would be required.
Simulators | Flexible authority
Even when creating a game that is mainly client-driven, we can still run some of the code on a Simulator. This is very useful to create, for instance, an NPC that operates even when all Clients (players) are disconnected, to give a semblance of a living world.
In this project we used this pattern for the little yellow robot that sits beside the camp. If players move one of the camp's key objects out of place, the robot will tidy up after them. It can even recreate burned objects out of thin air!
Because this behavior is run by a Simulator, even if no-one is connected, given enough time all objects will be back in their place.
To setup the robot Prefab to be run by a Simulator couldn't be simpler. The only thing we need to do is to set the Simulate In property of the CoherenceSync to Server Side.
By just doing so, when you start the game as a Client, the robot GameObject will be deactivated. But if starting as a Simulator (instructions are here), it will run.
We also set both the KeeperRobot script and the NavMeshAgent to disable on remote instances from the coherence Configuration panel, so they automatically turns themselves off on Client machines.
Note that the GameObject named "Simulator" is disabled by default in the demo scene. When creating a Simulator build, you need to enable it before building, or the robot won't appear in the Simulator (and hence, on Clients).
Besides the simple state machine code that runs it, only one thing is worth noting here.
The exact moment when the robot starts acting is not in Start like usual. We imagined this behavior for an always-on world, so that it could start acting even long after other Clients disconnected. To ensure this, we hook into the onLiveQuerySynced event of the CoherenceBridge:
This way, the Simulator has the time to sync up with whatever happened to the campfire objects on the Replication Server, before even beginning to act.
This means that while gameplay can benefit from the presence of this NPC, it's not dependent on it. The Simulator can be always online, or connect and disconnect at times, or to be online only at certain times of the day, and so on.
Coding behaviors like this can open up many creative possibilities in the game's design.
One typical pattern here is to wrap any server-side logic in the conditional compilation directive #if COHERENCE_SIMULATOR. This is a great idea especially if the code needs to be obfuscated to normal Client builds, because by doing so, it won't be compiled in the Client at all.
We did it, but we were careful to leave some things out:
As you can see, we left out the 4 Network Commands used to play sounds, and the properties they need to do it. The idea here is that the authoritative instance of the robot, which is running the logic on the Simulator, instructs the non-authoritative instances to play sounds when needed.
Remember that disabling a script only prevents Unity functions to be called (Awake, Start, Update...), but it doesn't prevent invoking its methods.
Besides the above, wrapping synced variables or Network Commands inside a pre-compiler directive would hide them from coherence schema baking, effectively creating a different schema for the Simulator, which would then not be able to connect to the RS.
Make sure you keep all data of this type out of the #if, so that both Client and Simulator bake the same schema.
Finally, you might have noticed how we not only compile this code for Simulator builds, but also when in the Unity editor:
This allows us to quickly test the behavior of this robot without adding and removing compilation directives. By simply changing the Simulate In property of the CoherenceSync to Client Side, we can hit the Play button and see the robot move, as if a Simulator was connected.
This is a great way to speed up development and one of the advantages of coherence's flexible authority model: you don't need to code a behavior in a special way to change it from Client to Server side and vice versa.
It is good practice though to switch the robot to Server Side again at regular intervals, and test the game by making an actual Simulator build, in order to create the whole network scenario with all its actors.
This will help locate bugs that have to do with timing, connection speed, authority transfers, etc.
Networked audio | Networked particles | Animation Events
Usually, visual feedback can be expressed via syncing variables like Animator parameters, positions, and rotations. But sometimes we have the need to play sounds and particles, which are not types that can be automatically set to sync, or that we can send as arguments of . So how to do it?
This project has a lot of moments where particles and sounds need to play, and we used different strategies for different cases, depending on how fast, repeated, or slow the action is.
The most straightforward solution to play a sound is to use a Network Command. Using Commands, you can remotely invoke methods on AudioSource or ParticleSystem components.
To do that, you could simply open the coherence Configuration panel (from the CoherenceSync), and check the methods you're interested in.
While this is a perfectly fine way of doing things, it requires you to call multiple Network Commands in case you wanted to play a sound and particles at the same time. This could lead to desynchronisation between sound and visuals.
As such, in this project we preferred compacting these calls into methods on their own that are invoked as one Network Command, often without parameters to minimize the data being sent across.
Connected to the above, let's see how to create our own Network Commands to play sounds (or particles) as a result of an event that happened remotely.
For these sounds, we isolated the sound-playing behavior into Commands of their own. At the end of the KeeperRobot.cs class, we have:
(soundHandler is a script attached to the same gameObject)
Each of these methods is invoked as a Network Command, like so:
You can see how we don't play the sound over the network, that would be bandwidth-consuming for no reason, but we just communicate the intention to play it.
Because we only have 4 sounds, we sort of "brute-forced" this, and created an individual Network Command for each sound. This is not a bad idea from the point of view of network traffic: sending a Network Command with no parameter produces less traffic than sending one with.
But it could be unwieldy if we had - say - 100 different sounds to play.
This solution also requires us to bake and produce a new schema if we add or remove one of these Commands. So for a more flexible solution, it could be nice to index the sounds and maybe create a generic Command like:
In this case though, it was ok to go for individual Commands.
There are actions that are really quick or short, and asking to play a sound via a command might result in a mismatch between the visuals (an animation) and the sound, due to network delay.
For instance, it wouldn't make sense to send a Command to inform other Clients to play the sound of a footstep. Chances are, by the time they receive the Command, another two-three footsteps have happened.
A script called PlayAnimationEvents.cs (remember to add it to the same object as the Animator!) listens to these events. An example from it:
This ensures an immediate playback, in sync with the animation. Plus, it produces zero network traffic.
So yes, fun fact: to "network" sounds and particles often you can do without networking anything at all!
One more trick! If you have a state machine blending several clips, you might hear multiple overlapping sounds when a transition happens. One less known trick is to measure the weight of each clip while executing Animation Events, like we do below:
Chat |
Communication is an inherent part of online games and a chat, however simple, is a great way to enhance the range of expression for the players.
We wanted to implement a very simple chat system. By pressing Enter, a small screen-space UI opens up and allows the player to compose a message. When they press Enter again, a balloon on top of their character displays the message to them, and to all connected Clients.
This is done in three parts.
The Chat script on the player reads the input, requests ChatComposerUI to display the chat composer that is part of the screen-space scene UI.
When the player sends a chat message, Chat is informed by an event sent by ChatComposerUI, and sends a Network Command SendChatMessage to all other clients.
Finally, the received message is displayed in world-space over the player's head the script ChatVisualiserUI present in the Player Prefab.
By default, coherence's Network Commands have a limit in the length that can be sent in one command. This is limited by the length of a UDP packet. While this limitation might be removed in the future, for now it means that chat messages can't be longer than a certain amount.
This amount, however, is quite different depending if you use a parameter of type string or of type byte[] (byte array). If you send a string, you will be able to pass on around 50 characters. This is really not much for a chat system.
If you use byte[] though, the number of characters goes up to (around) 500. Now we're talking!
So what we do in this demo is that first we convert the string that the player has typed in the UI into a byte array, and we send that via Network Command:
Then, on the receiving side, we reconvert it back into a string:
This simple trick allows us to send longer messages, or to send the same message generating less traffic.
Because we are sending the chat messages on the CoherenceSync that is on the Player Prefab, it means that if that particular player instance is not visible to a Client because it's outside of their LiveQuery, they won't receive the Network Command and thus the chat message. This is maybe desirable in this demo, where the chat is visualised on top of the player.
This page talked about a simple chat system to use during gameplay, but keep in mind that coherence also has a solution for long-form chats as part of Lobby rooms. Players can be in a lobby before but also during gameplay.
Object lifecycle | | Runtime Unique IDs
In many cases, creating and destroying GameObjects like usual will be enough. Just call Instantiate() or Destroy(), and coherence takes care of instantiating and destroying the appropriate Prefab instance on each connected Client.
However, there are moments when it makes sense to customize how exactly coherence does this. To take full control over the lifetime of the object, or to attach custom behavior to these events.
coherence provides by default (and we use one too), but for ultimate control we also have the ability to create new, completely custom ones.
The campsite in this demo has a few pre-placed unique objects in the scene, that can be picked up, moved, and burned on the campfire.
Until the comes in and recreates them, they will not be replaced.
When we burn them, we could in theory just destroy the instance. However the burn code is deeply nested in the Burnable.cs class which is used not only by these unique objects, but also by the pooled and non-unique wood logs.
In this method we do this:
However, by default unique network entities also get disabled, not destroyed. This doesn't work for our special objects!
We could potentially add an if statement in the GetBurned() above, detect if the object being destroyed is a log or not, and act differently based on that. Or subclass the Burnable and implement overrides for GetBurned...
... or we can just create a custom instantiator, and take full control of the object's lifecycle. Let's see the code.
Creating a custom instantiator is trivial. We just need a class to implement the interface INetworkObjectInstantiator, like so:
The key parts of this script being that on network entity creation a simple Object.Instantiate() is performed, and on release Object.Destroy(). The other methods (omitted here) are actually empty.
We also want to prepend the class with the DisplayName attribute so it shows up in the dropdown when we configure a CoherenceSync. Now the UniqueBurnableObjects instantiator appears alongside the others in the Instantiate via dropdown:
That's it, the instantiator is ready to use.
When we call ReleaseInstance() now, it will act differently depending on which instantiator the Prefab is configured to use: the wood logs get disabled, but the unique campfire objects get destroyed.
This was a very simple use case for customization, but it illustrates how easy it can be to get in control of the lifetime of Prefab instances associated to network entities.
One interesting thing we do with anchors is that they are themselves unique objects, but because they are spawned at runtime, they need to get their unique ID dynamically at runtime.
The code is in the PersistentObject class:
We take the ManualUniqueId from the object spawning it (i.e., "Boombox"), and we combine with the string "-anchor" to create a new unique ID, "Boombox-anchor". We register this ID to the UniquenessManager of the CoherenceBridge to inform it that the next spawned network entity will have that ID. And then we simply call Instantiate().
Because they are set to be Persistent, even though a player has burned something and disconnected, the anchors stay on the Replication Server. When a Simulator connects it will find these placeholders and, thanks to the synced properties, will know exactly what to recreate and where to put it.
The check code is in KeeperRobot.cs, under CheckAnchors() and ActOnAnchor().
First, each anchor's isObjectPresent property is used for a quick scan. This property is synced.
If the object is still present, the robot needs to get a reference to it. It calls GetLinkedObject() on the anchor, which does this:
Once again using the UUID of the object this anchor is a placeholder for (holdingForUUID) as a key, we can now ask the UniquenessManager to retrieve an object that has that UUID.
With a reference to this, the robot can now put it back into place using the anchor's position and rotation as a reference.
And if the object has been destroyed (isObjectPresent is false), the robot proceeds to recreate it.
After that, like we saw before, the robot registers the newly recreated object with the UniquenessManager so that it has the same UUID that it had before being burned.
The object is reinstated, and to a new Client connecting, it will look exactly the same as if it never got removed.
Erik Svedäng, the winner of IGF 2009, explains the high-level concepts behind networking games.
This article will try to explain a handful of fundamental concepts that all are central to how networked games work. It does not contain any code examples and tries to not delve into minor details. Instead, its goal is to prepare someone new to the field for thinking about networking from a high-level perspective; what problems can arise and how they are commonly solved. The information in here is very useful for understanding the coherence SDK, but it should also be general enough to be applicable to any other similar networking library.
When a game runs on your local computer, it contains a lot of which is used to model the game. This includes things like animation state, the position and orientation of various game objects, AI calculations, physical forces, among with any gameplay-specific variables. Colloquially we refer to all of this data as state. Efficiently updating state is a hard problem, even for a game that is only running locally.
To create the illusion that you're playing together in the same game world, a networked multiplayer game has to transmit enough of its state to the other players. Since computer networks have limited it is absolutely necessary to restrict the amount of data being sent.
Generally speaking, there are two main ways to synchronize state; we can either send inputs, or the updated data itself. It is also possible to mix these approaches in various ways. We will now discuss each of the options briefly.
It is usually possible to enumerate a number of predefined inputs that the players of the game are allowed to perform (e.g. "jump", "run", "activate"). When an input is applied to the local game state, we can also make sure it is simultaneously sent to every other player in the session. If we make sure that each player starts the game in exactly the same state, and make sure that everyone applies exactly the same inputs as everyone else, the game state will appear in sync for each player. For certain types of games, this can save a lot of data from having to be transferred.
A good example might be an game with hundreds of units, where it might be enough to send the coordinates of mouse clicks instead of the location of each unit. This of course requires completely deterministic game logic, which is a challenge in itself.
Another problem is that if there's even the slightest mismatch in inputs, the local game states of the players will begin to diverge. To learn more about this approach (and how to work around some of the problems) see our documentation on .
It is noteworthy that sending inputs doesn't necessarily require a server; thus it is a great model to be used in a peer-to-peer setting.
A second approach is to send the updated data itself. This can often be more costly in terms if data transfer (a single player action can change a lot of local data, which in turn has to be transmitted to the other players). It leads to some nice benefits though; most importantly that game states are allowed to diverge slightly, as long as they have a chance to catch up.
Since it's the clients that run the simulation locally and then send the updated game state to the server, this setup can be referred to as client-authoritative.
It is also worth noting that you can combine client-authoritative simulation with inputs in interesting and useful ways. For example, it is possible to let players simulate some less-critical parts of the game state locally, while still sending inputs for their characters to a central server to be processed.
As stated before, a game contains a lot of data and it is not feasible to send all of it over the network in a real-time fashion. While using inputs is often the most lightweight choice in terms of data usage, it is common to have to send updates to the game state - both from the client to the server, and vice versa. In both those cases we have to use some optimizations. Here are the most important ones.
By keeping track of what the other players know about the state of your game, it is often possible to avoid a lot of data transfer. For example, a player might drop some game object on the ground and send the new location of it to each other participant. Unless that object moves, it is unnecessary to keep sending the same position over and over. This simple idea is used pervasively in coherence (and other similar networking solutions) to great effect.
It's important to acknowledge that a game sometimes generates many changes in a short timeframe. In such a situation, it is useful to prioritize changes based on how important they are for the particular game in question, while also factoring in how long it has been on hold. This means that an "old" change that doesn't get sent will build up importance and relative priority compared to other changes, eventually getting sent.
This modular approach where various tasks are performed by different programs, potentially on different machines or from different physical locations, can help with the scaling of a game if it has many users.
Most people who play computer games versus other people online want it to be fair, with equal conditions for each player.
If your game is client-authoritative, with clients sending updates of the game state to the server, we can't verify the validity of such an update and it becomes a problem. It would be quite feasible for a savvy player to modify their game and remove certain limitations put there by the game developer.
As an example, a game client could send an update that sets the health of each enemy to 0. To prevent such blatant cheating, it is useful to introduce the concept of authority (also often called "ownership"). This means that the Replication Server keeps track of which client has the rights to update each entity in the game. If an unauthorized update is sent to the server, it is rejected and will not get sent to any other participant.
For an input-based game, the cheating problem is slightly different. Since inputs will have to be applied in the right situation to have any effect, it is much harder to simply set the game state to illegal values. The role of authority in this case is to make sure that no player sends inputs for a game object they shouldn't be able to control.
This design does not work well for fast-paced games, since their simulations run at many frames per second. By the time a lost network message has been resent and finally made it to its final address, the information in it will have a high chance of already being outdated.
Sending data from one computer to another takes time, and there's no way around that. As a programmer of a networked game, it is important to embrace this fact and recognize that it changes how you must think about your game logic. When programming a single-player game (especially if it only runs on a single processor thread) we can assume that any change to the game state is immediate. In a networked game, this is not true.
This means that each player of a networked game is playing in their own "parallel universe", which affect each other at a distance. Updates to data that you don't have authority over will appear in an irregular and unpredictable way. Because of this it is beneficial to use a defensive coding style that tries to correct for out-of-order updates, and other unexpected circumstances.
The Bridge establishes a connection between your scene and the coherence . It makes sure all networked entities stay in sync.
When you place a GameObject in your scene, the Bridge detects it and makes sure all the synchronization can be done via the CoherenceSync component.
At runtime, you can inspect which Entites the Bridge is currently tracking.
A Bridge is associated with the scene it's instantiated on, and keeps track of Entities that are part of that scene. This also allows for multiple connections at the same time coming from the game or within the Unity Editor.
The CoherenceBridge offers a couple of Unity Events in its inspector where you can hook your custom game logic:
This event is invoked when the Replication Server state has been fully synchronized, it is fired after OnConnected.
For example, if you connect to a ongoing game that has five players connected, when this event is fired all the entities and information of all the other players will already be synchronized and available to be polled.
This event is invoked the moment you stablish a connection with the Replication Server, but before any synchronization has happened.
Following the previous example, if you connect to an ongoing game that has five players connected, when this event is fired, you won't have any entities or information available about those five players.
This event is invoked when you disconnect from a Replication Server. In the parameters of the event you will be given a ConnectionCloseReason value that will explain why the disconnection happened.
This event is invoked when you attempt to connect to a Replication Server, but the connection fails, you will be returned a ConnectionException with information about the error.
The Client Connections system allows you to keep track of how many users are connected and uniquely identify them, as well as easily send server-wide messages.
Currently, the maximum number of persistent Entities supported by the Replication Server is 32 000. This limit will be increased in the future.
Any GameObject that needs to be synchronized over the network needs to have a CoherenceSync. It defines a network entity, and what data to sync from its GameObject. In addition, are sent to and from CoherenceSync components.
Handles the connection between the coherence transport layer and the Unity scene. It is necessary to have a CoherenceBridge to be able to connect.
A tool to optimise network traffic, a Live Query specifies an area of interest that is unique to each Client, so that each Client (or Simulator) only receives data that is relevant to them. If the World was very large, the Live Query could be attached to the playable character or camera and move with them, determining a moving area of interest.
It is necessary to have at least one Live Query in the scene.
Tag Queries offer the same kind of traffic-filtering behaviour, but they do it based on a tag rather than according to distance.
Enables a Simulator to take control of the state authority of a Client's CoherenceSync, while the Client retains input authority. This component is added by CoherenceSync in .
These two components are used when parenting entities (one is for runtime, the other for edit-time). You can find much more information on their specifics in the section.
To get a feel for how these components function, try the interactive demo.
And don't forget to have a look at the explanations.
CoherenceSync is a component that should be attached to every networked GameObject. It may be your player, an NPC or an inanimate object such as a ball, a projectile or a banana. Anything that needs to be synchronized over the network and turned into an Entity.
Once a CoherenceSync is added to a Prefab, you can select which individual public properties you would like to sync across the network, expose methods as Network Commands, and configure other network-related properties.
To start syncing variables, open the Configure window that you can access from the CoherenceSync's Inspector.
Any components attached to the GameObject with CoherenceSync that have public variables will be shown here and can be synced across the network.
Network Commands are public methods that can be invoked remotely. In other networking frameworks they are often referred to as RPCs (Remote Procedure Calls).
To mark a method as a Command, you can do it from the Configure window in the same way described above when syncing properties by going to the second tab labelled "Commands".
When an entity is instantiated in the network, other Clients will see it but they won't have authority on it. It is then important to ensure that some components behave differently when an entity is non-authoritative.
To quickly achieve this, you can leverage Component Actions, which are located in the Components tab of the Configure window:
(You can notice in the screenshot above how the isBeingCarried property is synced in code, and displays the [Sync] tag in front of its name.)
The two workflows can be used together, even on the same Prefab!
When you create a networked GameObject, you automatically become the owner of that GameObject. That means only you are allowed to update its values, or destroy it. But sometimes it is necessary to pass ownership from one Client to another. For example, you could snatch the football in a soccer game or throw a mind control spell in a strategy game. In these cases, you will need to transfer ownership over these Entities from one Client to another.
When an authority transfer request is performed, an Entity can be set up to respond in different ways to account for different gameplay cases:
Not Transferable - Authority requests will always fail. This is a typical choice for player characters.
Steal - Authority requests always succeed.
Request - This option is intended for conditional transfers. The owner of an Entity can reply to an authority request by either accepting or denying it.
Approve Requests - The requests will succeed even if no event listener is present.
Note that for Request, a listener to the event OnAuthorityRequested needs to be provided in code. If not present, the optional parameter Approve Requests can be used as a fallback. This is only useful in corner cases where the listener is added and removed at runtime. In general, you can simply set the transfer style to Steal and all requests will automatically succeed.
Any Client or Simulator can request ownership by invoking the RequestAuthority() method on the CoherenceSync component of a Network Entity:
A request will be sent to the Entity's current owner. They will then accept or deny the request, and complete the transfer. If the transfer succeeds, the previous owner is no longer allowed to update or destroy the Entity.
When a Client disconnects, all the Network Entities created by that Client are usually destroyed. If you want any Entity to stay after the owner disconnects, you need to set Entity lifetime type of that Prefab to Persistent.
Session Based - the Entity will be removed on all other Clients, when the owner Client disconnects.
Orphaned Entities
By making the GameObject persistent, you ensure that it remains in the game world even after its owner disconnects. But once the GameObject has lost its owner, it will remain frozen in place because no Client is allowed to update or delete it. This is called an orphaned GameObject.
In order to make the orphaned GameObject interactive again, another Client needs to take ownership of it. To do this, one can use APIs (specifically, Adopt()) or – more conveniently – enable Auto-adopt orphan on the Prefab.
Allow Duplicates - multiple copies of this object can be instantiated over the network. This is typical for bullets, spell effects, RTS units, and similar repeated Entities.
No Duplicates - ensures objects are not duplicated by assigning them a Unique ID.
Manual Unique ID - You can set the Unique ID manually in the Prefab, only one Prefab instance will be allowed at runtime, any other instance created with the same UUID will be destroyed.
Prefab Instance Unique ID - When creating a Prefab instance in the Scene at Editor time, a special Prefab Instance Unique ID is assigned, if the manual UUID is blank, the UUID assigned at runtime will be the Prefab Instance ID.
Manual ID vs. Prefab Instance ID
To understand the difference between these two IDs, consider the following use cases:
Manager: If your game has a Prefab of which there can only be 1 in-game instance at any time (such as a Game Manager), assign an ID manually on the Prefab asset.
Multiple interactable scene objects: If you have several instances of a given Prefab, but each instance must be unique (such as doors, elevators, pickups, traps, etc.), each instance created in Editor time will have a auto-generated Prefab Instance Unique ID. This will ensure that when 2 players come online, they only bring one copy of any given door/trap/pickup, but each of them still replicates its state across the network to all Clients currently in the same scene.
Defines which type of network node (Client or Simulator) can have authority over this Entity.
Client Side - The Entity is by default owned by the Client that spawns it. It can be also owned by a Simulator.
Server Side - The Entity can't be owned by a normal Client, but only by a "server" (in coherence called Simulator).
You can hook into the events fired by the CoherenceSync to conveniently structure gameplay in response to key moment of the component's lifecycle. Events are initially hidden, but you can reveal them using the button at the bottom of the Inspector called "Subscribe to...".
You can also subscribe to these events in code.
When CoherenceSync variables/components are sent over the network, by default, Reflection Mode is used to sync all the data at runtime. Whilst this is really useful for prototyping quickly and getting things working, it can be quite slow and unperformant. A way to combat this is to bake the CoherenceSync component, creating a compatible schema and then generating code for it.
The schema is a file that defines which data types in your project are synced over the network. It is the source from which coherence SDK generates C# struct types (and helper functions) that are used by the rest of your game. The coherence Replication Server also reads the schema file so that it knows about those types and communicates them with all of its Clients efficiently.
The schema must be baked in the coherence Settings window, before the check box to bake this Prefab can be clicked.
When the CoherenceSync component is baked, it generates a new file in the baked folder called CoherenceSync<AssetIdOfThePrefab>. This class will be instantiated at runtime, and will take care of networked serialization and deserialization, instead of the built-in reflection-based one.
Invalid bindings error is something that happens very often when you have a [Sync] attribute on a field, or a [Command] attribute on a method, and you make some modifications in code to those members, for example adding a new parameter to a method.
coherence has a built-in option to fix invalid bindings for just such cases. The Remove All Invalid Bindings button appears in the CoherenceSync Inspector view:
Clicking this button removes broken bindings within the selected CoherenceSync Object that contains invalid data, such as:
Bindings pointing a field or method that has been removed.
Bindings pointing a field or method that has been renamed.
Bindings targeting a component that has been removed from the game object.
Binding targeting an animator parameter that has been renamed or removed.
Duplicate bindings.
The CoherenceNode component is used to prepare a network entity that needs to be parented to another network entity at a deep level – that is, not as a direct child. You only need CoherenceNode if the object needs to be a child of a child, or more.
The goal of the CoherenceNode component is to keep track of where the object is in the hierarchy, so when it's reparented by its owner coherence is able to replicate the same hierarchy structure on each connected Client.
However, as a user you don't need to do anything about it. You just apply the component to a network entity, and coherence will take care of the rest for you. Happy re-parenting!
This section is only interesting if you want to understand deeply how CoherenceNode works under the hood.
CoherenceNode works using two public fields which are automatically set to sync using the [Sync] attribute.
The path variable describes where in the parent's hierarchy the child object should be located. It is a string consisting of comma-separated indexes. Every one of these indexes designates a specific child index in the hierarchy. The child object which has the CoherenceNode component will be placed in the resulting place in the hierarchy.
The pathDirtyCounter variable is a helper variable used to keep track of the applied hierarchy changes. In case the object's position in the parent's hierarchy changes, this variable will be used to help settle and properly sync those changes.
CoherenceLiveQuery is a component used to create an , that is, an area of the world that the Client is interested in for the purpose of network traffic.
Having at least one query in the scene is necessary to receive any network update!
A LiveQuery defines the area of interest. It is defined by its Transform's position and its extent (half the side of the cube).
There can be multiple LiveQueries in a single scene.
Working with multiple LiveQueries is an additive operation and not a subtractive one.
A common approach is to place a CoherenceLiveQuery component on the camera and adjust the extent to reach as far as the far clipping plane or visibility distance.
Moving the GameObject containing the LiveQuery notifies the Replication Server that the query for that particular client has moved.
Try it out yourself
In addition to filtering object by distance using a , coherence also supports filtering objects by tag with CoherenceLiveQuery. This is useful when you have some special objects that should always be visible regardless of their position.
The tag used by the CoherenceTagQuery component is not based on .
Having at least one query in the scene is necessary to receive any network update!
To create a TagQuery, right click a GameObject in the scene and select coherence > TagQuery from the context menu.
All networked GameObjects with matching tags will now be visible to the Client. The coherence tag can be any string and can be configured in the Advanced Settings section of the CoherenceSync component.
Tags and TagQueries can be updated at any time while the application is running, either from the Unity inspector or setting CoherenceSync.coherenceTag and CoherenceTagQuery.coherenceTag in code.
Currently, only a single tag per GameObject and TagQuery is supported. To include objects with different tags, you can create multiple TagQuery objects for each tag.
In the future, we plan to integrate TagQueries with LiveQueries allowing combined query restrictions, e.g., only show objects with tag "red" within an extent of 50.
You will find the code of chairs in Chair.cs, located in Scripts/Objects. Looking into it, we find the property used as a gate:
When approaching an object that can be interacted with, the InteractionInput script does the work of detecting objects that have an Interactable script, and highlights them by changing their layer. This makes them render with an additional outline, as per one of the passes in the URP Renderer Renderer_WorldUI, contained in Settings.
The prefab for the interactive tree is in Prefabs/Interactive. The log that is spawned by it is in Prefabs/Interactive/Burnables.
The campfire Prefab is in Prefabs/Interactive.
All non-static interactive objects are in Prefabs/Interactive/Burnables.
You'll find the robot Prefab in Prefabs/Characters.
You will find chairs in Prefabs/Interactive/Chairs.
Check the Log prefab in Prefabs/Interactive/Burnable/:
This Sync Config can be found in the coherence/ folder, and is a sub-object of another ScriptableObject: the CoherenceSyncConfigRegistry.
Secondly, open the KeeperRobot prefab contained in Prefabs/Characters. On the CoherenceSync component, change its Simulate In property to Client Side.
So, as long as a Simulator is connected, the campfire will keep burning
The code for the robot is all contained in the KeeperRobot.cs class, in Scripts/Robot.
For instance, the has a series of voices that play whenever it is performing an action. The robots is always controlled by the Simulator, so we need to play sounds on the Clients' devices.
So for footsteps, jump, landing, and more; we used a slightly different strategy. Audio and particles are all played locally as part of the animation, using Unity's own .
But if chat messages are shown in a UI panel and players should receive them all regardless, then it might make more sense to rely on a special type of CoherenceSync: . By sending the Network Command on that, it would ensure that the Command is sent and received regardless of LiveQuery ranges.
Read the for more info.
For more information about Lobbies, read .
A simple ReleaseInstance() does the trick for the logs which are non-unique objects. They just go back into the .
If you're curious about this code, you can check out the file in the coherence package folder in io.coherence.sdk/Coherence.Toolkit/CoherenceSyncConfigs/ObjectInstantiators and open DefaultInstantiator.cs
API Reference for INetworkObjectInstantiator can be found .
The first time these special unique objects come online, they spawn a persistent invisible object we call "object anchor". This object holds the original position and rotation of the object, so that the can come in at a later time and put the recreated object back into its place. You could think of these objects as placeholders.
Using the anchor's syncConfigId as a key, it looks in the CoherenceSyncConfigRegistry and finds the archetype to recreate. This is similar to how we used the registry as a catalogue .
This concept is usually referred to as . Not having a single "initial state" also makes it easier to support features like letting players join late, or backing up the state of the game world.
A third option is a combination of the two solutions above, where clients send inputs but receive updated world data. This requires a central that is be able to run the game logic. The Simulator is a program trusted by the game developer and it knows how the inputs sent by the players are supposed to affect the game state.
This is a server-authoritative setup; players won't be in charge of the simulation and can't affect the game state directly. This has multiple implications, for example it shifts some of the burden of computation from user devices onto the server. To read more about this approach, see .
Finally, a major way of limiting data usage is to filter out uninteresting information and only send the most important parts based on the needs of each participant, also known as . Most commonly this takes the form of a position-based query. The query will make sure that a specific player only gets updates from objects in its vicinity. Anything far away will simply be ignored, and no data has to be sent. It is also possible to send some (but less detailed) data depending on distance. To learn more about these techniques, take a look at the coherence documentation for and .
A game can have many users, and to facilitate the optimizations mentioned in the previous section it is necessary to track what each participant knows about the game state (and what they are interested in knowing). Instead of putting this burden on each game client, which entails an additional performance cost and can be hard to coordinate, it is better to make this part of a central server. For coherence, this is named the .
In the case of using an input-based setup, there also has to be a central arbiter in charge of handling the received inputs, applying them to the game state, and sending the new game state to each client. In a coherence setup, the simulation of the game (which requires game-specific knowledge) is handled by a which communicates with the Replication Server.
In many cases it is useful to allow for the . For example, there could be a magical potion that you can drink from in the game. If a player has authority over the potion, she can move it around and drink from it, or refill it. If she then gives the potion to another player, they would get authority over it and the original player would no longer be able to update it.
For certain game objects where we don't trust the players with updating them (or don't want potentially expensive logic to run on their devices) it is also possible to have dedicated machines that have authority over those objects and update them (see ).
There are multiple ways of sending data over a network. These are called protocols. When speed is not the single most important factor, is often used. It has mechanisms for checking that the correct information was sent and it will try to resend the information if it was lost along the way to it recipient.
So instead of TCP, games often use . This protocol is unreliable by design, but coherence adds a reliability layer on top of it. If turns out that an update didn't make it to its recipient, that update will be re-sent, but only after checking if any more recent changes to its data exist. This way, it is more likely that each player gets a consistent and up-to-date view of the shared game state.
One example of such a coding technique (which is already built into coherence) is . It uses a selection of algorithms to predict what a value will be, based on previous values. This "smooths out" the values over time, which often looks better than using the raw versions. The best example of this is probably interpolation of position - if an object is moving in a straight line at a certain speed and then the update with its new position is somehow lost, it is better to assume that the object will keep moving instead of stopping it.
If the concepts in this article were new to you, we hope that you now feel more confident thinking about the challenges of networked game. While networking surely can be tricky at times, it's also immensely cool and fun when it works - hopefully coherence will make you reach that point in no time! Our docs contain lots of information on how to proceed from here. Perhaps you should start by following a ?
You can use to get a CoherenceBridge associated with a scene:
You can read more about the Client Connections system .
If you have a , you can connect to Worlds or Rooms hosted in coherence Cloud. You can use the CloudService instance from CoherenceBridge to fetch existing Worlds or create or fetch existing Rooms, after you fetch a valid World or Room, you can use the JoinWorld or JoinRoom methods to easily connect your client.
You can read more about the coherence Cloud Service .
To start syncing a property, just use the checkbox. Optionally, choose how it is on the right.
For more info, refer to the page about .
The sections above describe UI-based workflows to sync variables and commands. We also offer a code-based workflow, which leverages directly from within code.
You can also create your own, .
Persistence - Entities with this option will persist as long as the Replication Server is running. For more details, see .
Server Side with Client Input - This automatically adds a component. Ownership is split: a Simulator holds State Authority, while a Client has Input Authority. See for more info.
Once revealed, you can use them just like regular :
You might also want to check out the CoherenceSync instance lifecycle section at the bottom of the article.
You can find more information on the page about .
To get familiar with all parenting options, we strongly recommend to read the section.
Go to our interactive demo and see it in action in scene 3 (Areas of Interest). There is also has an for the curious.
This page describes the order of various coherence events and scripts in relation to Unity's main loop.
Check out ScriptExecutionOrder.
Additionally, take a look at your project's Script Execution Order settings by opening Edit > Project Settings and selecting the Script Execution Order category. See this Unity manual article for more details.
Depending on the reason for a disconnection the onDisconnected event can be raised from different places in the code, including LateUpdate.
When a Prefab instance with CoherenceSync is created at runtime, it will be fully synchronized with the network in the OnEnable method of CoherenceSync. This means that you can expect your custom Components to have fully resolved synchronized values and authority state in your Awake method. It occurs in the following order:
Awake() is called
Internal initialization.
OnEnable() is called
Synchronize with a new or existing Network Entity.
OnBeforeNetworkedInstantiation event is invoked.
Initial component updates are applied (for entities you have no authority over).
OnNetworkedInstantiation event is invoked.
OnStateAuthority or OnStateRemote (for authority or non-authority instances respectively) event is invoked.
Awake() is called
At this point, if you get the CoherenceSync component, you can expect networked variables and authority state to be fully resolved.
CoherenceInput is a component that enables a Simulator to take control of a Client's entities, based on the Client's inputs. It is an essential piece of a server-authoritative setup.
When you select Server Side with Client Input in the Simulate In option on a CoherenceSync, coherence will add a CoherenceInput component to the entity.
From this point on, the authority on this entity is split: a Client has Input authority, while a Simulator will have State authority. This means that the Client is not fully in control of the entity, but only has the license to send inputs to a Simulator. The Simulator in turn will process these inputs, elaborate new state, and send it to the Client who can now display the results.
Because of this round-trip, there will always be a delay between the player's inputs and what they see on screen. To make the game more reactive, you might need to implement prediction.
For more information on how to setup and configure inputs for a CoherenceInput component, refer to the server-authoritative setup page.
The CoherenceSync component will help you prepare an object for network synchronization. It also exposes APIs that allows us to manipulate the object during runtime.
CoherenceSync is able to sync all public variables and methods on any of the attached components, for example Unity components such as Transform, Animator, etc. This will include any custom scripts, including third-party Asset Store packages that you may have downloaded.
Refer to the Prefab setup page to learn how to configure your Prefabs to network state changes.
coherence can sync the following types out of the box:
bool
int
uint
byte
char
short
ushort
float
string
Vector2
Vector3
Quaternion
GameObject
Transform
RectTransform
CoherenceSync
SerializeEntityID
byte[]
long
ulong
Int64
UInt64
Color
double
RectTransform is still in an experimental phase - use at your own discretion!
Aside from configuring your CoherenceSync bindings from within the Configure window, it's possible to use the [Sync] and [Command] C# attributes directly on your scripts. Your Prefabs will get updated to require such bindings.
Mark public fields and properties to be synchronized over the network.
It's possible to migrate the variable automatically, if you decide to change its definition:
If a variable is never updated after it is first initialized, it can be flagged to only be synchronized when the GameObject is created. This will improve performance, as coherence won't need to continually sample its value for changes like it would normally do.
Mark public methods to be invoked over the network. Method return type must be void.
It's possible to migrate the command automatically, if you decide to change the method signature:
Note that marking a command attribute only marks it as programmatically usable. It does not mean it will be automatically called over the network when executed.
You still need to follow the guidelines in the Messaging with Commands article to make it work.
Notifying State Changes
It is often useful to know when a synchronized variable has changed its value. It can be easily achieved using the OnValueSyncedAttribute. This attribute lets you define a method that will be called each time a value of a synced member (field or property) changes in the non-simulated version of an entity.
Let's start with a simple example:
Whenever the value of the Health field gets updated (synced with its simulated version) the UpdateHealthLabel will be called automatically, changing the health label text and printing a log with a health difference.
This comes in handy in projects that use authoritative Simulators. The Client code can easily react to changes in the Player entity state introduced by the Simulator, updating the visual representation (which the Simulator doesn't need).
The OnValueSyncedAttribute requires using baked mode.
Remember that the callback method will be called only for a non-simulated instance of an Entity. Use on a simulated (owned) instance requires calling the selected method manually whenever the value of a given field/member changes. We recommend using properties with a backing field for this.
The OnValueSynced feature can be used only on members of user-defined types, that is, there's no way to be notified about a change in the value of a Unity type member, like transform.position. This might however change in the future, so stay tuned!
Even though coherence provides Component Actions out of the box for various component, you can implement your own Component Actions in order to give designers on the team full authoring power on network entities, directly from within the Configure window UI.
Creating a new one is simply done by extending the ComponentAction abstract class:
Your custom Component Action must implement the following methods:
OnAuthority This method will be called when the object is spawned and you have authority over it.
OnRemote This method will be called when a remote object is spawned and you do not have authority over it.
It will also require the ComponentAction class attribute, specifying the type of Component that you want the Action to work with, and the display name.
For example, here is the implementation of the Component Action that we use to disable Components on remote objects:
coherence makes it easy to instantiate networked objects. If you instantiate a while the game is running, it automatically instantiates on all connected clients. You don't need to do anything else to make it happen.
However some rules apply, so read on to understand more about the process.
It is important to understand that coherence has no concept of a "player Prefab" that maps 1:1 with each Client. Clients can control only one network entity, multiple, or none at all.
Clients can also trade authority over them at runtime. For example, a Client might initially have authority over a character, which can then move to another Client during gameplay.
It's up to you to decide what constitutes a "player Prefab": you can instantiate one before connecting, right after connection, or at any point during the simulation. You can even just leave it in the scene, and let each player bring a copy of that into the simulation (in this case, make sure the Prefab is not set to be unique!).
Finally, if you come from other networking frameworks, you might expect a player Prefab to be be instantiated by the network manager (in coherence, the CoherenceBridge), but that is not the case. Like all other network entities, it can be instantiated by any script.
Identifying Clients
You do have the ability to assign a Prefab to each client: the ClientConnection Prefab. This lives and dies with the client's connection, and you can use it to hold important data related to that Client. You can assign it in the Inspector of the CoherenceBridge.
ClientConnection Prefabs are optional.
You can instantiate a networked Prefab in the following ways:
Use GameObject.Instantiate(), and provide a reference to the Prefab:
Simply include the Prefab in a scene.
(Editor only, for testing) Drag the Prefab from the Project window to the scene or to the Hierarchy while the game is running.
In all of these cases, the Prefab will be immediately instantiated on all other connected clients and Simulators.
Just ensure to include a CoherenceSync component on the Prefab, and that netcode is baked correctly.
Whoever instantiates a Prefab gets full authority over it. All other clients will see it as remote.
The value of the Simulate In property on the CoherenceSync can modify this behaviour. Read more about authority models.
You cannot directly instantiate an entity owned by another Client. The Client that instantiates a Prefab automatically has authority over it.
However, you can transfer authority immediately after instantiation. In code:
(to get other clients' IDs you need to have ClientConnections enabled)
This is a perfectly valid strategy to have a Simulator spawn player characters for connected Clients.
To destroy a networked Prefab, simply invoke GameObject.Destroy() on it. coherence will automatically destroy all remote copies.
Keep in mind is that only whoever has State authority over it can destroy an entity. If someone else does it, they will get a warning in the console.
Clients cannot directly destroy entities they don't have authority over. Instead, you may:
Send a Network Command to ask the owner to destroy it. In code:
Take authority over the entity first, then destroy it locally. This is slightly slower as it implies a full roundtrip (request > response > destruction), but it's a viable option if the requester needs to verify whether the entity can be destroyed at all. You can implement the conditions under which the other client will approve or deny the request. In code:
Note that we're assuming that the request above always succeeds, and we're not implementing any approval/denial code for the sake of simplicity.
In coherence, you can take full control of how network entities are instantiated.
A typical use for custom instantiation is streaming assets in with the Addressables package, which coherence is fully integrated with. Another typical use case is object pooling.
To use custom instantiation you can't just hard reference the Prefab and invoke Instantiate() or Destroy() as described above. Instead, you have to use its CoherenceSyncConfig to let the chosen instantiator script take over and perform custom operations.
We natively support object pooling, so that newly requested entities don't just get created from scratch, but they are taken from a pre-existing pool.
In the CoherenceSync component inspector, you will find an option called Instantiate Via.
Select the option called Pool, and define the initial and max size of the pool:
When the game starts, coherence will automatically create a pool of disabled instances of this Prefab in the DontDestroyOnLoad scene. It will then activate these for new remote entities that use this Prefab that other clients created.
If you want to take from the same pooling system to instantiate your own local/authoritative entities, you can do so by using the CoherenceSyncConfig asset corresponding to your Prefab. If you reference this asset, you will be able to instantiate and destroy entities by using its API: these methods will use the underlying pool implementation to do so.
When remote entities are removed or go out of a LiveQuery, they will be automatically deactivated and move back into the pool.
If you already have a pooling system in place (even a third-party asset!) and you would like remote objects to leverage it, you can hook your own pool into a custom instantiator using the INetworkObjectInstantiator interface. This is described in the Instantiate Via page.
Extending what can be synced from the Configure window
This is an advanced topic that aims to bring access to coherence's internals to the end user.
The Configure window lists all variables and methods that can be synced for the selected Prefab. Each selected element in the list is stored in the Prefab as a Binding with an associated Descriptor, which holds information about how to access that data.
By default, coherence uses reflection to gather public fields, properties and methods from each of the Prefab's components. You can specify exactly what to list in the Configure window for a given component by implementing a custom DescriptorProvider. This allows you to sync custom component data over the network.
Take this player inventory for example:
Since the inventory items are not immediately accessible as fields or properties, they are not listed in the Configure window. In order to expose the inventory items so they can be synced across the network, we need to implement a custom DescriptorProvider.
DescriptorProviderThe main job of the DescriptorProvider is to provide the list of Descriptors that you want to show up in the Configure window. You can instantiate new Descriptors using this constructor:
name: identifying name for this Descriptor.
ownerType: type of the MonoBehaviour that this Descriptor is for.
bindingType: type of the ValueBinding class that will be instantiated and serialized in CoherenceSync, when selecting this Descriptor in the Configure window.
required: if true, every network Prefab that uses a MonoBehaviour of ownerType will always have this Binding active.
If you need to serialize additional data with your Descriptor, you can inherit from the Descriptor class or assign a Serializable object to Descriptor.CustomData.
Here is an example InventoryDescriptorProvider that returns a Descriptor for each of the inventory items:
To specify how to read and write data to the Inventory component, we also need a custom binding implementation.
BindingA Descriptor must specify through the bindingType which type of ValueBinding it is going to instantiate when synced in a CoherenceSync. In our example, we need an InventoryBinding to specify how to set and get the values from the Inventory. To sync the durability property of the inventory item, we should extend the IntBinding class which provides functionality for syncing int values.
We are now ready to sync the inventory items on the Prefabs.
PrefabSyncGroup is a component to enable workflows where networked Prefabs are nested into each other. By adding this component, coherence will be able to track "which Prefab is nesting which one", and thus keep their structure and lifetime synchronised once the game is running.
The complexity of that is all taken care of for you. As a user, all you need to do is add PrefabSyncGroup to the root of the Prefab that is containing the others.
Read more and see an example in the dedicated page Nesting Prefabs at Edit time.
To get familiar with all parenting options, we strongly recommend to read the Parenting network entities section.
coherence only replicates animation parameters, not state. Latency can create scenarios where different Clients reproduce different animations. Take this into account when working with Animator Controllers that require precise timings.
Unity Animator's parameters are bindable out of the box, with the exception of triggers.
While coherence doesn't officially support working with multiple AnimatorControllers, there's a way to work around it. As long as the parameters you want to network are shared among the AnimatorControllers you want to use, they will get networked. Parameters need to have the same type and name. Using the example above, any AnimatorController featuring a Boolean Walk parameter is compatible, and can be switched.
Triggers can be invoked over the network using commands. Here's an example where we inform networked Clients that we have played a jump animation:
Now, bind the PlayJumpAnimator method as a command.
Binding to variables and methods within the hierarchy
If a synced Prefab has a hierarchy, you can synchronize variables, methods and component actions for any of the child GameObjects within its hierarchy.
Note: on this page we cover children GameObjects or nested Prefabs that don't have their ownCoherenceSync. If a child object does have a CoherenceSync of their own, they become an independent network entity. For that, see the Parenting section.
When the Configure window is open it will show the variables, methods and component actions available for synchronization for your currently selected GameObject.
First, make sure to be editing the Prefab in Prefab Mode:
Once in Prefab Mode and with the Configure window open, shift the selection to any of the GameObjects that belong to the hierarchy.
The Configure window will be updated automatically, showing you everything that is available to be synchronized on the child GameObject:
That's it!
Syncing properties, methods and component actions on child GameObjects doesn't require any different flow than what you usually do for the root object. They all get collected and networked as part of one single network entity.
After your changes to GameObject, don't forget to Bake again to rebuild the netcode for the entity.
Make sure to not destroy child GameObjects that have synced properties, or you will receive a warning in the Console. To destroy a synced object, always remove the root.
(you can totally destroy children that don't have any synced property)
Entity references let you set up references between Entities and have those be synchronized, just like other value types (like integers, vectors, etc.)
To use Entity references, simply select any fields of type GameObject, Transform, or CoherenceSync for syncing in the Configuration window:
The synchronization works both when using reflection and in baked sync scripts.
Entity references can also be used as arguments in Commands.
It's important to know about the situations when an Entity reference might become null, even though it seems like it should have a value:
A client might not have the referenced entity in its LiveQuery. A local reference can only be valid if there's an actual Entity instance to reference. If this becomes a problem, consider switching to using the CoherenceNode component or Parent-Child relationships of prefabs, which ensures that that Entity stays part of the query.
The owner of the Entity reference might sync the reference to the Replication Server before syncing the referenced Entity. This will lead to the Replication Server storing a null reference. If possible, try setting the Entity references during gameplay when the referenced Entities have already existed for a while.
Cyclic references are undefined behavior for now. Therefore multiple entities created on the same Client that reference each other might never get synced properly. This is also holds true for references that exist through intermediate entities (A has reference to B has reference to C has reference A - cyclic).
In any case, it's important to use a defensive coding style when working with Entity references. Make sure that your code can handle missing Entities and nulls in a graceful way.
Commands are network messages sent from one CoherenceSync to another CoherenceSync. Functionally equivalent to RPCs, commands bind to public methods accessible on the GameObject hierarchy that CoherenceSync sits on.
We have a video that can clarify how Network Commands work when invoked on network entities of varying authority state (from 5:00):
In the design phase, you can expose public methods the same way you select fields for synchronization: through the Configure window on your CoherenceSync component.
By clicking on the method, you bind to it, defining a command. The grid icon on its right lets you configure the routing mode. Commands with a Send to Authority Only mode can be sent only to the authority of the target CoherenceSync, while ones with the Send to All Instances can be broadcasted to all Clients that see it. The routing is enforced by the Replication Server as a security measure, so that outdated or malicious Clients don't break the game.
To send a command, we call the SendCommand method on the target CoherenceSync object. It takes a number of arguments:
The generic type parameter must be the type of the receiving Component. This ensures that the correct method gets called if the receiving GameObject has components that implement methods that share the same name.
Example: sync.SendCommand<Transform>(...)
If there are multiple commands bound to different components of the same type (for example, your CoherenceSync hierarchy has five Transforms, and you create a command for Transform.SetParent on all of them), the command is only sent to the first one found in the hierarchy which matches the type.
The first argument is the name of the method on the component that we want to call.
It is good practice to use the C# nameof expression when referring to the method name, since it prevents accidentally misspelling it, or forgetting to update the string if the method changes name.
Alternatively, if you want to know which Client sent the command, you can add CoherenceSync sender as the first argument of the command, and the correct value will be automatically filled in by the SDK.
The second argument is an enum that specifies the MessageTarget of the command. The possible values are:
MessageTarget.All – sends the command to each Client that has an instance of this Entity.
MessageTarget.AuthorityOnly – send the command only to the Client that has authority over the Entity.
MessageTarget.Other - sends the command to every Entity other than the one SendCommand is called on.
Mind that the target must be compatible with the routing mode set in the bindings, i.e. Send to authority will allow only for the MessageTarget.AuthorityOnly while Send to all instances allows for both values.
Also, it is possible that the message never sends as in the case of a command with MessageTarget.Other sent from the authority with routing of Authority Only.
The rest of the arguments (if any) vary depending on the command itself. We must supply as many parameters as are defined in the target method and the schema.
Here's an example of how to send a command:
If you have the same command bound more than once in the same Prefab hierarchy, you can target a specific MonoBehaviour when sending a message, via the SendCommand(Action action) method in CoherenceSync.
Additionally, if you want to target every bound MonoBehaviour, you can do so via the SendCommandToChildren method in CoherenceSync.
By default commands don't have any order. In other words, commands might be received by other Clients in a completely different order than they were sent.
If the order of commands is crucial, use SendOrderedCommand instead of SendCommand. This guarantees that any given ordered command will be received by other Clients in the same order in which it was sent from the source Client, relative to other sent ordered commands by that Client.
Note that ordered commands are not ordered relative to entity creation/destruction or binding updates. They are ordered only relative to other ordered commands.
Sending commands as ordered should be used only where necessary, since each ordered command slightly increases bandwidth and latency in case of bad network conditions.
We don't have to do anything special to receive the command. The system will simply call the corresponding method on the target network entity.
If the target is a locally simulated entity, SendCommand will recognize that and not send a network command, but instead simply call the method directly.
While commands by default carry no information on who sent them in order to optimize traffic, you can create commands that include a ClientID as one of the parameters. Then, on the receiving end, compare that value with a list of connected Clients.
Another useful way to access ClientID is via CoherenceBridge, like this:
You can create your own implementation for these IDs or, more simply, use coherence's built-in Client Connections feature.
Sometimes you want to inform a bunch of different CoherenceSyncs about a change. For example, an explosion impact on a few players. To do so, we have to go through the instances we want to notify and send commands to each of them.
In this example, a command will get sent to each CoherenceSync under the state authority of this Client. To make it only affect CoherenceSyncs within certain criteria, you need to filter to which CoherenceSync you send the command to, on your own.
Some of the primitive types supported are nullable values, this includes:
Byte[]
string
Entity references: CoherenceSync, Transform, and GameObject
Refer to the supported types page.
In order to send one of these values as a null (or default) we need to use special syntax to ensure the right method signature is resolved.
Null-value arguments need to be passed as a ValueTuple<Type, object> so that their type can be correctly resolved. In the example above sending a null value for a string is written as:
(typeof(string), (string)null)
and the null Byte[] argument is written as:
(typeof(Byte[]), (Byte[])null)
Mis-ordered arguments, type mis-match, or unresolvable types will result in errors logged and the command not being sent.
When a null argument is deserialized on a client receiving the command, it is possible that the null value is converted into a non-null default value. For example, sending a null string in a command could result in clients receiving an empty string. As another example, a null Byte[] argument could be deserialized into an empty Byte[0] array. So, receiving code should be ready for either a null value or an equivalent default.
When a Prefab is not using a baked script there are some restrictions for what types can be sent in a single command:
4 entity references
maximum of 511 bytes total of data in other arguments
a single Byte[] argument can be no longer than 509 bytes because of overhead
Some network primitive types send extra data when serialized (like Byte arrays and string types) so gauging how many bits a command will use is difficult. If a single command is bigger than the supported packet size, it won't work even with baked code. For a good and performant game experience, always try to keep the total command argument sizes low.
When a Client receives a command targeted at AuthorityOnly but it has already transferred an authority of that entity, the command is simply discarded.
Authority over an Entity is transferrable, so it is possible to move the authority between different Clients or even to a Simulator. This is useful for things such as balancing the simulation load, or for exchanging items. It is possible for an Entity to have no Client or Simulator as the authority - these Entities are considered orphaned and are not simulated.
In the design phase, CoherenceSync objects can be configured to handle authority transfer in different ways:
Request. Authority transfer may be requested, but it may be rejected by the current authority.
Steal. Authority will always be given to the requesting party on a FCFS ("first come first serve") basis.
Disabled. Authority cannot be transferred.
When using Request, an optional callback OnAuthorityRequested can be set on the CoherenceSync behaviour. If the callback is set, then the results of the callback will override the Approve Requests setting in the behaviour.
The request can be approved or rejected in the callback.
When Lifetime is set to Persistent, you will see an extra checkbox called Auto-adopt Orphan.
Enabling this option makes it so that if the entity is abandoned by its owner, as soon as possible the Replication Server will assign it to a Client again. This can be useful for instance in a big game world, where entities often go out of LiveQueries. When they are first seen again by a Client, the Auto-adopt Orphan option ensures that the Client takes over that entity (i.e. its State authority) without you having to write code for it.
Note: If you abandon an entity but it's still in your LiveQuery, on the next frame the Replication Server might assign it to you again. If you want more control over that, then perhaps you should turn Auto-adopt Orphan off, and implement callbacks to the authority events for that entity.
Requesting authority is very straight-forward.
RequestAuthority returns false if the request was not sent. This can be because of the following reasons:
The sync is not ready yet.
The entity is not allowed to be transferred becauseauthorityTransferType is set to NonTransferable.
There is already a request underway.
The entity is orphaned, in which case you must call Adopt instead to request authority.
The request itself might fail depending on the response of the current authority.
As the transfer is asynchronous, we have to subscribe to one or more UnityEvents in CoherenceSync to learn the result.
These events are also exposed in the Custom Events section of the CoherenceSync inspector.
Supporting Unity physics in a network environment requires managing the state of rigid bodies on replicated Prefabs. Generally, if a Prefab using CoherenceSync has a Rigidbody or Rigidbody2D component, the replicated instances of the Prefab should have the body set to kinematic so that they do not simulate in the physics step on non-authoritative clients. There is a convenient configuration for this in the CoherenceSync configuration components tab.
For most purposes, this is all that is required to have physically simulated entities correctly replicated on Clients. However, only the transform of the rigid body is actually replicated. For additional physical state replication a more advanced setup is required.
The CoherenceSync component supports three modes for replication of Unity rigid bodies:
Direct - the default mode used for basic replication of the transform of the Unity GameObject with a rigid body component. When a rigid body is detected, the position and rotation of the GameObject are provided by and assigned to the rigid body's position and rotation directly and Unity updates the GameObject transform after the physics step.
Manual - disables automatic update of position and rotation of CoherenceSync Prefabs with rigid bodies and enables the use of callbacks, allowing custom implementation of how position and rotation updates are applied. The callbacks are OnRigidbody2DPositionUpdate, OnRigidbody3DPositionUpdate, OnRigidbody2DRotationUpdate, and OnRigidbody3DRotationUpdate.
Networked entities can be simulated either on a Game Client ("Client authority") or a Simulator ("Server-side authority"). Authority defines which Client or Simulator is allowed to make changes to the synced properties of an entity, and in general defines who "runs the gameplay code" for that entity.
When an entity is created, the creator is assigned authority over the entity. Authority can be then at any time between Clients – or even between Clients and Simulators, or .
In any case, only one Client or Simulator can be the authority over the entity at any given time.
To learn more about authority, check out this short video:
When architecting a multiplayer game, it is important to choose which authority model the game relies on. coherence supports a variety of models.
Client authority is the easiest to set up initially, but it has some drawbacks:
Higher latency. Because both Clients have a non-zero ping to the Replication Server, the minimum latency for data replication and commands is the combined ping (Client 1 to Replication Server and Replication Server to Client 2).
Higher exposure to cheating. Because we trust Game Clients to simulate their own Entities, there is a risk that one such Client is tampered with and sends out unrealistic data.
In many cases, especially when not working on a competitive PvP game, these are not really issues and are a perfectly fine choice for the game developer.
Client authority does have a few advantages:
Easier to set up. No Client vs. Server logic separation in the code, no building and uploading of Simulation Servers, everything just works out of the box.
Cheaper. Depending on how optimized the Simulator code is, running a Simulator in the cloud will in most cases incur more costs than just running a Replication Server (which is comparatively very lean).
Running a Simulator in the cloud next to the Replication Server (with the ping between them being negligible) will also result in lower latency.
A typical choice for competitive games, sometimes called "Server-authoritative". The entity is simulated on the Server, and the Client only sends inputs. To achieve smoother gameplay, the Client can predict the entity's state locally and then reconciliate once the Simulator has come back with a new state.
Mixing authority models
A cool possibility that coherence enables is to mix these modes, since authority is not tied to the match but rather a property of each CoherenceSync.
So for instance, you can have a game where some critical entities are server-side with client input for cheat prevention, while others are distributed among Clients. It's up to you!
While we generally speak of "authority" in abstract, in the coherence model we break authority in two, in order to support the variety of scenarios needed in multiplayer games. We call these State authority and Input authority.
A Client or Simulator can only have State authority over an entity, only Input authority, or both (in this case we say it has "full authority"). In fact, if you use coherence on a basic level, most of the time you will be dealing with full authority without realising it.
When a Client has State authority over an entity it means that they are authorized to change its state, that is, the values of the entity's networked properties.
For instance, if the entity's Transform.position and Transform.rotation properties are set to sync, the Client who has authority can change these and move the entity around.
A Client who tries to change properties with no State authority will see those properties be reset immediately by coherence.
Hint: If you see an entity jittering around, it might be the signal that the current Client has no authority over an entity, but it's trying to change its values. Time to do some debugging!
When a Client or Simulator has State authority over an entity, it means that they are authorized to send inputs to the State authority.
Whoever has State authority then is in charge of processing that input, and producing a new state for the entity, which is then sent to all observing Clients.
Entities that no-one has authority over (neither State nor Input) are called "orphans". Orphaned entities are not simulated, so the values of their synced properties don't change. In a way you could think of them as sleeping.
Authority over an entity can be given up using CoherenceSync.AbandonAuthority(). Using this API will make an entity orphan until someone else adopts it. An entity can also become an orphan when a Client or Simulator that had State authority disconnects.
For an entity to become an orphan, they need to be set as Persistent. A non-persistent entity that is abandoned will be immediately deleted by the Replication Server.
When a Client has no authority whatsoever over an entity, we often refer to that entity as "remote". It's important to understand that a remote entity is only remote to some of the Clients, so "remote" is not a authority state in itself, but just a way to refer to an entity from the point of view of a certain Client.
For instance, an entity seen as remote by Client A might be:
Authoritative on some other Client B or C, or on Simulator A, etc.
Authority in practice
To recap all possibilities with an example, consider the following case. We're creating a competitive 1v1 robot fighting game in a big arena.
Client A has Input authority over their mech robot.
Client B also has Input authority over their robot.
The Simulator Server in charge of the match has State authority over both mechs, so they can't cheat.
Client A sees the robot belonging to Client B as a remote entity.
The same happens to Client B: they see Client A's robot as remote.
Client A also has State authority over some cosmetic items they are wearing.
They can turn them on/off at any time by enabling/disabling the MeshRenderer component, or literally remove them and leave them on the ground.
If Client A drops an item to the ground, the entity gets abandoned by them. It is now an orphan, and won't move for the duration of the match.
If Client B finds the cosmetic item and picks it up, they will adopt it and can now wear it on themselves.
We hope that using this example you can see all the possibilities that a flexible authority system can provide.
For an object to appear to move smoothly on the screen, it must be rendered at a high rate, usually 60 frames per second or more. However, depending on the settings in your project, and the conditions of your internet connection, data may not always arrive at a smooth 60 frames per second across the network. This is completely okay, but in order to make state changes appear smooth on the Client, we use interpolation.
Interpolation is a type of estimation, a method of constructing new data points within the range of a discrete set of known data points.
When you select a variable to replicate in the Configure window, it is automatically assigned a default interpolation setting. The default settings are usually good to get started, but you can modify or create your own interpolation settings that better fit your specific needs.
In the Configure window, each binding displays its interpolation settings next to it.
Built-in interpolation settings for position and rotation are provided out-of-the-box, but you are free to create your own and use them instead.
You can also create an interpolation settings asset: Assets > Create > coherence > Interpolation Settings
Spline interpolation blends between samples using the Catmull-Rom spline method which gives a smoother movement than linear interpolation without any sharp corners, at the cost of increased latency (see: Latency below). Spline interpolation requires at least 4 samples to produce good results.
If interpolation type is set to None, the value will simply snap to the most recent sample without any blending. This is recommended for binding types that have no obvious blending methods, e.g., string, byte array and object references.
You could also implement your own interpolation type (see: Custom Interpolators below).
Interpolation will add some additional latency to synced bindings. That's because incoming network samples must first be put in a buffer that is then used to calculate the interpolated value.
The amount of latency depends on the binding's sample rate and interpolation type. The lower the sample rate, the higher the latency.
Linear Interpolation requires a headroom of one sample while Spline Interpolation requires two samples. If interpolation type is set to None, there is no additional latency added, and samples will be rendered as soon as they arrive over the network.
Example: A Prefab that uses Spline Interpolation for its position binding with a sample rate of 30 Hz and network latency of 100 ms will appear to be 2*1/30+0.100 = 0.16 s behind the local time.
Since a Prefab can define separate interpolation types and sample rates for its different bindings, it is possible that not all bindings share the same latency. If, for example, position and rotation are interpolated with different latency, the position and rotation of a vehicle might not match on the remote object.
There are a few settings you can tweak:
Smoothing
Max Smoothing Speed: the maximum speed at which the value can change, unless teleporting.
Latency
Network Latency Factor: fudge factor applied to the network latency. A factor of 1 means adapting to network latency with no margin, so the incoming sample must arrive at its exact predicted time to prevent the buffer from becoming stale. In general, a factor of 1.1 is recommended to prevent network fluctuations from causing dead reckoning due to latency peaks.
Network Latency Cooldown: when network latency decreases, wait this amount of time (in seconds) before recalculating network latency. This prevents network fluctuations from causing dead reckoning due to latency valleys.
Additional Latency: increases latency by a fixed amount (in seconds) to add an additional margin for the sample buffer.
Overshooting
Max: how far into the dead reckoning to venture when the time fraction exceeds 100%, as a percentage of the sample rate.
Retraction: how fast to pull back to 100% when overshooting the allowed dead reckoning maximum (in seconds)
Teleport Distance: if two consecutive samples are further apart than this, the value will teleport or snap to the new sample immediately without interpolating or smoothing in between.
Stale Factor: defines when to insert a virtual sample in case of a longer time gap between the samples. High stale factor puts the virtual sample close to first sample leading to a smooth transition between two distant samples. This is suitable for parameters that do not change rapidly - the position of a big ship for example. Low stale factor places the virtual sample near the second sample resulting in initial lack of change in value during interpolation followed by a quick transition to the second sample. This is best suited for parameters that can change rapidly, e.g. position of a player.
Dead reckoning is a form of replicated computing so that everyone participating in a game winds up simulating all the entities (typically vehicles) in the game, albeit at a coarse level of fidelity.
The basic notion of dead reckoning is an agreement in advance on a set of algorithms that can be used by all player nodes to extrapolate the behavior of entities in the game, and an agreement on how far reality should be allowed to get from these extrapolation algorithms before a correction is issued.
Interpolation settings can be tweaked in Play mode where you can see the result on the screen immediately, but the changes you make will be reverted again once you exit Play mode. This is because - in Play mode - a copy of the interpolation settings is created.
Remember that interpolation only happens on remote objects, so you need to select a remote object to experiment with interpolation settings in Play mode.
Interpolation works both in Baked and Reflection modes. You can change these settings at runtime via the Configure window (editor) or by accessing the binding and changing the interpolation settings yourself:
The Linear and Spline interpolators that are provided by coherence are sufficient for most common use cases, but you can also implement your own interpolation algorithm by sub-classing Interpolator.
You can choose to override one or more of the base methods depending on which type or types of values you want to support. The method signatures usually take two adjacent samples and a fractional value (from 0 to 1) to blend between them. There are also method signatures that provide four samples, which is useful for the Catmull-Rom spline interpolation.
Here's an example of a custom interpolator that makes the remote object appear at an offset distance from the object's actual position.
The NumberOfSamplesToStayBehind property controls the internal latency.
Catmull-Rom splines require four samples to blend between, so its NumberOfSamplesToStayBehind property must be set to 2.
Combination - you can combine any of the above, so that bindings are updated in more than one Unity callback
Nothing - bindings will completely stop receiving new values because interpolation is fully disabled
Extrapolation uses historical data to predict the future state of a binding. By predicting the state of other players before their network data actually arrives, network lag can be reduced or removed entirely. This will cause mispredictions that need to be corrected when the incoming network data does not match the predicted state.
For the full list of supported binding types, see .
Support for requests based on is coming soon.
Also because of their asynchronous nature, clients can receive for entities that they have already transferred. Such commands are dropped.
Interpolated - similar to Direct mode, except the update to the rigid body position and rotation are applied using and which allows the Unity physics system to calculate rigid body state such as linear and angular velocity on Clients with replicated Entities.
For best behavior, it is recommended that the interpolation timing use only FixedUpdate. See the article on .
You can see the basic Authority principles in practice in our interactive demo. You can read the as well.
Having one or several taking care of important world simulation tasks (like AI, player character state, score, health, etc.) is always a good idea for competitive PvP games. In this scenario, the Simulator has authority over key game elements, like a "game manager", a score-keeping object, and so on.
You can read more about how to achieve this in the section about , or below in the section.
Splitting Input and State authority is a common pattern when creating a .
To change the state of an orphan entity, someone has to take State authority over them. This is done either automatically when an orphan is seen for the first time (only if the entity is set to be on ), or intentionally, using the API CoherenceSync.Adopt().
If no one has authority over it, it is an .
Even if an entity is not currently being simulated locally (the Client does not have authority), we can still affect its state by sending a or even .
Authority has been disabled for the robot mechs, so even if cheating, Clients couldn't be stealing authority from each other.
Linear interpolation blends values by moving along straight lines from sample to sample. This makes the networked object move in a zig-zag pattern, but this is usually not noticeable when sampled at a sufficient rate and with some additional smoothing applied (see section > Smoothing below).
Smooth Time: additional smoothing can be applied (using ) to clear out any jerky movement after regular interpolation has been performed.
By default, each binding is interpolated on every call. This can be changed using the Interpolate On property on the under Advanced Settings. Possible values are:
Update / LateUpdate / FixedUpdate - bindings will be updated with interpolated values on every / / call
If you are using Rigidbody for movement of a GameObject, it is recommended to set Interpolate On to FixedUpdate. Also, to achieve completely smooth movement, should be enabled and you should avoid setting the position of a GameObject directly using or .
The CoherenceSync editor interface allows us to define the Lifetime of a networked object. The following options are available:
Session Based. No persistence. The Entity will disappear when the Client or Simulator disconnects.
Persistent. The Entity will remain on the Server until the World is shut down or the Replication Server gets restarted.
For managing unique persistent objects, see Uniqueness.
For a live demonstration, check out the Persistence section of the First Steps demo.
Maybe it's also a good idea to read more about how to set up Persistence?
A persistent object can be deleted only by the Client or Simulator that has authority over it. For indirect remote deletion, see the section about network commands.
Deleting a persistent object is done the same as with any network object - by destroying its GameObject.
All persistent objects remain in the World for the entire lifetime of the World or its assigned Replication Server. If the World is shut down or the Replication Server is restarted, then the saved persistent objects are lost.
Currently, the maximum number of persistent objects supported by the Replication Server is 32 000. This limit will be increased in the near future.
When we connect to a Game World with a Game Client, the traditional approach is that all Entities originating on our Client are session-based. This means that when the Client disconnects, they will disappear from the network World for all players.
A persistent object, however, will remain on the Replication Server even when the Client or Simulator that created or last simulated it, is gone.
This allows us to create a living world where player actions leave lasting effects.
In a virtual world, examples of persistent objects are:
A door anyone can open, close or lock
User-generated or user-configured objects left in the world to be found by others
Game progress objects (e.g. in PvE games)
Voice or video messages left by users
NPC's wandering around the world using an AI logic
Player characters on "auto pilot" that continue affecting the world when the player is offline
And many, many more
A persistent object with no Simulator is called an orphan. Orphans can be configured to be auto-adopted by Clients or Simulators on a FCFS basis.
At the moment, coherence supports session persistence only. This means that players can leave the World for a moment, come back, and still find persistent objects and entities. However, as soon as a World is being shut down or the Replication Server is restarted, the state is lost.
This is somewhat of an advance technique. If you're new to coherence and simply looking to instantiate an object, refer to the Instantiation page.
Instead of hard referencing Prefabs in your scripts to instantiate them using Unity's own Instantiate(), you can reference a CoherenceSyncConfig and instantiate Prefab instances through our API. This will respect the custom loading and instantiation rules set on the CoherenceSync component, that is the instantiator specified in Instantiate via and the asset loader specified in the Load via properties.
In code terms, it utilizes the internal INetworkObjectProvider and INetworkObjectInstantiator interfaces to load and instantiate the Prefab in a given .
To instantiate a networked Prefab starting from its CoherenceSyncConfig, you simply need to invoke GetInstance():
You can also hard reference the Prefab in your script, and then use our CoherenceSync API to instantiate the Prefab:
While the end result is the same, the main difference is that referencing a CoherenceSyncConfig instead of a Prefab makes it a much more scalable and future-proof architecture. Since it doesn't need a Prefab hard reference, you won't have to change the code if the way that the Prefab is loaded into memory changes later on (for example, if you go from Resources to load it via Addressables).
coherence provides two types of spaces where realtime gameplay can happen: Rooms and Worlds. In addition to these, Lobbies provide functionality for players to meet before a match, and to chat.
Rooms are best for session-based gameplay where the match between players takes place in a short-lived environment. You can use the Online Dashboard to configure Rooms.
A good example is a first person shooter multiplayer match. The match takes place between two teams in a single game session, and players enter through a lobby and matchmaking. When the match is concluded, the multiplayer environment the match took place in (the Room) is closed and players return to a lobby.
This is one example of how Rooms can be used, but it is by no means the only use case. The important distinction between Rooms and Worlds (see below) is that Rooms are relatively short-lived and are meant to be created and closed by the Game Client through the coherence SDK.
See Rooms API.
Worlds, as opposed to Rooms, are longer-lived and permanent multiplayer environments provided by coherence. Using the Online Dashboard, your project will easily define and manage your World configurations.
See Worlds API.
A good example of a World is a permanent environment for an Massively Multiplayer Game (MMO). Regardless of the number of players connected, the environment is always available, and players can connect and disconnect at will.
Entities can be permanently saved in the World so that even if there are no active connections, they still persist when players do connect.
Note that upon shutting down the World or restarting its Replication Server, the state of persistence is lost under current implementation.
Your project does not have to choose one or the other. A project in coherence can contain both World and Rooms.
The primary difference in the configuration and usage of Room and Worlds is that Worlds are managed in the Developer Portal, whereas Rooms are created and managed through the SDK.
A good example of this scenario is again, our MMO. Although players connect to a permanent and persistent World, they may enter a dungeon instance with other players. These dungeon instances can be Rooms.
What about Lobbies?
In coherence, Lobbies work slighlty differently than Rooms and Worlds, and in fact they are not run by a Replication Server.
Lobbies are a convenient way to do matchmaking between player accounts, filter players based on their attributes, and provide a way for them to communicate among each other.
For more info, you can read the Lobbies section.
coherence uses the concept of authority to determine who is responsible for simulating each Entity. By default, each Client that connects to the Replication Server owns and simulates the Entities they create. There are a lot of situations where this setup is not adequate. For example:
The number of Entities could be too large to be simulated by the players on their own, especially if there are few players and the World is very large.
The game might have an advanced AI that requires a lot of coordination, which makes it hard to split up the work between Clients.
It is often desirable to have an authoritative object that ensures a single source of truth for certain data. State replication and "eventual correctness" doesn't give us these guarantees.
Perhaps the game should run a persistent simulation, even while no one is playing.
With coherence, all of these situations can be solved using dedicated Simulators. They behave very much like normal Clients, except they run on their own with no player involved. Usually, they also have special code that only they run (and not the clients). It is up to the game developer to create and run these programs somewhere in the cloud, based on the demands of their particular game.
Simulators can also be independent from the game code. A Simulator could be a standalone application written in any language, including C#, Go or C++, for instance. We will post more information about how to achieve this here in the future. For now, if you would like to create a Simulator outside of Unity, please contact our developer relations team.
To use Simulators, you need to enter your credit card details. You can do it by logging into our Dashboard, selecting the Billing tab, finding the Payment Methods section and clicking the Manage button.
If you're on the Free plan, you won't be charged anything - our payment provider will temporarily reserve a small amount to verify that the credit card is in working order.
Only Paid and Enterprise plans offer Simulators external network connectivity. When switching from Free plan to a Paid or Enterprise plan, it may take up to 10 minutes for the Simulators to have their external connectivity enabled.
If you have determined that you need one or more Simulator for your game, there are multiple ways you can go about implementing these. You could create a separate Unity project and write the specific code for the Simulator there (while making sure you use the same schema as your original project).
An easier way is to use your existing Unity project and modify it in a way so that it can be started either as a normal Client, or as a Simulator. This will ensure that you maximize code sharing between Clients and Servers - they both do simulation of Entities in the same Game World after all.
To force a build to start as a Simulator, you can use the following command line argument:
The Simulator is started with the following parameters in coherence Cloud:
Important: if you want to deploy Simulators on the coherence Cloud, they have to be built for Linux 64-bit.
The SDK provides a static helper class to access all the above parameters in the C# code called SimulatorUtility.
To build Simulators, it's best to use the Linux Dedicated Server Build Target.
This is great for Simulators since we're not interested in rendering any graphics on these outside of local development. You will also get a leaner executable that is smaller and faster to be published in coherence Cloud.
When a room has only Simulators (no Clients) it shuts down automatically after a short period of time.
Refer to the Simulator: Build and deploy section.
This document explains how to set up an ever increasing counter that all Clients have access to. This could be used to make sure that everyone can generate unique identifiers, with no chance of ever getting a duplicate.
By being persistent, the counter will also keep its value even if all Clients log off, as long as the Replication Server is running.
First, create a script called Counter.cs and add the following code to it:
This script expects a command sent from a script called NumberRequester, which we will create below.
Next, add this script to a Prefab with CoherenceSync on it, and select the counterand the method NextNumber for syncing in the bindings window. To make the counter behave like we want, mark the Prefab as "Persistent" and give it a unique persistence ID, e.g. "THE_COUNTER". Also change the adoption behaviour to "Auto Adopt":
Finally, make sure that a single instance of this Prefab is placed in the scene.
Now, create a script called NumberRequester.cs. This will be an example MonoBehaviour that requests a unique number by sending the command GetNumber to the Counter Prefab. As a single argument to this command, the NumberRequester will send an entity reference to itself. This makes it possible for the Counter to send back a response command (GotNumber) with the number that was generated. In this simple example we just log the number to the console.
To make this script work, add it to a Prefab that has the CoherenceSync script and mark the GotNumber for syncing in the bindings window.
In coherence, it is possible to specify how a Prefab is instantiated at runtime using the Instantiate via option on the CoherenceSync component.
We support three implementations out of the box: Default, Pool or DestroyCoherenceSync, but you can also create your own.
This instantiator will create a new instance of your Prefab, and when the related network entity is destroyed, this Prefab instance will also be destroyed.
This instantiator supports object pooling, instead of always creating and destroying instances, the pool instantiator will attempt to reuse existing instances. It has two options:
Max Size: maximum size of the pool for this Prefab, instances that exceed the limit of the pool will be destroyed when returned.
Initial Size: coherence will create this amount of instances on app startup.
This instantiator will create a new instance for your Prefab, but instead of completely destroying the object when the related network entity is destroyed, it will destroy or disable the CoherenceSync component instead.
You can implement the INetworkObjectInstantiator interface to create your custom implementations that will be used by coherence when it needs to instantiate a Prefab in the scene.
Custom implementations can be Serializable and have their own custom serialized data.
To begin, use the dropdown menu on the CoherenceSync and use the Create Implementation... option:
Let coherence generate the scripts for you, and customise them as you see fit.
Once created, implementations of this interface will appear in the Instantiate via dropdown shown above, or in the corresponding CoherenceSyncObject asset.
In coherence, it's possible to specify how the Prefab for a network entity will be loaded into memory at runtime using the Load via option on the CoherenceSync.
We support three default implementations, or you can create your own. The three default implementations are Resources, Direct Reference or Addressables:
Resources loader will be used if your Prefab is inside a Resources folder. If you wish to use any other type of loading method, you will be prompted to move the Prefab outside of the Resources folder.
This loader will be used if your Prefab is outside of a Resources folder, and the Prefab is not marked as Addressable. This means that we will need to hard reference the Prefab in the CoherenceSyncConfig, which means it will always be loaded into memory from the moment you start your game.
This option is only available if you have the Addressables Package installed.
This loader will be used if your Prefab is marked as an Addressable asset, and it will be soft referenced using Addressables' AssetReference class, meaning it's not loaded in memory at the beginning of the game but it gets loaded on demand, when needed.
When you choose this method, you don't have to implement Addressables code: coherence takes care of doing the loading for you, transparently.
You can implement the INetworkObjectProvider interface to create your custom implementations that will be used by coherence when we need to load the Prefab into memory.
Custom implementations can be Serializable and have your own custom serialized data.
To begin, use the dropdown menu on the CoherenceSync and use the Create Implementation... option:
Let coherence generate the scripts for you, and customise them as you see fit.
Once created, implementations of this interface will appear in the Load via dropdown shown above, or in the corresponding CoherenceSyncObject asset.
When scripting Simulators, we need mechanisms to tell them apart.
Ask Coherence.SimulatorUtility.IsSimulator.
There are two ways you can tell coherence if the game build should behave as a Simulator:
COHERENCE_SIMULATOR preprocessor define.
--coherence-simulation-server command-line argument.
Connect and ConnectionTypeThe Connect method on Coherence.Network accepts a ConnectionType parameter.
Whenever the project compiles with the COHERENCE_SIMULATOR preprocessor define, coherence understands that the game will act as a Simulator.
Launching the game with --coherence-simulation-server will let coherence know that the loaded instance must act as a Simulator.
You can supply additional parameters to a Simulator that define its area of responsibility, e.g. a sector/quadrant to simulate Entities in and take authority over Entities wandering into it.
You can also build a special Simulator for AI, physics, etc.
You can define who simulates the object in the CoherenceSync inspector.
coherence includes an auto-connect MonoBehaviour out of the box for Room- and World-based Simulators. The Component its called AutoSimulatorConnection.
When you add the Component, it will parse the connection data passed with Command-line arguments to connect to the given Replication Server automatically. This will also work for Simulators you upload to the coherence Cloud.
Multi-Room Simulators have their own per-scene reconnect logic. The AutoSimulatorConnection components should not be enabled when working with Multi-Room Simulators.
If the Simulator is invoked with the --coherence-play-region parameter, AutoSimulatorConnection will try to reconnect to the Server located in that region.
This page illustrates a few API you can use to interact with the Replication Server.
When the Replication Server is running, you connect to it using the Connect method.
After trying to connect you might be interested in knowing whether the connection succeeded. The Connect call will run asynchronously and take around 100 ms to finish, or longer if you connect to a remote Server.
The OnLiveQuerySynced event is triggered when the initial game state has been synced to the client. More specifically, it is fired when all entities found by the Client's first Live Query have finished replicating. This is the last step of the connection process and is usually a good place to start the game simulation.
To connect to Cloud-hosted Servers, see Rooms API and Worlds API documentation.
Check Run in Background in the Unity settings under Project Settings > Player so that the Clients continue to run even when they're not the active window.
To connect with multiple Clients locally, publish a build for your platform (File > Build and Run, details in Unity docs). Run the Replication Server and launch the build any number of times. You can also enter Play Mode in the Unity Editor.
For Mac Users: You can open new instances of an application from the Terminal:
By default, the number of players that can connect to a locally hosted Replication Server is limited to 100.
By definition, a locally hosted Replication Server is one that is not managed by coherence, for example if it has been started from a Unity editor or by a game client in the self-hosting scenario. Replication Servers running in the coherence Cloud have no player limit.
This restriction can be lifted by supplying the SDK with an unlock token. The token can be generated in the Settings section of your project dashboard at coherence.io.
Once you have the token, it needs to be added to the coherence RuntimeSettings (Assets/coherence/RuntimeSettings.asset):
The unlock token will now be automatically passed to all the Replication Server instances started via Unity editor or the Coherence.Toolkit.ReplicationServer API.
If you plan to execute the Replication Server manually the token can be supplied via the --token <token> command line argument.
Before deploying a Simulation Server, testing and debugging locally can significantly improve development and iteration times. There are a few ways of accomplishing this.
Using the Unity Editor as a Simulator allows us to easily debug the Simulator. This way we can see logs, examine the state of scenes and GameObjects and test fixes very rapidly.
To run the Editor as a Simulator, run the Editor from the command line with the proper parameters:
--coherence-simulation-server: used to specify that the program should run as a coherence Simulator.
--coherence-simulator-type: tells the Simulator what kind of connection to make with the Replication Server, can be Rooms or World.
--coherence-region: tells the Simulator which region the Replication Server is running in: EU, US or local.
--coherence-ip: tells the Simulator which IP it should connect to. Using 127.0.0.1 will connect the Simulator to a local server, if one is running.
--coherence-port: specifies the port the Simulator will use.
--coherence-world-id: specifies the World ID to connect to, used only when set to Worlds.
--coherence-room-id: specifies the Room ID to connect to, used only when set to Rooms.
--coherence-unique-room-id: specifies the unique Room ID to connect to, used only when set to Rooms.
For example:
Keep in mind that all regular Unity arguments are supported. You can see the full list here: Unity Editor command line arguments.
If you're not sure which values should be used, adding a COHERENCE_LOG_DEBUG define symbol will let you see detailed logs. Among them are logs that describe which IP, port and such the Client is connecting to. This can be done in the Player settings: Project Settings > Player > Other Settings > Script Compilation > Scripting Define Symbols.
To learn more about Simulators, see Simulators.
Another option is making a Simulator build and running it locally. This option emulates more closely what will happen when the Simulator is running after being uploaded.
You can run a Simulator executable build in the same way you run the Editor.
This allows you to test a Simulator build before it is uploaded or if you are having trouble debugging it.
You can also run existing Simulator build from coherence Hub > Simulators > Run local simulator build.
Use the Fetch Last Endpoint button to autofill the required fields.
When using a Rooms-based setup, you first have to create a Room in the local Replication Server (e.g. by using the connect dialog in the Client).
The local Replication Server will print out the Room ID and unique Room ID that you can use when connecting the Simulator.
To learn more about creating a Simulator build, see SIMULATORS: Build and Deploy.
How to parent CoherenceSync objects to each other
Out of the box, coherence offers several options to handle parenting of networked entities. While some workflows are automatic, others require a specific component to be added.
Generally there is a distinction if the parenting happens at runtime vs. edit time, and whether the two entities are direct parent-child, or have a complex hierarchy. See below for each case.
At runtime:
CoherenceSyncs as a direct child: when you create a parent-child relationship of CoherenceSync objects at runtime.
Deeply-nested CoherenceSyncs: when you create a complex parent-child relationship of CoherenceSync objects at runtime.
At edit time:
Nesting connected Prefabs assets: the developer prepares several connected Prefabs and nests them one to another before entering Play Mode. This covers both Prefabs in the scene and in the assets.
When preparing a CoherenceSync Prefab for use as a child object it is important to always configure the bindings so that position, rotation, and scale are bound. This will ensure that the proper transform state of the entity is maintained when it is parented to another CoherenceSync object.
Try it out in our First Steps interactive demo! Don't forget to also look at the explanations.
Uniqueness is about naming entities and guaranteeing that a named entity can only exist once. This name is referred to as Unique ID.
To start using uniqueness, set CoherenceSync's Uniqueness setting to No Duplicates:
The ID or name of the entity. Use any name you might help you recognize it over the network, for example: game manager, boss, spawner, chest 1, ...
When Manual Unique ID is left empty, Prefab Instance Unique ID will be used instead. The latter is assigned automatically (for prefab instances), to tell apart different instances on the scene easily. This is handy when your scene has a handful of the entities [that come from the same Prefab] around.
In coherence, the concepts of Authority, Persistence and Uniqueness often go hand-in-hand. For example, uniqueness can be useful to keep track of persistent objects. Despite this, all three can also function on their own.
Replacement occurs when there's an attempt to create a named entity that already exists. For example, you have player in your scene, and you instantiate another player.
By default, a Replace strategy is applied. This strategy makes sure the actual GameObject is kept, but the underlying linked entity is updated. This way, Unity Object references are not lost.
However, there's scenarios where you might want to trigger an actual Destroy operation when this happens - for such cases, the Destroy strategy can be used.
CoherenceSync direct parent-child relationships at runtime
Objects with the CoherenceSync component can be connected at runtime to other objects with a CoherenceSync component to form a direct parent-child relationship.
For example, an item of cargo can be parented to a vehicle, so that they move together when the vehicle is in motion.
Keep in mind that on this page we deal with direct parenting of two CoherenceSync GameObjects. If it's not practical to parent a network entity directly to the root of another, see instead how to deeply nest CoherenceSyncs.
When an object has a parent in the network hierarchy, its transform (position and orientation) will update in local space, which means its transform is relative to the parent's transform.
A child object will only be visible in a LiveQuery if its parent is within the query's boundaries.
Parenting network entities directly doesn't require any extra work. Any parenting code (i.e. Unity's own transform.SetParent() will work out of the box, without any need for additional action.
You can add and remove parent-child relationships at runtime – even from the Unity editor, by drag-and-drop.
If the child object is using LODs, it will base its distance calculations on the world position of its parent. For more info, see the Level of detail documentation.
When the parent CoherenceSync is destroyed, by default its CoherenceSync children get destroyed together with it. This can be changed via the Preserve Children option on the parent, under Advanced Settings:
When Preserve Children is enabled, if the authority destroys or disables the parent entity, child entities get unparented instead of being destroyed together with the parent. Those children will now reside at the root of the Scene hierarchy.
For an example of direct child CoherenceSync components parenting and unparenting at runtime, check out the First Steps sample project, specifically lesson 4.
In this section we cover in-depth how coherence handles loading networked Prefabs into memory, and how it instantiates them when a new remote entity appears on the network.
Whenever you start synchronizing one of your Prefabs, either by adding the CoherenceSync component manually or clicking the Sync with coherence toggle in the Prefab Inspector, coherence will create a CoherenceSyncConfig ScriptableObject to track the existence of this entity, and add it to a registry.
This object holds information on how a certain type of network entity is loaded and instantiated.
As a user, the two main changeable options here are Load via, and Instantiate via.
There is a 1:1 correspondence between a networked Prefab and its CoherenceSyncConfig object, so you can also edit the related CoherenceSyncConfig directly from the Inspector of any CoherenceSync component:
These edits will in fact be saved not in the component, but on the associated CoherenceSyncConfig ScriptableObject.
Behind the scenes, the CoherenceSyncConfig object allows coherence to do the following:
Hard reference the prefab in Editor, this means that whenever we have to do postprocessing in synced prefabs, we don't have to do a lookup or load them from Resources.
Serialize the method of loading and instantiating this prefab in runtime.
Soft reference the prefab in Runtime with a GUID, this means we can access the loading and instantiating implementations without having to load the prefab itself into memory.
Every time a CoherenceSyncConfig object is created, it gets added to a registry, represented by a single ScriptableObject of type CoherenceSyncConfigRegistry.
In addition to just inspecting the ScriptableObject, you can see all of the CoherenceSyncConfig assets in one place in the CoherenceSync Objects window, found under the coherence > CoherenceSync Objects menu item:
This is a great way to see the configuration of different entities next to each other, and it allows you to do mass edits by clicking the Edit Mode button.
Creating complex hierarchies of CoherenceSyncs at runtime
While the basic case of direct parent-child relationships between CoherenceSync entities is handled automatically by coherence, more complex hierarchies (with multiple levels) need a specific component.
An example of such a hierarchy would be a synced Player Prefab with a hierarchical bone structure, where you want to place an item (e.g. a flashlight) in the hand:
Player > Shoulder > Arm > Hand
To prepare the child Prefab that you want to parent at runtime, add the CoherenceNode component to it (in addition to its CoherenceSync). In the example above, that would be the flashlight you want your player to be able to pick up. No additional changes are required.
This setup allows you to place instances of the flashlight Prefab anywhere in the hierarchy of the Player (you could even move it from one hand to the other, and it would work).
You don't need to input any value in the fields of the CoherenceNode. They are used at runtime, by coherence, automatically.
To recap, for deep-nesting network entities to work, you need two things:
The parent: a Prefab with CoherenceSync that has some hierarchy of child transforms (these child transforms are not networked entities themselves).
The child: another connected Prefab with CoherenceSync and CoherenceNode.
One important constraint for using CoherenceNode is that the hierarchies have to be identical on all Clients.
Example: if on Client A an object is parented to Player > Shoulder > Arm > Hand, the hierarchy on Client B needs to be exactly: Player > Shoulder > Arm > Hand.
Removing or moving an intermediate child (such as Shoulder or Arm) would lead to undesirable results, and desynchronisation.
Position and rotation
Similarly to the above, intermediate children objects need to have the same position and rotation on all Clients. If not, that would lead to desync because the parented entity doesn't track the position of its parent object(s).
If you plan to move these intermediate children, then we suggest to sync the position and/or rotation of those objects as part of the containing Prefab.
Following the previous example, if an object is parented to Player > Shoulder > Arm > Hand, you might want to mark the position and rotation of Shoulder, Arm and Hand as synced, as part of the prefab Player.
This way if any of them moves, the movement will be replicated correctly on all clients, and the object parented to Hand will also look correct.
Keep in mind that there is no penalty for synching positions of objects that never or rarely move, because the position is not synched every frame if it hasn't changed.
For an example of a CoherenceSync parenting and unparenting at runtime in a deep hierarchy, check out the First Steps sample project, lesson 5.
Sometimes, distributing authority is not the way to go. Certain types of games require a model where the server (or, we should say, the Simulator) is in control of the simulation of the whole game, and the players only send inputs to it. The Simulator elaborates these inputs, and in response updates the Client about the new game state.
This way of doing things is usually referred to as server-authoritative.
In competitive games. Many game genres use client inputs and centralized simulation to guarantee the fairness of actions or the stability of physics simulations.
In situations where Clients have low processing power. If the Clients don't have sufficient processing power to simulate the World it makes sense to send inputs and just display the replicated results on the Clients.
In situations where determinism is important. RTS and fighting games can use CoherenceInput component and rollback to process input events in a shared (not centralized) and deterministic way so that all Clients simulate the same conditions and produce the same results.
coherence currently only supports using CoherenceInput in a centralized way, where a single Simulator is setup to process all inputs and replicate the results to all Clients.
Setting up an object for server-side simulation using CoherenceInput is done in three steps:
The Simulate property needs to be set to Server Side with Client Input.
At this point, a CoherenceInput component is automatically added to the object.
Setting the simulation type to this mode instructs the Client to automatically transfer State Authority for this object to the Simulator that is in charge of simulating inputs on all objects, and only retain Input Authority.
Each simulated CoherenceSync component is able to define its own, unique set of inputs via the CoherenceInput interface.
An input can be of types:
Button. A button input is tracked with just a binary on/off state.
Axis / Axis2D / Axis3D. An axis input is tracked as one/two/three floats from -1 to 1.
String. A string value representing custom input state. (max length of 63 characters)
Rotation. A rotation is represented by a Quaternion.
Integer. Represented as an int.
In order for the inputs to be used, they must be baked.
If the CoherenceInput fields or name is changed, then the CoherenceSync object must be re-baked to reflect the new fields/values.
When a Simulator is running it will find objects that are set up using CoherenceInput components and will automatically take over State Authority, and start simulating them.
During gameplay, scripts from both the Client and Simulator work with the inputs defined on the CoherenceInput of the replicated object: the Client uses the Set* methods to set input values, and the Simulator uses the Get* methods to access them.
In all of these methods, the name parameter is the same as the Name field defined on the CoherenceInput component.
Check the CoherenceInput API for a complete list of the available methods.
For example:
The mouse click position can be passed from the Client to the Simulator via the "Move" field in the setup example.
The Simulator can access the state of the input to perform simulation on the object.
The elaborated state is then reflected back to the Client, just as any replicated object is.
Each object only accepts inputs from one specific Client, called the object's Input Authority.
When a Client spawns an object it automatically becomes the Input Authority for that object. The object's creator will retain control over the object even after State Authority has been transferred to the Simulator.
If an object is spawned directly by the Simulator, you will need to assign the Input Authority manually. Use the TransferAuthority method on the CoherenceSync component to assign or re-assign a Client that will take control of the object:
The ClientId used to specify Input Authority can currently only be accessed from the ClientConnection class. For detailed information about setting up the ClientConnection Prefab, see the Client Connections page.
Use the OnInputAuthority and OnInputRemote events on the CoherenceSync component to be notified whenever an object changes input authority.
Only the object's current State Authority is allowed to transfer Input Authority.
The OnInputSimulatorConnected event can also be raised on the Simulator or host if they have both Input and State Authority over an entity. This allows the session host to use inputs just like any other client but might be undesirable if input entities are created on the host and then have their Input Authority transferred to the clients.
To solve this you can check the CoherenceSync.IsSimulatorOrHost flag in the callback:
Compared to Client-side simulation, server-side simulation takes a significantly longer time from the Client providing input until the game state is updated. That's because of the time required for the input to be sent to the Simulator, processed, and then the updates to the object returned across the network. This round-trip time results in an input lag that can make controls feel awkward and slow to respond.
If you want to use a server-authoritative setup without sacrificing input responsiveness, you need to use Client-side prediction.
With Client-side prediction is enabled for a binding, incoming network data is ignored, allowing the Client to calculate (predict) its value locally. A typical use case is to predict position and rotation for the local player, but you can toggle Client-side prediction for any binding in the Configuration window:
By processing inputs both on the Client and on the server, the Client can make a prediction of where the player is heading without having to wait for the authoritative server response. This provides immediate input feedback and a more responsive playing experience.
Note that inputs should not be processed for Clients that neither have State Authority nor Input Authority. That's because we can only predict the local player; remote players and other networked objects are synced just as normal.
With Client-side prediction enabled, the predicted Client state will sometimes diverge from the server state. This is called misprediction.
When misprediction occurs, you will need to adjust the Client state to match the server state in one way or another. This is called server reconciliation.
There are many possible approaches to server reconciliation and coherence doesn't favor one over another. The simplest method is to snap the Client state to the server state once a misprediction is detected. Another method is to continuously blend from Client state to server state.
Misprediction detection and reconciliation can be implemented in a binding's OnNetworkSampleReceived event callback. This event is called every time new network data arrives, so we can test the incoming data to see if it matches with our local Client state.
The misprediction threshold is a measure of how far the prediction is allowed to drift from the server state. Its value will depend on how fast your player is moving and how much divergence is acceptable in your particular game.
Remember that incoming sample data is delayed by the round-trip time to the server, so it will trail the currently predicted state by at least a few frames, depending on network latency. The simulationFrame parameter tells you the exact frame at which the sample was produced on the authoritative server.
For better accuracy, incoming network samples should be compared to the predicted state at the corresponding simulation frame. This requires keeping a history buffer of predicted states in memory.
This feature is in the experimental phase.
A client-hosted session is an alternative way to use CoherenceInput in Server Side With Client Input mode that doesn't require a Simulator.
A Client that created a Room can join as a Host of this Room. Just like a Simulator, the Host will take over the State Authority of the CoherenceInput objects while leaving the Input Authority in the hands of the Client that created those objects.
The difference between a Host and a Simulator is that the Host is still a standard client connection, which means it counts towards the Room's client limit and will show up as a client connection in the connection list.
To connect as a Host all we have to do is call CoherenceBridge.ConnectAsHost:
CoherenceLiveQuery is a component that can be used to constrain the area of entities that are replicated on the client.
When using a LiveQuery, The Replication Server filters out networked objects that are outside the range of the defined range. This can be useful as an optimization, and a security mechanism, to ensure clients can't exploit the system by inspecting the incoming network traffic, outside of what they are allowed to see. However the question arises: what if the player exploits by moving the position of the LiveQuery?
When a query component is part of a CoherenceSync that is set to Server Side With Client Inputs, the query visibility will be applied to the client that owns Input Authority (i.e., the Client) while the component's state remains in control of the State Authority (i.e., the Simulator).
This prevents clients from viewing other parts of the world by simply manipulating the extents or the position of the LiveQuery.
See CoherenceLiveQuery and Area of interest for more information on how to use queries.
Preparing nested connected Prefabs at edit time
coherence supports all Prefab-related Unity workflows, and nesting is one of them. It can make a lot of sense to prepare multiple networked Prefabs, parent them to each other, and either place them in the scene, or save them as a complex Prefab, ready to be instantiated. This page covers these cases.
When preparing a networked Prefab that contains another networked Prefab, one extra component is needed to allow coherence to sync the whole hierarchy: PrefabSyncGroup.
For instance, let's suppose we have a vehicle in an RTS that can carry cargo, and it comes with cargo pre-loaded when it's instantiated:
In this example Spacetruck is a synced Prefab, with 4 instances of the synced Prefab Cargo nested within. To make this work, we add a PrefabSyncedGroup to the root:
The component keeps track of child Prefabs that are also synced Prefabs. Now, whenever Spacetruck is instantiated, PrefabSyncGroup makes sure to take 4 instances of Cargo and link the Prefab instances to the correct network entities.
Please note that if the nested Prefabs are more than one level under the root object, you still need to add a CoherenceNode component to the child ones (in the example above, Cargo), to enable deep nesting at runtime.
So to recap:
The outermost Prefab needs CoherenceSync and PrefabSyncGroup.
The child Prefabs need CoherenceSync and, optionally, CoherenceNode.
When dealing with synced Prefabs that are hand-placed in the scene before connecting, such as level design elements like interactive doors, you need to ensure that they are seen as "unique". This is also covered in the Uniqueness page, but it's worth talking about it in the context of nested synced Prefabs.
When preparing such a Prefab, you need to set the Uniqueness property to No Duplicates. This ensures that, once multiple Clients connect and open the same scene, the synced Prefabs contained within are not spawned on the network multiple times.
Let's suppose we have a networked Prefab that represents a structure in an RTS (a LandingPad) that can be pre-placed in the scene. This structure also contains a networked vehicle Prefab (a Lander). This Prefab is synced as an independent network entity because at runtime it can detach, change ownership, be destroyed, etc.
To achieve this, all we need to do is ensure that both Prefabs are set to be unique. When we drag-and-drop the LandingPad Prefab into the scene, coherence automatically assigns a randomly-generated Prefab Instance Unique ID as an override. This number identifies these particular instances of these two Prefabs in the scene.
With this setting, we don't need to do anything else for these compound Prefabs to work.
Like for runtime-instantiated Prefabs, keep in mind that if the Lander is nested 2 or more levels deep in the hierarchy, it will also need a CoherenceNode component.
If you plan to also instantiate this Prefab at runtime, you can add a PrefabSyncGroup to the root as described in the previous section. This makes the Prefab work when instantiated at runtime, while the uniqueness takes care of copies in the scene.
To recap:
The outermost Prefab needs its Uniqueness set to No Duplicates. Optionally, you can add PrefabSyncGroup to enable runtime-instantiation.
Any child Prefab also needs its Uniqueness set to No Duplicates. It also needs a CoherenceNode if it's parented deep in the hierarchy.
An important thing to keep in mind when working with compound Prefabs in the scene: when you add a new nested synced Prefab to an existing one that has already been placed in the scene a few times, the Prefab Instance Unique ID for these instances will initially be the same.
For this reason, once you play the game, you might see all children disappear (except one). That is normal: coherence thinks that all these network entities are the same, because they have the same uniqueness ID.
You need to ensure that these new children have an overriden and unique ID on each instance in the scene. To do so, click on the button next to the Prefab Instance Unique ID for each child that needs it:
Out of the box, coherence can use C# Reflection to sync data at runtime. This is a great way to get started but is very costly performance-wise and has a number of limitations on what features can be used through this system.
For optimal runtime performance and a complete feature set, we need to create a schema and perform code generation specific to our project. coherence calls this mechanism Baking.
Learn more about schemas in the How does coherence work section.
Click on the coherence > Bake menu item.
This will go through all indexed CoherenceSync GameObjects (Resources folders and Prefab Mapper) in the project and generate a schema file based on the selected variables, commands and other settings. It will also take into account any LODs that have been added.
For every Prefab with a CoherenceSync component attached, the baking process will generate a C# baked script specifically tuned for it.
Check settings.
When baking, the generated code will output to Asset/coherence/baked.
You can version the baked files or ignore them, your call.
If you work on a larger game or team, where you use continuous integration, chances are you are better off including the baked files on your VCS.
Since baked scripts access your code, changing networked variables or commands with coherence will get you into compilation errors.
When you configure your Prefab to network variables, and then bake, coherence generates baked scripts that access your code directly, without using reflection. This means that whenever you change your code, you might break compilation by accident.
For example, if you have a Health.cs script which exposes a public float health; field, and you toggle health in the Configure window and bake, the generated baked script will access your component via its type, and your field via field name.
Like so:
If you decide you want to change your component name (Health) or any of your bound fields (health), Unity script recompilation can fail. In this example, we will be removing health and adding health2 in its place.
When baking via assets, the watchdog is able to catch compilation problems related with this, and offer you a solution right away.
It will suggest that you delete the baked folder, and then diagnose the state of your Prefabs. After a few seconds of script recompilation, you will be presented with the Diagnosis window.
In this window, you can easily spot variables in your Prefabs that can't be resolved properly. In our example, health is no longer valid since we've moved it elsewhere (or deleted it).
From here, you can access the Configure window, where you can spot the problem.
Now, we can manually rebind our data: unbind health and bind health2. Once we do, we can now safely bake again.
Remember to bake again after you fix your Prefabs.
Once the baked code has been generated, Prefabs will automatically make use of it. If you want to switch a particular Prefab to reflection code, you can do so in the Inspector of its CoherenceSync, by unchecking the Baked checkbox:
The Replication Server is an essential part of coherence. It is an executable that replicates the state of the world to all connected Clients and Simulators.
To understand what is happening in the game world, and to be able to contribute your simulated values, you need to connect to a Replication Server.
A Replication Server can be run in the coherence Cloud, but while developing we recommend that you first start with one running locally on your computer. coherence is designed so you can easily develop everything locally first, and then deploy to the Cloud without any change to the game.
You can start a local Replication Server from the coherence Hub, in the Replication Servers tab, just by clicking on the buttons there:
To understand the two types of Replication Server that you can run, refer to the Rooms and Worlds page.
You can also start the Replication Server from the coherence > Local Replication Server menu, or by pressing Ctrl+Shift+Alt+R (for Rooms) or Ctrl+Shift+Alt+W (for Worlds).
If you start a Replication Server locally, a new Terminal window will open.
Once a Replication Server is running, connection to it can be established using a CoherenceBridge component.
The CoherenceBridge needs to know what to connect to. A simple way to connect is to use one of our Sample Connection UIs:
Sample Connection UIs scan the available Worlds and Rooms, and prepare the endpoint data so that the CoherenceBridge can find the Replication Server. You can find them in the SDK package itself, by going to Unity's Package Manager, and then exploring the package samples.
Later on, when you are developing a full game, you will probably recreate your own UI, using the Replication Server APIs.
For more information on your first time using a Replication Server, refer to the Local Development page in our getting started guide.
The Replication Server supports different packet frequencies for sending and receiving data.
The send frequency is the frequency that the Replication Server uses to send packets to a given Client. Each Client can be sent packets at different times, but the packet receive frequency for any Client will not exceed the Replication Server's send frequency.
The receive frequency is the maximum frequency at which the Replication Server expects to receive packets from any Client, before throttling. If a Client sends packets to the Replication Server at a higher than expected frequency, that Client will receive a command to slow down sending. If the Client doesn't respect the command to throttle packet sending then the Client is disconnected after a time. All extra packets received by the Replication Server, after a threshold based on the receive frequency, are dropped and not processed. This is to prevent malicious Clients from flooding the Replication Server. The Unity SDK handles throttling automatically.
It is possible for the Replication Server to temporarily request Clients to reduce their packet send rates if the processing load of the Replication Server is too high. This is automatic and send rates from the affected Clients are commanded to resume once the load is reduced.
Low and consistent send rates from the Replication Server allow for optimal bandwidth use and still support a smooth stream of updates to Clients. Try different rates during local replication tests to see what works well for your game.
For a locally hosted Replication Server, you can edit the send and receive frequencies by using the CLI arguments --send-frequency and --recv-frequency. Or by changing it in the coherence Settings -> Local Replication Server -> Send Frequency / Recv Frequency.
On the dashboard, the packet frequencies for sending and receiving data can be adjusted per project too. It is part of the Advanced Config section of Worlds create/edit and Rooms pages of the dashboard.
Adjusting the send and receive frequencies on the dashboard is available for paid plans.
Scenes or levels are a common feature of Unity games. They can be loaded from Unity scenes, custom level formats, or even be procedurally generated. In networked games, players should not be able to see entities that are in other scenes. To address this, coherence's scene feature gives you a simple way of controlling what scene you're acting in.
Each Coherence scene is represented by an integer index. You can map this index to your scenes or levels in any way you find appropriate. Projects that don't use scenes will implicitly put all their entities into scene 0.
Since the connection to the Replication Server is done through the CoherenceBridge component, it means that if you switch Scenes, the current CoherenceBridge that holds the connection to the Replication Server will be destroyed.
In order to keep a CoherenceBridge with its connection alive between Scene changes, you will have to set it as Main Bridge in the Component inspector:
If this approach to keeping the connection alive is not a good fit for your game, see Custom Setup in the second part of this document.
In the CoherenceBridge inspector you will find all the options related to handling Scene transitions. First thing to know is that Client Connections must be enabled for this feature to work.
These are the options related to Scene transitions:
Main Bridge: This CoherenceBridge instance will be saved as DontDestroyOnLoad and its connection to the Replication Server will be kept alive between Scene changes. All other CoherenceBridge components that are instantiated from this point forward will update the target Scene of the Main Bridge, and destroy themselves afterwards.
Use Build Index as Scene Id: Every Scene needs a unique identifier over the network. This option will automate the creation of this ID by using the Scene Build Index (from the Build Settings window).
Scene Identifier: If the previous option is unchecked, then you will be able to manually set a Scene Identifier of your own (restricted to unsigned integers).
Using these options will automate Scene transitions.
The only requirement is having a single CoherenceBridge set as Main (the first one that your game will load). The rest of the Scenes you want to network should also have a CoherenceBridge component, but not set as main.
This option requires no extra code on your part.
A Client Connection and all the entities that Client has authority over are always kept in the same coherence scene. Clients cannot have authority over entities in other scenes. This implies a few things:
When a Client changes scene, it will bring along any entities it has authority over.
If an entity changes owner via Authority transfer, it will be moved to the new owner's scene.
To avoid an entity moving with a Client, the owner has to relinquish authority by using AbandonAuthority(), and then they can move scenes. These entities will stay in the scene where their previous owner left them.
Note that Unity will destroy all game objects not marked as DontDestroyOnLoad whenever a new Unity scene is loaded (non-additively). If the client has authority over any of those entities at that point, coherence will replicate that destruction to all other clients. If that is undesirable and you need to leave entities behind, make sure that authority has been lost or transferred before loading the new Unity scene. You can of course also mark them as DontDestroyOnLoad, which will bring them along to then new scene.
Since this process involves a bit of logic that has to be executed over several frames, coherence provides a LoadScene helper method (co-routine) on CoherenceSceneManager. Here's an example of how to use it:
It is not possible to move entities to other scenes without the client connection also moving there. Additionally, you can't currently query for entities in other scenes.
Both of these limitations are planned to be addressed in future versions of coherence.
If your project isn't a good fit for the automatic scene transitioning support described above, it is possible to use a more manual approach. There are a few important things to take care of in such a setup:
If you ever load another Unity scene, the CoherenceBridge that connects to the server needs to be kept alive, or else the client will be disconnected. A straightforward way of doing this is to call Unity's DontDestroyOnLoad method on it. This creates two problems when replicating entities from other Clients:
The bridge instantiates remote entities into the scene where it is currently located. To override this behaviour, set the InstantiationScene property on your CoherenceBridge to the desired scene.
Any new CoherenceSync instances will look for the bridge in the same scene that they are located. If the bridge is moved to the DontDestroyOnLoad scene, this lookup will fail. You can use the static CoherenceSync.BridgeResolve event to solve this problem (see the code sample in the next section). Alternatively, if you have a reference to a Scene, you can register the appropriate bridge for entities in that scene with CoherenceBridgeStore.RegisterBridge before it is loaded.
Additionally, coherence queries (e.g. CoherenceLiveQuery) also look for their bridge in their own scene, so you might have to set its bridgeResolve event too.
If you load levels via your own level format, or by loading Unity scenes additively, it is quite possible that you can skip some of the steps above.
The only thing strictly necessary for coherence scene support is to call
CoherenceBridge.SceneManager.SetClientScene(uint sceneIndex);
so that the Replication Server knows in which scene each Client is located.
Here's a complete code sample of how to use all the above things together:
World Simulators are started and shut down with the World. They can be enabled and assigned in the Worlds section of the Developer Portal.
World simulation servers are started with the command line parameters described in the Simulators section.
When using the Simulators tab in the coherence Hub, you can specify a Simulator slug. This is simply a unique identifier for a Simulator. This value is automatically saved in RuntimeSettings when an upload is complete, and Room creation requests will use this value to identify which Simulator should be started alongside your room.
The Simulator slug can be any string value, but we recommend using something descriptive. If the same slug is used between two uploads, the later upload will overwrite the previous Simulator.
A list of uploaded Simulators and their corresponding slugs can be found in the Developer Portal:
The following CLI flags can be specified on Unity Builds. They are read by the SDK via the API.
Simulate multiple Rooms at the same time, within one Unity instance
Multi-Room Simulators are Room Simulators which are able to simulate multiple game rooms at the same time - one sim to rule them all!
In order to achieve this, the game code should be defensive on which room it is affecting. Game state should be kept per Room, meaning game managers, singletons (static data), etc. need to account for this.
Each Room is held in a different scene. So for every Room created, the Multi-Room Simulator should open a connection to it, hence loading additively a scene and stablishing a Simulator connection (via Bridge).
By using Multi-Room Simulators, the coherence Cloud is able to instruct your Simulator which room to join and start simulating.
This communication happens via HTTP. An HTTP server is started by your game build when the MultiRoomSimulator component is active. This component listens to HTTP requests made by the coherence __ Online Dashboard.
For offline local development, you can use a MultiRoomSimulatorLocalForwarder component on your clients, which will create HTTP requests against your local simulator upon client connection, like joining a room.
For local development, enable the Local Development Mode flag in the .
Once the MultiRoomSimulator receives a request to join a room, it spawns a CoherenceSceneLoader that will be in charge of loading additively the scene specified.
The quickest way to get Multi-Room Simulators set up is by using the provided wizard.
It will take you through the GameObjects and Components needed to make it happen.
Here's a quick overview video of the setup:
These are the pieces needed for Multi-Room Simulators to work:
Simulators
In the initialization scene (splash, init, menu, ...)
MultiRoomSimulator — listens to join room requests and delegates scene loading (by instantiating CoherenceSceneLoaders)
Clients
(Only for local development) In the scene where you connect to a Room (where you have the Sample UI or your custom connection logic)
MultiRoomSimulatorLocalForwarder — requests the local MultiRoomSimulator to join rooms when the Client connects.
Independently
In the scene where the networked game logic is (game, Room, main, ...)
Bridge — handles the connection
LiveQuery — filters Entities by distance
CoherenceScene — when the scene is loaded via CoherenceSceneLoader, it will try to connect using the data given by it. It attaches to the Bridge, creates a connection, and handles auto reconnection. If a scene loaded through CoherenceSceneLoader doesn't have a CoherenceScene on it, one will be created on the fly.
There are two components that can help you fork Client and Simulator logic, for example, by enabling or disabling the MultiRoomSimulator component depending on whether it's a Simulator or a Client build. These are optional but can come in handy.
SimulatorEventHandler — events on the build type (Client/Simulator).
ConnectionEventHandler — events on the connection stablished by the Bridge associated with that Scene.
It is possible to visualize each individual Room the Multi-Room Simulator is working on. By default, Simulator connections to Rooms are hidden, as shown in the image above. You can toggle the visibility per scene by clicking the Eye icon. You can also change the default visibility of the loaded scene (defaults to hidden) on the CoherenceScene component:
Working with Multi-Room Simulators needs your logic to be constrained to the scene. Methods like FindObjectsOfType will return objects in all scenes — you could affect other game sessions!
Check out Coherence.Toolkit.SceneUtils for alternative APIs to FindObjectsOfType that work per scene.
Also, Coherence.Toolkit.ActiveSceneScope can help make sure instantiation happens where you want it to be.
This is also true for static members, e.g. singletons. When using Multi-Room Simulators, there need to be as many isolated instances of your managers as there are open simulated rooms.
For example, if you were to access your Game Manager through GameManager.instance, now you'll need a per-scene API like GameManager.GetInstance(scene).
There may be third-party or Unity-provided features that can't be accessed per scene, and that affect the whole game.
Loading operations, garbage collections, frame-rate spikes... all these will affect performance on other sessions, since everything is running within the same game instance.
Simulators per room can be enabled in the dashboard for the project. The Simulator used is matched according to the in the RuntimeSettings scriptable object file. This is set automatically when you upload a Simulator.
For each new Room, a Simulator will be created with the command line parameters described in the section. The Simulator is shutdown automatically when the Room is closed.
Communication between Clients
ClientConnections are CoherenceSyncs that the CoherenceBridge can handle for you and that let you uniquely identify users connected, find them by their ID, and easily send commands between those users.
When using ClientConnections, CoherenceBridge will spawn a CoherenceSync for each connection (Client or Simulator). Those CoherenceSyncs are subject to a different ruleset than standard CoherenceSyncs:
They can't be created or destroyed by the Client - they are always driven by CoherenceBridge.
They are global - they are replicated across Clients regardless of the extent.
ClientConnections shine whenever there's a need to communicate something to all the connected players. Usage examples:
Global chat
Game state changes: game started, game ended, map changed
Server announcements
Server-wide leaderboard
Server-wide events
The global nature of ClientConnections doesn't fit all game types - for example, it rarely makes sense to keep every Client informed about the presence of all players on the server in an MMORPG. If this is your use case, don't set ClientConnections on your CoherenceBridge.
To enable ClientConnections, turn Global Query on in your (it should be on by default):
Disabling Global Query on one Client doesn't affect other Clients, i.e. the ClientConnection object of this Client will still be visible to other Clients that have Global Query turned on.
Most of the ClientConnection functionality is accessible through the CoherenceBridge.ClientConnections object:
Each connection is represented by a plain C# CoherenceClientConnection object. It contains all the important information about a connection - its ClientID, Type, whether it IsMyConnection, and a reference to the GameObject and CoherenceSync associated with it.
The CoherenceClientConnection.ClientID is guaranteed to not change during a connection's lifetime. However, if a Client disconnects and then connects again to the same Room/World, a new ClientID will be assigned (since a new connection was established).
Each ClientConnection can have a CoherenceSync automatically being spawned and associated with it. Those objects, like any other objects with CoherenceSync, can be used for syncing properties or sending messages, with a little twist - they are global and thus not limited by the CoherenceLiveQuery extent. That makes them perfect candidates for operations like:
Syncing global information - name, stats, tags, etc.
Sending global messages - chat, server interaction
To enable connection objects:
CoherenceBridgeFor the system to know which object to create for every new Client connection, we have to link our Prefab to the CoherenceBridge. Simply drag the prefab to the Client field in the inspector:
From now on every new connection will be assigned an instance of this Prefab, which can be accessed through the CoherenceClientConnection.GameObject property.
Note that there's a separate field for the Simulator Connection Prefab. It can be used to spawn a completely different object for the Simulator connection that may contain Simulator-specific commands and replicated properties. If the field is left empty, no object will be created for the Simulator connection.
The Prefab selection process can be also controlled from code using the CoherenceBridge.ClientConnections.ProvidePrefab callback:
A Prefab provided through the ProvidePrefab callback takes precedence over Prefabs linked in the Inspector.
Preparing to use Client messages requires the same approach as exposing a command on a script present on the Client Connection Prefab that we set up in the CoherenceBridge in the previous section:
Don't forget to bind the method to define a Command:
That same Command can now be sent using the CoherenceClientConnection.SendClientMessage method:
If the ClientID of the message recipient is known we can use the CoherenceBridge.ClientConnections directly to send a Client message:
A Simulator build is a built Unity Player for the Linux 64-bit platform that you can upload to coherence straight from the Unity Editor.
Open Coherence Hub and select the Simulators tab.
From here you can build and upload Simulators.
Click the little info icon in the top right corner to learn more about Simulators and how to build them properly.
You can change your Simulator build options by editing the SimulatorBuildOptions object, or in the coherence Hub Simulators tab.
There are several settings you might want to change.
Specify the scenes you want to get in the build via the Scenes To Build field.
For a local build, you can choose to enable/disable the Headless Mode by ticking the checkbox. For a cloud build, Headless Mode is always enabled by default.
Make sure you meet the requirements:
Press the coherence Hub > Simulators > Build And Upload Headless Linux Client button.
When the build is finished, it will be uploaded to your currently selected organization and project in the Developer Portal.
You'll see in the developer dashboard when your Simulator is ready to be associated with a Room or World.
Target frame rate on Simulator builds is forced at 30.
This feature is experimental, please make sure you make a backup of your project beforehand.
You can set the values for the Build Size Optimizations in the drop-down list of the build configuration inspector. It looks like this:
Select the desired optimizations depending on your needs.
Once your Simulator is built and uploaded, you'll be prompted with the option to revert the settings to the ones you had applied before building. This is to avoid these settings from affecting other builds you make.
Areas of interest (or queries) are not only a way to optimise, but a fundamental tool for Clients to specify what part(s) of the online world they are interested in.
With them, the Replication Server can filter the information to send based on each Client's interest, and thus greatly optimise network traffic.
At the moment, coherence offers two ways to express this interest: and .
You need at least one query in your scene, or you won't see anything update over the network.
When a non-authoritative object falls outside of all queries, it gets destroyed (or returned to an object pool). When it gets back in, it gets reinstantiated (or taken out of the pool). If the right properties are synced, the object's state will be automatically restored by coherence, making the player feel like that object never disappeared.
Queries only filter network entities that are non-authoritative. Your own entities will never be destroyed for falling outside of a query.
When using queries and adding more than one, they act in an additive way.
So for instance, two overlapping LiveQueries will define a bigger area.
Similarly, a LiveQuery + a TagQuery will add up, looking for entities both within a range but also for the ones that have a certain tag, regardless of position.
Non-additive filtering will come in a future version of coherence.
It is a very common pattern to move a LiveQuery around, following a player character or the camera, to ensure the visible objects are updated.
In addition to this, queries can be turned on/off (simply by disabling the GameObject that hosts them), or their properties can be changed at runtime (like radius, position, or tag), making for a very dynamic tool to optimise bandwidth.
Queries are per-Client, meaning that each Client (or Simulator!) has its own queries and thus sees different parts of the simulation.
No matter how fast the internet becomes, conserving bandwidth will always be important. Some Game Clients might be on poor quality mobile networks with low upload and download speeds, or have high ping to the Replication Server and/or other Clients, etc.
Additionally, sending more data than is required consumes more memory and unnecessarily burdens the CPU and potentially GPU, which could add to performance issues, and even to quicker battery drainage.
In order to optimize the data we are sending over the network, we can employ various techniques built into the core of coherence.
Delta-compression (automatic). When possible, only send differences in data, not the entire state every frame.
Compression and quantization (automatic and configurable). Various data types can be compressed to consume less bandwidth that they naturally would.
Simulation frequency (configurable). Most Entities do not need to be simulated at 60+ frames per second.
Levels of detail (configurable). Entities need to consume less and less bandwidth the farther away they move from the observer.
Area of interest. Only replicate what we can see.
This feature requires .
coherence can support large game worlds with many objects. Since the amount of data that can be transmitted over the network is limited, it's very important to only send the most important things.
You already know a very efficient tool for enabling this – the . It ensures that a client is only sent data when an object in its vicinity has been updated.
Often though, there is a possibility for an even more nuanced and optimized approach. It is based on the fact that we might not need to send as much data for an entity that is far away, compared to a close one. A similar technique is often used in 3D-programming to show a simpler model when something is far away, and a more detailed when close-up.
This idea works really well for networking too. For example, when another player is close to you it's important to know exactly what animation it is playing, what it's carrying around, etc. When the same player is far off in the horizon, it might suffice to only know it's position and orientation, since nothing else will be discernible anyways.
To use this technique we must learn about something called .
Any Prefab with the CoherenceSync component can be optimized to use a various levels of details (LODs).
There must always exist a LOD 0, this is the default level and it always has all components enabled (it can have per-field overrides though, see below.)
There can be any number of subsequent LODs (e.g. LOD 1, LOD 2, etc.) and each one must have a distance threshold higher than the previous one. The coherence SDK will try to use the LOD with the highest number, but that is still within the distance threshold.
Example
An object has three LODs, like this:
LOD 0 (threshold 0)
LOD 1 (threshold 10)
LOD 2 (threshold 20)
If this object is 15 units away, it will use LOD 1.
Confusingly, the highest numbered LOD is usually called the lowest one, since it has the least detail.
On each LOD, there are two options for optimizing data being transferred:
Components can be turned off, meaning you won't receive any updates from them.
Its fields can be configured to use fewer bits, usually leading to less fine-grained information. The idea is that this won't be noticeable at the distance of the LOD.
coherence allows us to define the range of numeric fields and how many bits we want to allocate to them.
Here are some terms we will be using:
Bits. The number of bits (octets) used for the field. When used for vectors, the number defined the number of bits used for each component (x, y and z). A vector3 set to 24 bits will consume 3 * 24 = 72 bits.
Range. For integer values and fixed-point floats, we define a minimum and maximum possible value (e.g. Health can lie between 0 and 100).
More bits mean more precision. Increasing the range while leaving the bit count the same will lower the precision of the field.
The maximum number of bits used for any field/component is currently 32.
coherence allows us to define these values for specific components and fields. Furthermore, we can define levels of detail so that precision and therefore bandwidth consumption falls with the distance of the object to the point of observation.
Levels of detail are calculated from the distance between the entity and the center of the LiveQuery.
On each LOD you can configure the individual fields of any component to use less data. You can only decrease the fidelity, so a field can't use more data on a lower (more far away) LOD. The Archetype editor interface will help you to follow these rules.
In order to define levels of detail, we have to click the Optimize button on a Prefab's CoherenceSync component with defined field bindings.
That opens the Optimization window. We can override the base component settings even without defining further levels of detail.
Clicking on Add new Level Of Detail will add a new LOD. We can now define the distance at which the LOD starts. This is the minimum distance between the entity and the center of the LiveQuery at which the new level of detail becomes active (i.e. the Replicator will start sending data as defined here at this distance).
You can also disable components at later LOD levels if they are not needed. In the example above, you can see that in LOD2 the entire Transform and Animator components are disabled beyond the distance of 20 units. At 100 units (a.k.a. meters), we usually do not see animation details, so we can save a lot of bandwidth and processing power by not replicating this data.
The Data Cost Overview shows us that this takes the original 913 bits down to just 372 bits at LOD level 2.
The primitive types that coherence supports can be configured in different ways:
These three types can all be configured in the same way, using different compression types:
None
No compression will be used, a full 32-bit float will be transmitted every time.
Truncated
Allows for specifying the number of bits for compression. Less bits means lower bandwidth usage but at the cost of precision loss. The minimum number of bits is 10. Using 22 bits will result in around half of the precision of the full float, while 16 will result in the quarter of the precision.
Fixed point
Allows for specifying the range of values used together with either number of bits or a desired precision.
Range affects the maximum and minimum value that the data type can take on. For example, a range of 100 to 200 means only values within that range can be sent - any value outside of this range will be clamped to the nearest correct value.
Precision defines the greatest deviation allowed for the data type. For example, a precision of 0.1 means that a float of value 10.0 can be transmitted as anything from 9.9 to 10.1 over the network. The minimum allowed precision is 0.1, while the maximum precision depends on the range. Changing precision automatically recalculates the number of bits required for given range.
Bits dictate how many bits to use when calculating the precision for a given range. When set manually, it will trigger recalculation of the precision for a given range. Mind that the number of bits can be rounded down if the calculated precision uses less, e.g. for a range of [0, 1] setting the number of bits to 6 will result in precision of 0.1 and a final bit count of 4, since 4 bits suffice to represent this range with a calculated precision.
When using these range settings for vectors, it affects each axis of the vector separately. Imagine shrinking its bounding box, rather than a sphere.
Integers can be configured to any span (that fits within a 32-bit integer) by setting its minimum and maximum value.
For example, the member variable age in a game about ancient trolls might use a minimum of 100 and a maximum of 2000. Based on the size of the range (1900 in this case) a bit-count will be calculated for you.
For integers, it usually make sense to not decrease the range on lower LODs since it will overflow (and wrap-around) any member on an entity that switches to a lower LOD. Instead, use this setting on LOD 0 to save data for the whole Archetype.
Quaternions and Colors can be configured using the number of bits per component. Quaternions require sending 3 components while Colors require 4 components.
All other types (strings, booleans, entity references) have no settings that can be overridden, so your only option for optimizing those are to turn them off completely at lower LODs.
If a LODed game object is parented to another synced object, the child will base its LOD level on the World position of its parent. This means that the (local) position of the LODed child does not have any effect on its LOD, until it is unparented.
Also – to save bandwidth, detection of LOD changes on the client only happens when the entity sends a component update. This means that a child object might appear to be using a nonsensical LOD until it changes in some way, for example by modifying its position.
When we bake, information from the CoherenceArchetype component gets written into our schema. Below, you can see the setup presented earlier reflected in the resulting schema file.
The most unintuitive thing about archetypes and LOD-ing is that it doesn't affect the sending of data. This means that a "fat" object with tons of fields will still tax the network and the Replication Server if it is constantly updated, even if it uses a very optimized Archetype.
Also, it's important to realize that the exact LOD used on an entity varies for each other client, depending on the position of their query (or the closest one, if several are used.)
Assets/coherence/CoherenceSyncConfigs is the default location of all CoherenceSyncConfig objects.
This ScriptableObject is generated by coherence, and is located in Assets/coherence.
By default, scenes will have their . coherence ticks the physics scene on the CoherenceScene component, which the target scene to be loaded should include.
Multi-Room Simulators are still . You need to enable Simulators for Rooms and enable Multi-Room Simulators in the coherence Online Dashboard, as shown here:
This step is described in detail in the . In short, it is enough to create a Prefab with a CoherenceSync and a custom component (PlayerConnection in this example):
Client messages is a shortcut to send using a CoherenceClientConnection object as the target instead instead of a CoherenceSync. The end recipient of the command will however still be the CoherenceSync associated with the , just like a regular Network Command.
Choose your preferred Scripting Implementation from the drop-down list. It can either be or .
For more information about the options listed under Build Size Optimizations, see .
Make sure you have completed the steps required in .
You have to have Linux modules (Linux Build Support (IL2CPP), Linux Build Support (Mono), and Linux Dedicated Server Build Support) installed in Unity Editor. See .
You have to be logged into the coherence Developer Portal, through the Unity Editor. See for more information.
With the filtering is volume-based, kind of like moving a torch to look around in a dark cave.
With even distant objects can be seen, provided they have the right tag.
Queries can also be used for cheat prevention, see for more information.
If you want to know more about how LODs work inside the schema files, take a look at .
Replace Textures And Sounds With Dummies
Project's textures and sound files are replaced with tiny and lightweight alternatives (dummies). Original assets are copied over to <project>/Library/coherence/AssetsBackup. They are restored once the build process has finished.
Keep Original Assets Backup
The Assets Backup (found at <project>/Library/coherence/AssetsBackup) is kept after the build process is completed, instead of deleted. This will take extra disk space depending on the size of the project, but is a safety convenience.
Compress Meshes
Sets Mesh Compression on all your models to High.
Disable Static Batching
Static Batching tries to combine meshes at compile-time, potentially increasing build size. Depending on your project, static batching can affect build size drastically. Read more about static batching.
--coherence-region <region>
eu, us, usw, ap or local.
Region
--coherence-ip <ip>
Specific IP to point to.
Ip
--coherence-port <port>
Specific port to point to.
Port
--coherence-room-id <room-id>
Specific Room to point to.
RoomId
--coherence-room-tags <base64-tags>
A base64 enconded string containing the Room tags (space-separated). Example: tag1 tag2 tag3
RoomTags
--coherence-room-kv-json <base64-json>
A base64 encoded string containing a JSON object literal with key-valure pairs. Example:
{"key1": "value1", "key2": "value2"}
RoomKV
--coherence-world-id <world-id>
Specific World ID to point to.
WorldId
--coherence-simulation-server
Connect and behave as a Simulator.
HasSimulatorCommandLineParameter
--coherence-simulator
Same as --coherence-simulation-server.
HasSimulatorCommandLineParameter

Without a special configuration, Entity data is captured at the highest possible frequency and sent to the Replication Server. This often generates more data than is needed to efficiently replicate the Entity's state across the network.
On a Simulator, we can limit the framerate globally using Unity's built-in static variable targetFrameRate.
coherence will automatically limit the target framerate of uploaded Simulators to 30 frames per second. We plan to make it possible to lift this restriction in the future. Check back for updates in the next couple of releases.
Replication frequency can be configured for each binding individually in the Prefab Optimize window. The Sample Rate controls how many times per second values are sampled and synced over the network.
Since the default packet send frequency of the Replication Server is 20Hz, sample rates above that value won't have any benefits unless you increase the Replication Server send frequency, too. See here how to adjust the Replication Server send frequency.
High sample rates increase replication accuracy and reduce latency, but consume more bandwidth. The upper limit at which samples can be quantized is 60hz, so sample rates beyond that are generally not recommended. It is not possible to change sampling frequency at runtime.
Values that don't change over time do not consume any bandwidth. Only bindings with updated values will be synced over the network.
An integration with the Unity Profiler provides basic statistics on networking events and bandwidth.
The module is only available in Unity 2021.2 and newer.
To view the module, open the Unity Profiler by selecting Window > Analysis > Profiler. Open the Profiler Modules dropdown menu in the top left, and select the coherence module.
To hide unneeded graph lines, select the colored square next to the item you do not wish to see.


