LogoLogo
HomeOnline DashboardAPIDiscordForums
SDK 1.7 Preview
SDK 1.7 Preview
  • Welcome
  • Overview
    • Features
    • Roadmap
  • Getting started
    • Get the Unity SDK
    • Setup a project
      • 1. Scene setup
      • 2. Prefab setup
      • 3. Test your game locally
        • Local testing using builds
        • Local testing via Unity's Multiplayer Play Mode
        • Local testing via ParrelSync
      • 4. Test in the cloud
        • Deploy a Replication Server
        • Share builds
    • How to... ?
    • Single-player to multiplayer
    • Video tutorials
    • Samples and tutorials
      • Package samples
      • Sample Connection UIs
      • First Steps tutorial
        • 1. Basic syncing
          • 1.1 Animation parameters
          • 1.2 Sending commands
        • 2. Physics / Authority transfer
        • 3. Areas of interest
        • 4. Parenting entities
        • 5. Complex hierarchies
        • 6. Persistence
      • Campfire project
        • Game mechanics
        • Leveraging object pooling
        • Remote interactions: Chairs
        • Remote interactions: Trees
        • A unique object with complex state
        • Custom instantiation and destruction
        • Running a server-side NPC
        • Playing audio and particles
        • A simple text chat
      • Beginner's guide to networking
    • Troubleshooting
  • Manual
    • Unity Components
      • CoherenceSync
      • CoherenceBridge
      • CoherenceLiveQuery
      • CoherenceTagQuery
      • CoherenceGlobalQuery
      • CoherenceInput
      • CoherenceNode
      • PrefabSyncGroup
      • Order of execution
    • Networking state changes
      • Instantiate and Destroy Objects
      • Supported types
      • Messaging with Commands
      • Syncing child GameObjects
      • Animation
      • CoherenceSync references
      • [Sync] and [Command] Attributes
      • [OnValueSynced] Attribute
      • Creating your own syncable member
      • Custom Component Actions
      • Rigid Bodies
      • Interpolation
    • Authority
      • Authority transfer
      • Server-authoritative setup
    • Lifetime
      • Persistence
      • Uniqueness
      • Example: A global counter
    • Parenting network entities
      • Direct children CoherenceSyncs
      • Deeply-nested CoherenceSyncs
      • Nesting Prefabs at Edit time
    • Asset management
      • Instantiating from CoherenceSyncConfig
      • Instantiate via
      • Load via
    • Scene management
    • Multiple Connections within a Game Instance
    • Baking (code generation)
      • Conditional compilation
    • Replication Server
      • Rooms and Worlds
      • Replication Server API
    • Simulators (Servers)
      • Scripting: Client vs Simulator
      • Run local Simulators
      • World Simulators
      • Room Simulators
      • Advanced Simulator Authority
      • Simulator slugs
      • Build and Deploy
      • Command-line arguments
    • Client Connections
    • Optimization
      • Areas of Interest
      • Level of Detail (LOD)
      • Profiling
      • Simulation Frequency
    • Project Settings
    • Advanced topics
      • Big worlds
        • World Origin Shifting
        • Load balancing
      • Competitive games
        • Simulation Frame
        • Determinism, Prediction and Rollback
      • Team workflows
        • Version Control integration
        • Continuous Integration
      • Schema explained
        • Specification
        • Field settings
        • Archetypes
      • Code stripping
      • Replication Server CLI
      • Single-player gameplay
    • Scripting API
  • Hosting
    • Choosing where to host
    • coherence Cloud
      • Online Dashboard
      • Manage Worlds
      • Configure Rooms
      • Player Accounts
      • Game Services
        • Lobbies
        • Cloud Storage
        • Key-Value Store (Legacy)
      • APIs
        • Worlds
        • Rooms
        • Lobbies
        • Cloud Storage
        • Key-Value Store (Legacy)
    • Peer-to-peer
      • Implementing Client hosting
        • Steam Relay
        • Epic Online Services (EOS) Relay
        • Azure PlayFab Relay
  • Support
    • Release notes
    • Glossary
    • Unreal Engine support
    • WebGL support
    • ECS / DOTS support
    • Known issues
    • Upgrade guide
      • Upgrade 1.6 -> 1.7
      • Upgrade 1.5 -> 1.6
      • Upgrade 1.4 -> 1.5
      • Upgrade 1.3 -> 1.4
      • Upgrade 1.2 -> 1.3
      • Upgrade 1.1 -> 1.2
      • Upgrade 1.0 -> 1.1
      • Upgrade 0.10 -> 1.0
      • Upgrade 0.9 -> 0.10
    • Credit cost & pricing
    • Report a bug
Powered by GitBook
On this page
  • Running the Editor as a Simulator
  • Running a Simulator build locally from the command line
  • Running a Simulator build locally from the Unity Editor
  • Connecting a Simulator to a Room

Was this helpful?

Export as PDF
  1. Manual
  2. Simulators (Servers)

Run local Simulators

Before deploying a Simulation Server, testing and debugging locally can significantly improve development and iteration times. There are a few ways of accomplishing this.

Running the Editor as a Simulator

Using the Unity Editor as a Simulator allows us to easily debug the Simulator. This way we can see logs, examine the state of scenes and GameObjects and test fixes very rapidly.

To run the Editor as a Simulator, run the Editor from the command line with the proper parameters:

  • --coherence-simulation-server: used to specify that the program should run as a coherence Simulator.

  • --coherence-simulator-type: tells the Simulator what kind of connection to make with the Replication Server, can be Rooms or World.

  • --coherence-region: tells the Simulator which region the Replication Server is running in: EU, US or local.

  • --coherence-ip: tells the Simulator which IP it should connect to. Using 127.0.0.1 will connect the Simulator to a local server, if one is running.

  • --coherence-port: specifies the port the Simulator will use.

  • --coherence-world-id: specifies the World ID to connect to, used only when set to Worlds.

  • --coherence-room-id: specifies the Room ID to connect to, used only when set to Rooms.

  • --coherence-unique-room-id: specifies the unique Room ID to connect to, used only when set to Rooms.

For example:

<Editor path> -projectPath <project path>
--coherence-simulation-server 
--coherence-simulator-type rooms
--coherence-region local
--coherence-ip 127.0.0.1 
--coherence-port 32001 
--coherence-room-id [room-id]
--coherence-unique-room-id [room-uid]
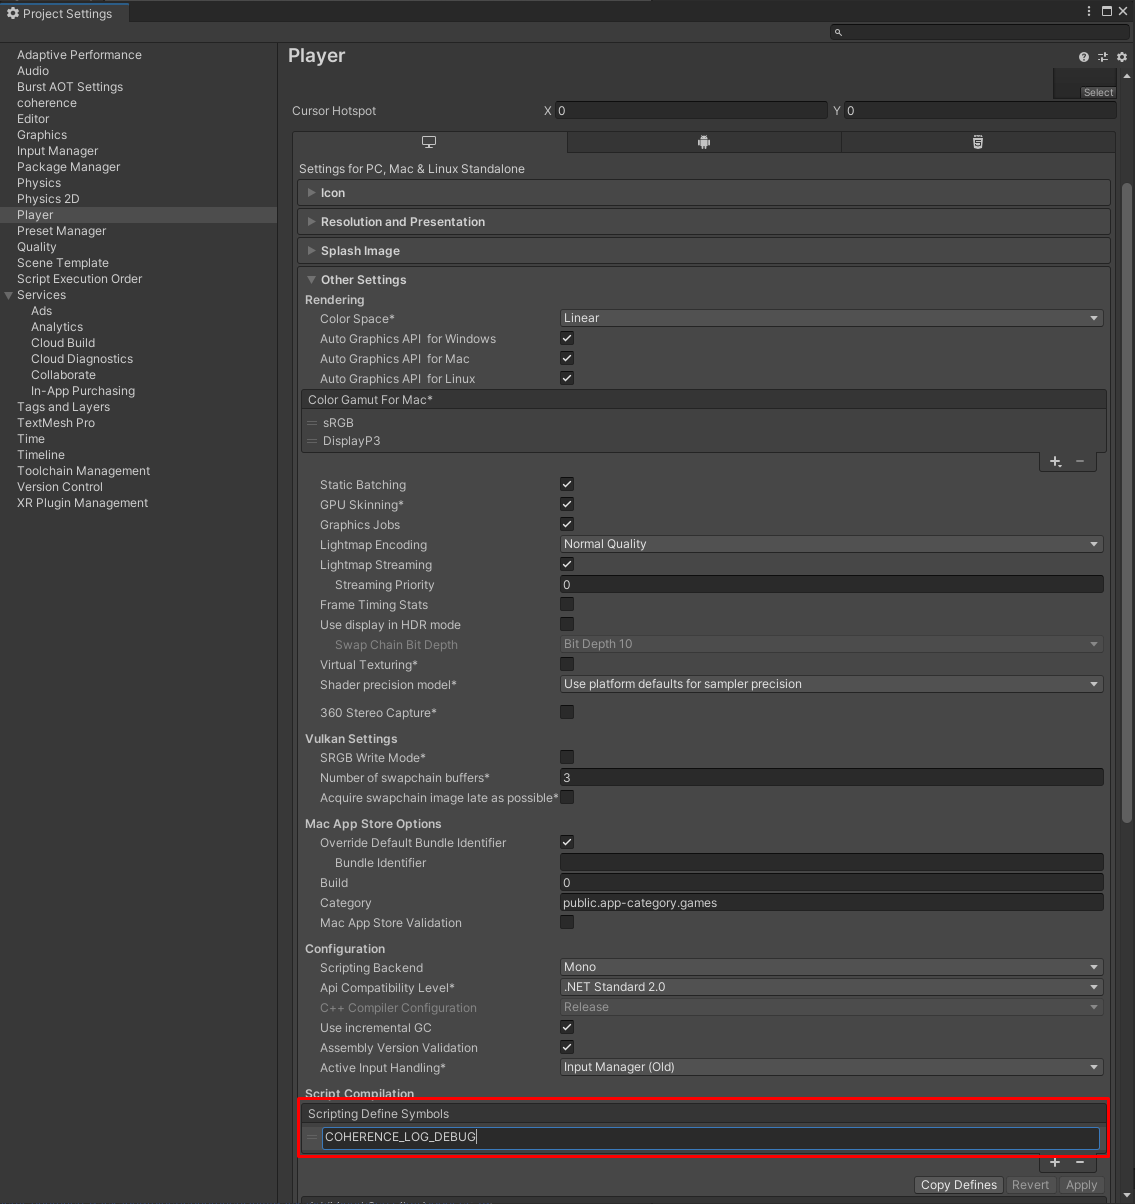
If you're not sure which values should be used, adding a COHERENCE_LOG_DEBUG define symbol will let you see detailed logs. Among them are logs that describe which IP, port and such the Client is connecting to. This can be done in the Player settings: Project Settings > Player > Other Settings > Script Compilation > Scripting Define Symbols.

Running a Simulator build locally from the command line

Another option is making a Simulator build and running it locally. This option emulates more closely what will happen when the Simulator is running after being uploaded.

You can run a Simulator executable build in the same way you run the Editor.

"simulator build path"
--coherence-simulation-server 
--coherence-ip 127.0.0.1 
--coherence-port 32001 
--coherence-world-id 0 
--coherence-room-id [room-id]
--coherence-unique-room-id [room-uid]

This allows you to test a Simulator build before it is uploaded or if you are having trouble debugging it.

Running a Simulator build locally from the Unity Editor

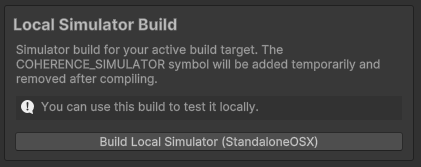
Once installed, you can create a local simulator build by clicking the 'Build Local Simulator (target)' button from coherence > Simulator > Simulator Build Wizard where target is the operating system on your local machine.

The COHERENCE_SIMULATOR symbol is added during the local simulator build. Symbols can be examined in the Player Settings and can be found at Edit > Project Settings... in the Player tab under Script Compilation.

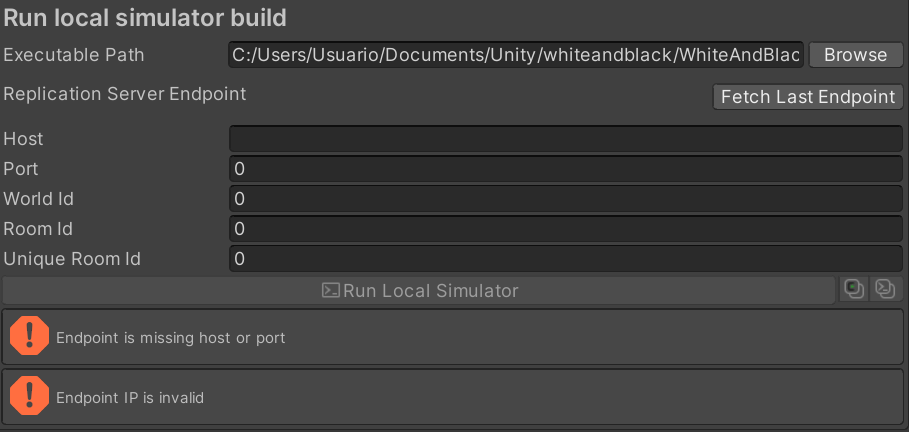
Local simulator builds can be run from coherence > Simulator > Run Simulator Locally.

Use the Fetch Last Endpoint button to autofill the required fields.

Connecting a Simulator to a Room

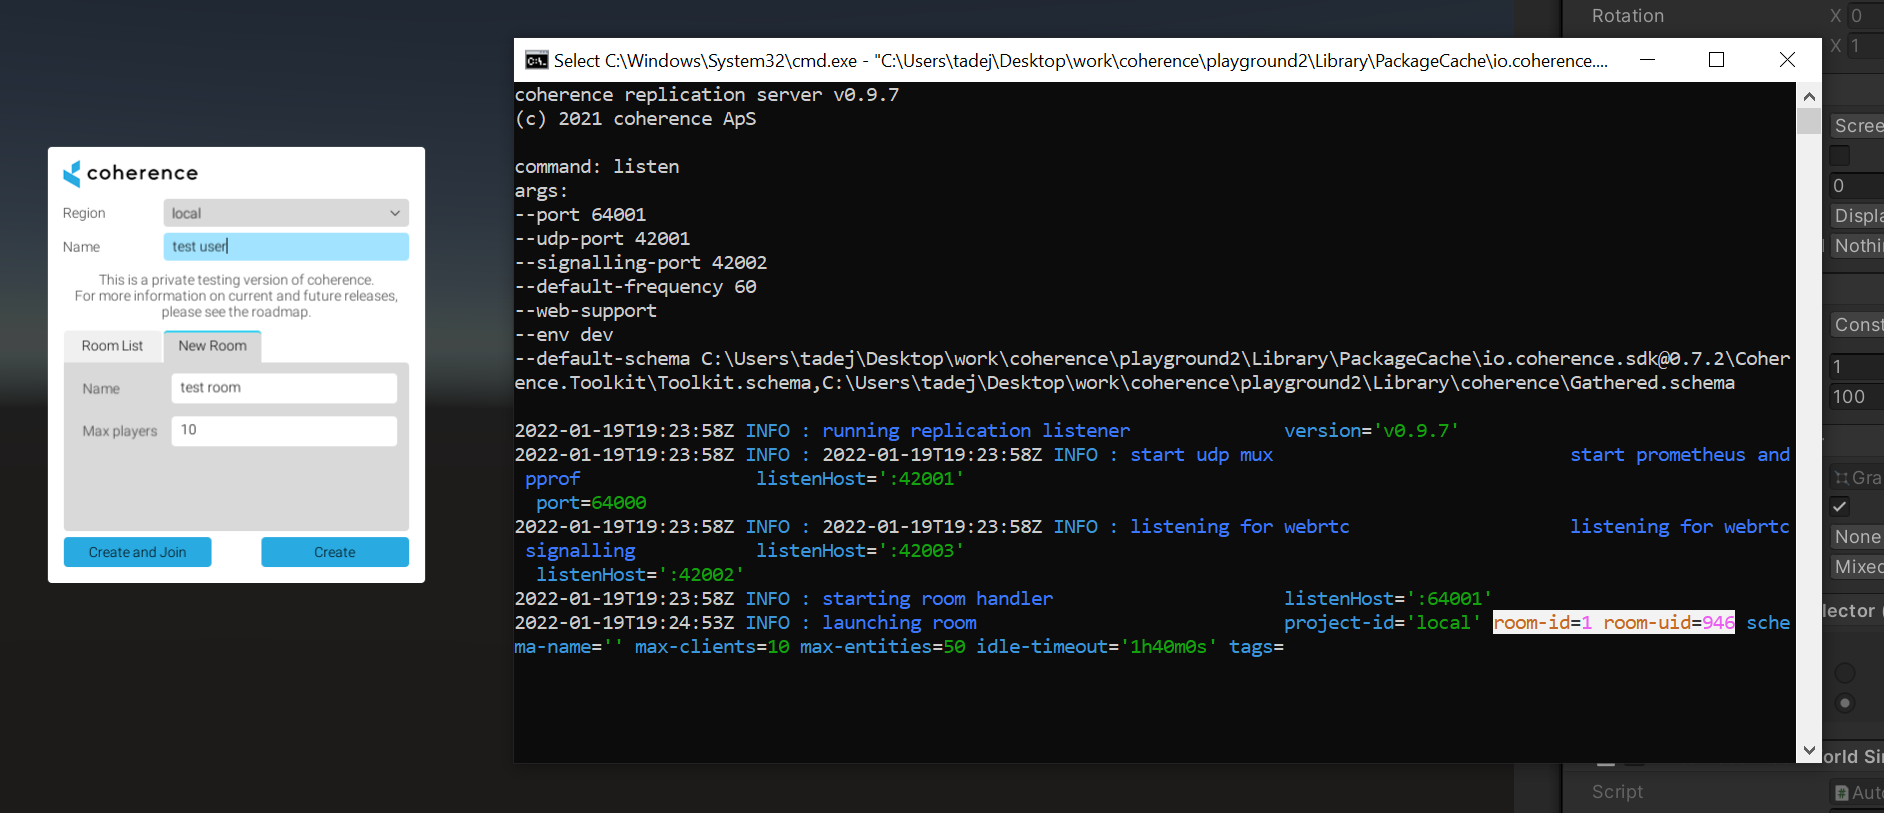
When using a Rooms-based setup, you first have to create a Room in the local Replication Server (e.g. by using the connect dialog in the Client).

The local Replication Server will print out the Room ID and unique Room ID that you can use when connecting the Simulator.

Was this helpful?

Keep in mind that all regular Unity arguments are supported. You can see the full list here: .

To learn more about Simulators, see .

Local simulator builds require the Dedicated Server for your version on Unity.

To learn more about creating a Simulator build, see .

Unity Editor command line arguments
Simulators
module to be installed
SIMULATORS: Build and Deploy
Installed modules in the Unity Hub showing Dedicated Server build support for Mac and Windows
Build Local simulator button on a machine running MacOS