LogoLogo
⚠️ Outdated documentationGo to LatestHomeAPI
SDK 1.2
SDK 1.2
  • Welcome
  • Overview
    • How does coherence work?
    • Rooms, Worlds and Lobbies
    • Features and Roadmap
  • Learn
    • Beginner's guide to networking
    • Package samples
    • First Steps tutorial
      • 1. Basic syncing
        • 1.2. Animation parameters
        • 1.3. Sending commands
      • 2. Physics / Authority transfer
      • 3. Areas of interest
      • 4. Parenting entities
      • 5. Complex hierarchies
      • 6. Persistence
    • Campfire project
      • Game mechanics
      • Leveraging object pooling
      • Remote interactions: Chairs
      • Remote interactions: Trees
      • A unique object with complex state
      • Custom instantiation and destruction
      • Running a server-side NPC
      • Playing audio and particles
      • A simple text chat
    • How to network [genre]…
      • Racing
      • Turn-based
      • First-Person Shooter
      • MMO
      • Fighting
    • Video tutorials
  • Get started
    • Install coherence
    • Scene Setup
      • Sample UIs
    • Prefab setup: CoherenceSync
    • Local Development
      • Local Testing via Player Builds
      • Local Testing via Unity's Multiplayer Play Mode (MPPM)
      • Local Testing via ParrelSync
    • coherence Cloud
      • Create a free account
      • Deploy a Replication Server
      • Share builds
  • coherence SDK for Unity
    • Upgrade Guide
      • Upgrade 1.1 -> 1.2
      • Upgrade 1.0 -> 1.1
      • Upgrade 0.10 -> 1.0
      • Upgrade 0.9 -> 0.10
    • Components
      • CoherenceSync
      • CoherenceBridge
      • CoherenceLiveQuery
      • CoherenceTagQuery
      • Order of execution
    • Asset Management
      • Using CoherenceSyncConfig to instantiate GameObjects locally
    • Networking State Changes
      • Supported types
      • Messaging with Commands
      • Syncing child GameObjects
      • Parenting network entities
        • Direct child CoherenceSyncs
        • Deeply-nested CoherenceSyncs
        • Nesting Prefabs at Edit time
      • Animation
      • CoherenceSync references
      • [Sync] and [Command] Attributes
      • [OnValueSynced] Attribute
      • Creating your own syncable member
      • Custom Component Actions
    • Baking (code generation)
    • Scene Management
    • Authority
      • Authority transfer
      • Server-authoritative setup
    • Lifetime
      • Persistence
      • Uniqueness
      • Example – a global counter
    • Optimization
      • Simulation Frequency
      • Areas of Interest
      • Level of Detail (LOD)
    • Profiling
    • Interpolation
    • Rigid Bodies
    • Settings
    • Simulation Frame
    • Replication Server
    • Simulators
      • Scripting: Client vs Simulator
      • Local Development
      • World Simulators
      • Room Simulators
      • Simulator Slugs
      • Multi-Room Simulators
      • Build and Publish
      • Command-line arguments
      • Load Balancing
    • Client-Hosting
    • Client Connections
    • Rollback Networking Support
    • World Origin Shifting
    • Offline gameplay
    • CLI
    • Code Stripping
    • Version Control Integration
  • Hosting & Cloud
  • coherence Cloud
    • Developer Portal
    • Dashboard
    • Worlds
    • Rooms
    • Lobbies
    • Game Services
      • Account
      • Key-Value Store
    • Using coherence Cloud in Unity
      • Worlds
      • Rooms
      • Lobbies
      • Game Services
        • Authentication Service (Player Accounts)
        • Key-value store
  • Schema explained
    • Overview
    • Specification
    • Field settings
    • Archetypes
  • coherence API reference
  • Additional resources
    • Community
    • Continuous Integration
    • Unreal Engine Support
    • WebGL Support
    • Peer-to-Peer Support (P2P)
    • Glossary
  • Credit cost & pricing
  • Known Issues and Troubleshooting
  • Release Notes
Powered by GitBook
On this page
  • Tips for automated building
  • Uploading schemas in CI scenarios
  • Simulator build pipeline
  • Building and uploading to the Cloud
  • Project Token
  • Commands example
  • Customizing your Simulator builds

Was this helpful?

Export as PDF
  1. Additional resources

Continuous Integration

Tips and trips for setting up Continuous Integration (CI) for your projects

Was this helpful?

Tips for automated building

Continuous Integration means that any changes to the project are merged frequently into the main branch, and automation (especially of testing) is used to ensure quality. The main benefits of Continuous Integration (henceforth CI) are that it makes software development easier, faster, and less risky for developers. Building your Game Client with CI and automated testing might require coherence setup.

For automated delivery of your project changes and testing it in CI, you can take the following steps to make sure coherence is set up appropriately in your project before building a standalone Client.

  1. Make sure you generate your schema or schemas before building. For example, you can create a build method and call it from Unity via command line as a custom method.

            public static void GenerateSchema()
            {
                BakeUtil.GenerateSchema(out var _, out var _);
            }
  2. After that, you will need to your code according to the schema. Baking is also accessible via the Unity command line in a custom method.

            public static void Bake()
            {
                BakeUtil.Bake(BakeUtil.Settings.Default);
            }
  3. To start the Replication Server in CI you can also use scripts generated in ./Library/coherence folder /project_path/Library/coherence/run-replication-server-rooms.sh and /project_path/Library/coherence/run-replication-server-worlds.sh.

Uploading schemas in CI scenarios

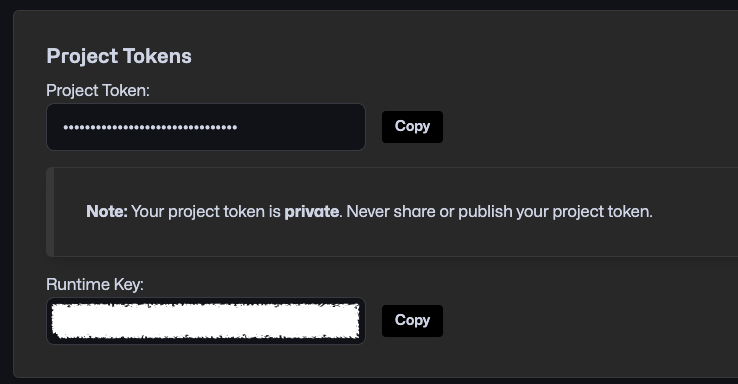
If you want to automate the uploading of schemas, keep in mind that you need to set the COHERENCE_PORTAL_TOKEN environment variable in your continuous integration setup so the upload is accepted by the coherence Cloud. You can get the token from coherence Dashboard > Project > Settings > Project Settings > Project Token.

Simulator build pipeline

Building and uploading to the Cloud

There are two methods you will need to call, in order, to build and upload a Simulator build successfully:

  • Coherence.Build.SimulatorBuildPipeline.PrepareHeadlessBuild This method will add the COHERENCE_SIMULATOR scripting symbol, will set the build sub target to Server (for Unity 2021) and it will change the platform to Linux. It is necessary to perform these steps in an isolated Unity execution, because in batch mode, there is no editor loop that will make sure your assemblies are reloaded with the changes.

  • Coherence.Build.SimulatorBuildPipeline.BuildHeadlessLinuxClientAsync ****This method will build the Unity Client and upload it to your selected organization and project.

Project Token

In order to be able to interact with your coherence Dashboard from the command line, you will need to export your project token as an environment variable.

Commands example

export COHERENCE_PORTAL_TOKEN=<YOUR_PROJECT_TOKEN>

"<Unity Editor Executable Path>" -projectPath "<Project Path>" -batchmode -nographics -quit -executeMethod Coherence.Build.SimulatorBuildPipeline.PrepareHeadlessBuild

"<Unity Editor Executable Path>" -projectPath "<Project Path>" -batchmode -nographics -quit -executeMethod Coherence.Build.SimulatorBuildPipeline.BuildHeadlessLinuxClientAsync -simSlug TestSlug 

Customizing your Simulator builds

You can use the Simulator Build Pipeline public API to build and upload your Simulator builds to the coherence Cloud from the command line. If you wish to learn more about Simulators, check out the .

You can create your custom build steps by implementing Unity interfaces and . In order to verify that the build being created is a Simulator, you can check for the SimulatorBuildPipeline.IsBuildingSimulator boolean.

dedicated section
IPreprocessBuildWithReport
IPostprocessBuildWithReport
bake