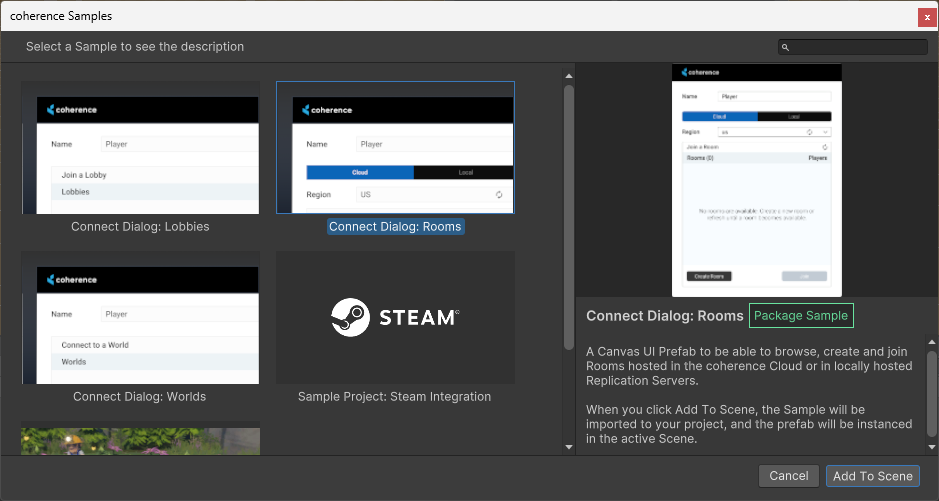
# Sample UIs
The **coherence** package comes with several samples you can choose to add to your project. Each provides Prefabs and scripts that you can add to your Scene and edit however you want.
There are currently 3 samples available: a [Room connection dialog](#room-connect-dialog), a [World connection dialog](#world-connect-dialog), and a Lobby connection dialog.
The difference between Rooms and Worlds is explained on this page: [Rooms and Worlds](https://docs.coherence.io/1.2/overview/rooms-and-worlds), while [Lobbies](https://docs.coherence.io/1.2/coherence-cloud/lobbies) have somewhat of a different role in that they are usually used in addition to Rooms in a game flow.
## Adding a dialog to the scene
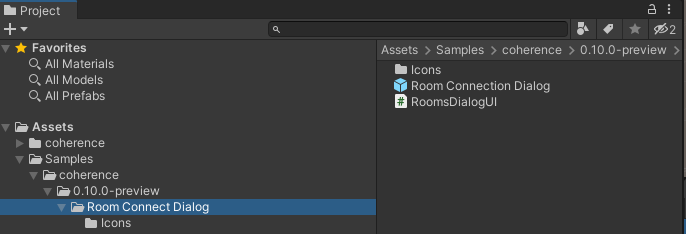
Each sample comes with a Prefab that can be added to your Scene.\
You can add them via *coherence > Explore Samples*.
Effectively these do two things for you :
1. Import the sample in the Samples directory of your project, if it isn't already.
Adding the Room Connect Dialog creates a copy in your project
2. Add the Prefab from the sample to your Scene.\
Int the example above, that would be `Room Connection Dialog.prefab`.
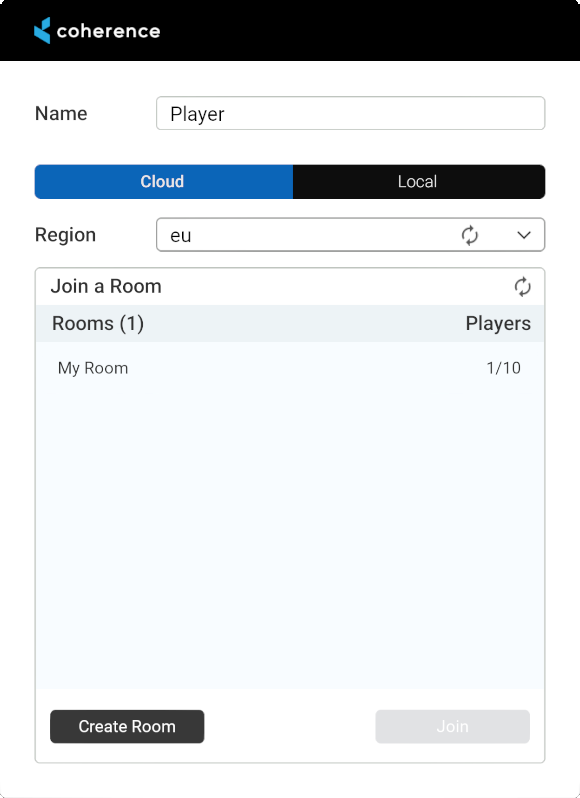
## Room connect dialog
The *Rooms Connect Dialog* has a few helpful components that are explained below.
The Room connection dialog
* At the top of the dialog we have an **input field for the player's name**.
* Next is a **toggle between Cloud and Local**.\
You can switch to Local if you want to connect to a Rooms Server that is running on your computer.
* Next is a **dropdown for region selection**. This dropdown is populated when regions are fetched from the coherence cloud. The default selection is the first available region.\
This is not enabled when you switch from Cloud to Local. This is also only relevant if you deploy your game to several different regions.
* Next is a **dropdown of available Rooms** in the selected region (or in your local server if using the Local mode).
* After selecting a Room from the list the ***Join*** button can be used to join that Room.
* If you know someone has created a room but you don't see it, you can manually refresh the rooms list using the ***Refresh*** button.
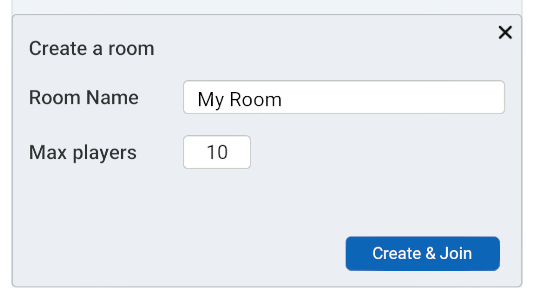
### Creating a room
The *Create a room* section adds a Room to the selected region.
Create room section of the Room connect dialog
This section contains controls for setting a **Room's name** and **maximum player capacity**. Pressing the ***Create*** button will create a Room with the specified parameters and immediately add it to the *Room Dropdown* above. ***Create and Join*** will create the Room, and also join it immediately.
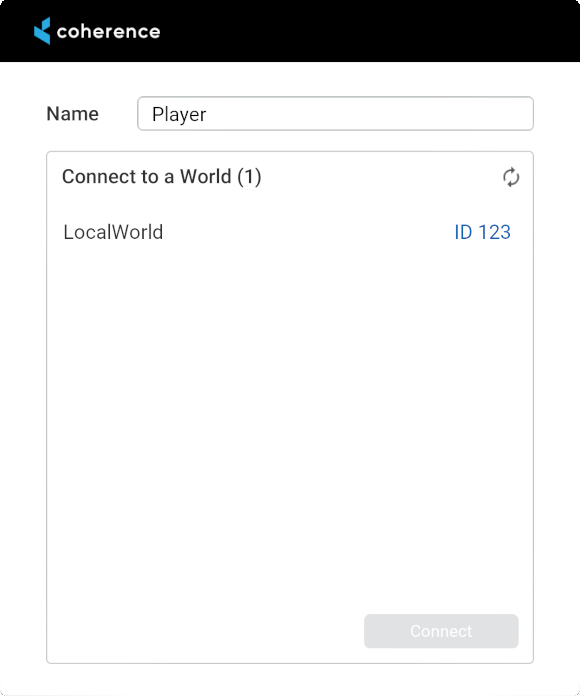
## World connect dialog
The *Worlds Connect Dialog* is much simpler. It simply holds a **dropdown for region selection**, an input field for the **players name**, and a ***Connect*** button.
The Worlds connect dialog
If you start a local World server, it will appear as `LocalWorld`.
## Modifying a sample
Samples are copied to your assets folder, this means you can change and customize the scripts and Prefabs however you like.
## Upgrading samples
Future versions of **coherence** won't override your changes. If you upgrade to a newer version of **coherence** and import a new sample, they will be imported in a separate folder named after the **coherence** version.
{% hint style="info" %}
If you want the new sample to overwrite the old one, first rename the folder in which the samples are, then import the new version.
The folder to rename is the one that is named after the version number (normally its path would be something like :file\_folder:`Samples/coherence/1.1.0/` for coherence 1.1.0).
{% endhint %}
{% hint style="warning" %}
If you notice that the samples are non-responsive to input, make sure you have an EventSystem component in the scene.
{% endhint %}